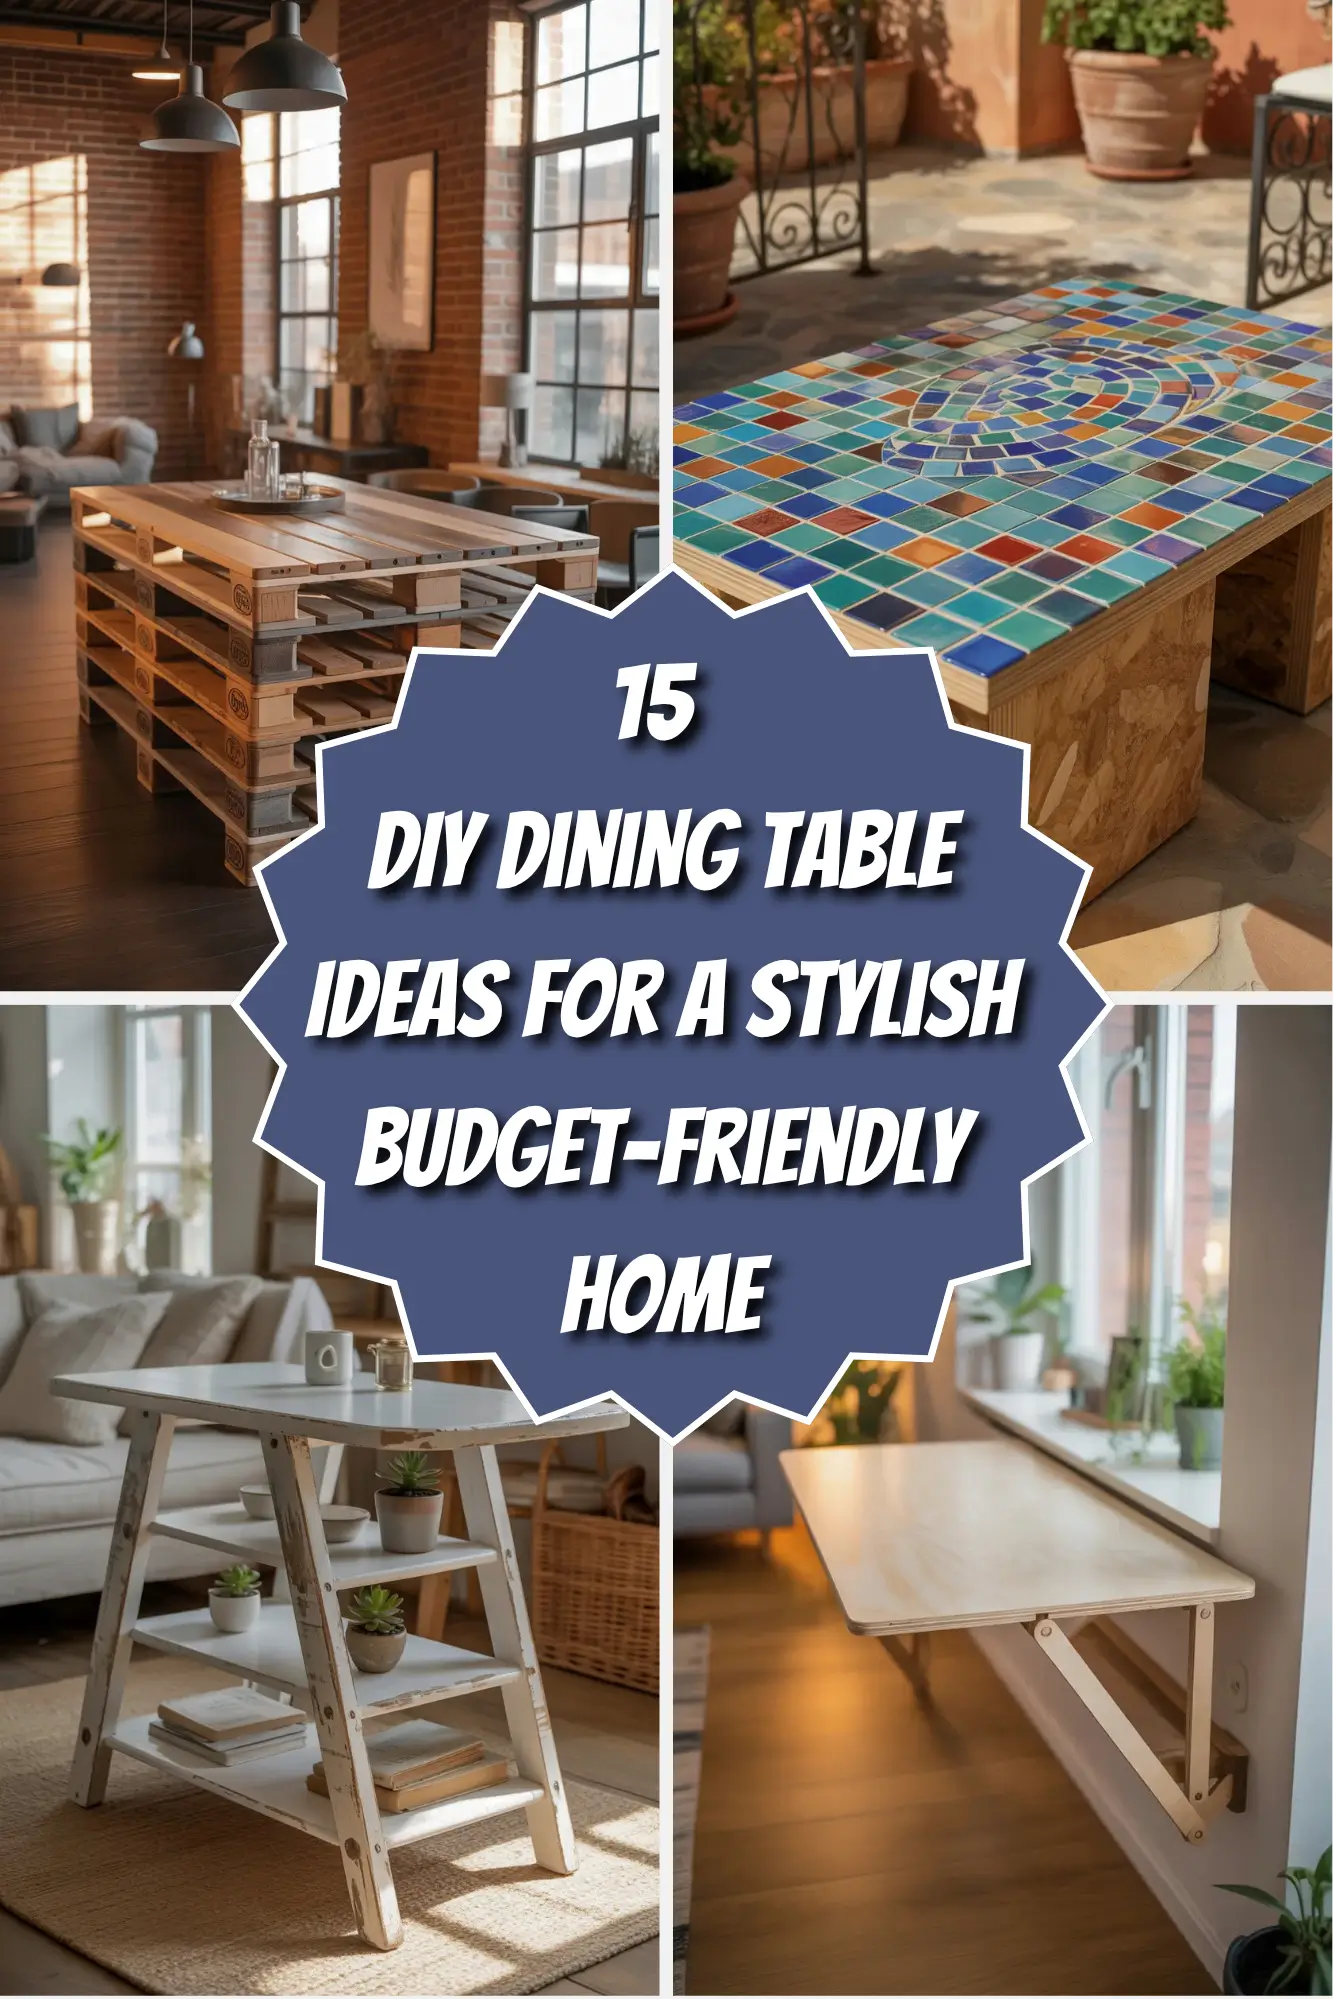
15 DIY Dining Table Ideas
You walk into a furniture store, flip a price tag, and your stomach drops. Six hundred dollars for a table that wobbles. You can do better. Much better. With two hands and a weekend, you can build a dining table that looks like it cost a thousand bucks. And the best part? You get to say, “I made that.” Let me show you fifteen ways to make it happen.
Introduction
A dining table is where life happens. Homework piles up on it. Friends laugh over pizza on it. Holiday dinners stretch late into the night on it. But buying a nice one can empty your wallet faster than a teenager eats leftovers.
Here is the truth. You do not need a fancy workshop or years of experience. You need a few tools, some lumber, and a little courage. Every single idea in this list has been built by regular people in garages, apartments, and backyards.
I am going to walk you through fifteen DIY dining table ideas. Some cost almost nothing. Others take a bit more skill. But all of them will give you a table you can be proud of. No fluff. No confusing instructions. Just clear, human words that a seventh grader can follow.
Let us dig in.
1. The Simple Farmhouse Table
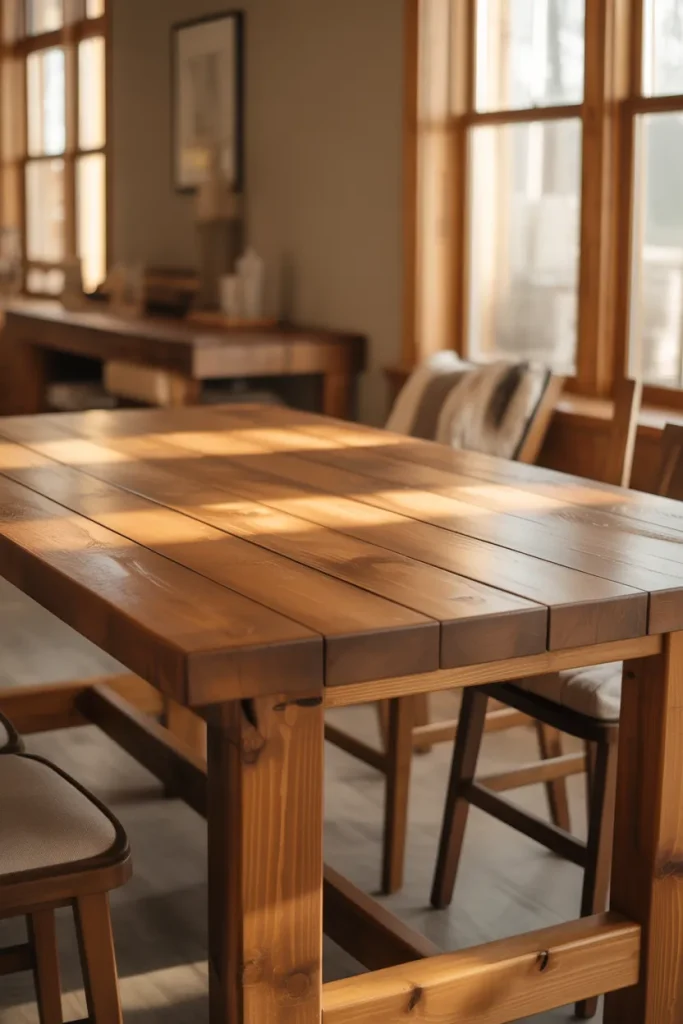
Farmhouse tables are everywhere. For good reason. They look solid, feel warm, and fit almost any home. You can build one with basic pine boards from the hardware store.
Start with four legs. Use 4×4 lumber. That is the thick stuff. Cut all four to the same height. Most dining tables stand 30 inches tall. Then build a frame. Use 2×4 boards to connect the legs at the top and bottom. Now you have a skeleton.
For the tabletop, grab five or six 2×6 boards. Lay them side by side. Glue the edges and clamp them tight. Once the glue dries, sand everything smooth. Stain it dark brown or paint it white. Add a little wear on the edges with sandpaper to make it look old. That is the farmhouse charm.
Cost? About 80 dollars if you already have glue and screws.
2. The Pallet Wood Table
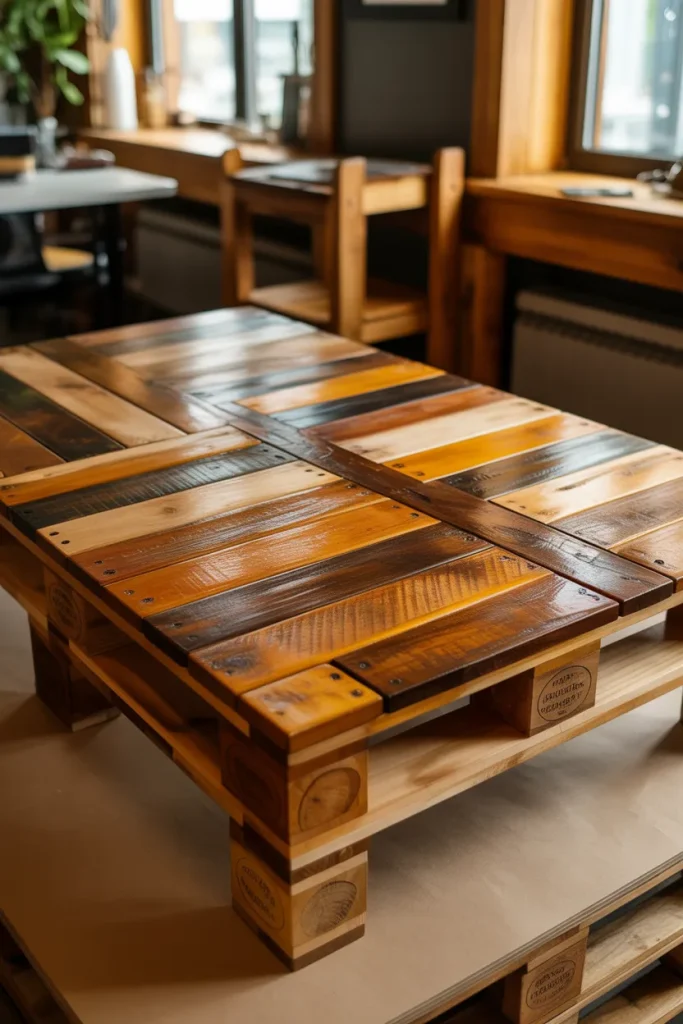
Pallets are free. You just have to find them. Look behind grocery stores or furniture shops. Ask first. Most places give them away.
Take the pallet apart. This takes patience. Use a crowbar and hammer. Pull out every nail. Now you have dozens of small wood slats. Arrange them like a puzzle on a flat surface. Glue and screw them to a cheap plywood base. The base keeps everything flat.
The gaps between slats give the table character. Fill big gaps with wood filler if food falls through. Sand the top until your hand glides across it. Seal with polyurethane so spills wipe right off.
This table looks rough and rugged. Perfect for a cabin or a college apartment. Total cost? Maybe 15 dollars for screws and glue.
3. The Hairpin Leg Table
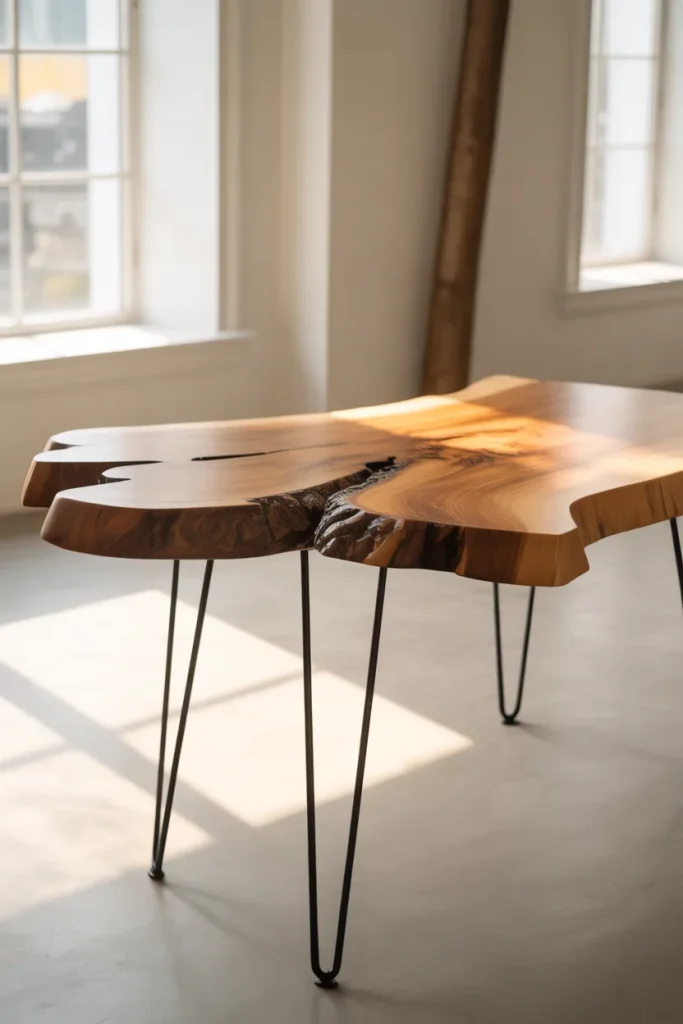
Hairpin legs are thin metal legs that look like bent wire. You can buy them online for 40 to 60 dollars. They come with screws already attached.
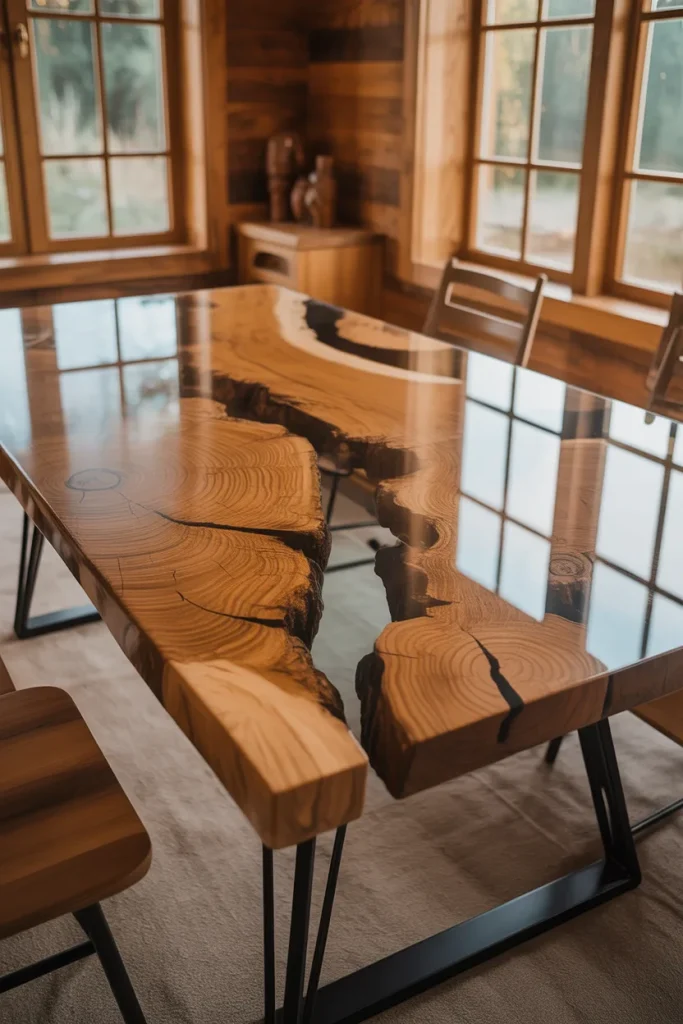
All you need is a tabletop. Go to a lumber yard and ask for a “live edge slab.” That is a slice of tree with the natural bark line still on one side. Sand it until it feels like silk. Then screw the hairpin legs into the bottom. That is it.
No frame. No complicated joinery. Just a top and four legs. This table looks modern and artsy. It also weighs almost nothing. You can carry it with one hand.
Cost: 40 to 100 dollars depending on the wood you choose.
4. The Pipe Fitting Table
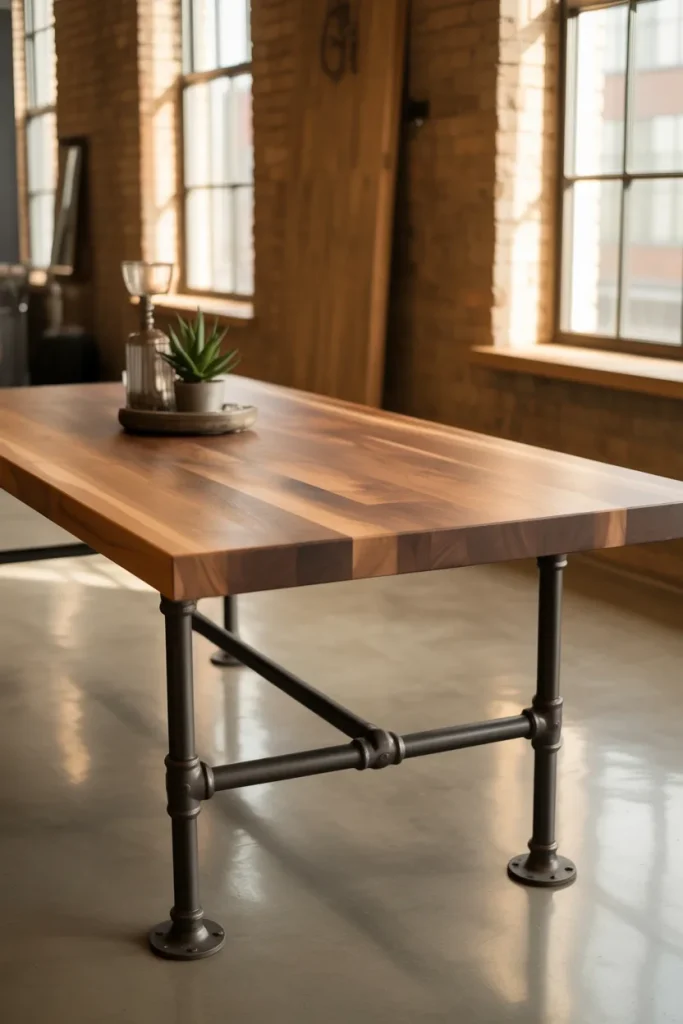
Metal pipes are not just for plumbers. They make amazing table legs. Go to the hardware store and buy black iron pipes. Get four floor flanges, four 18-inch pipes, and four caps for the feet.
Screw the flanges into a wooden tabletop. Then screw the pipes into the flanges. Add the caps on the bottom so the pipes do not scratch your floor. The result is an industrial table that looks like it came from a fancy loft.
For the top, use a thick butcher block. Or glue together 2×4 boards. Paint the pipes with rust-proof spray paint if you want color.
Cost: 70 to 120 dollars.
5. The Door Table
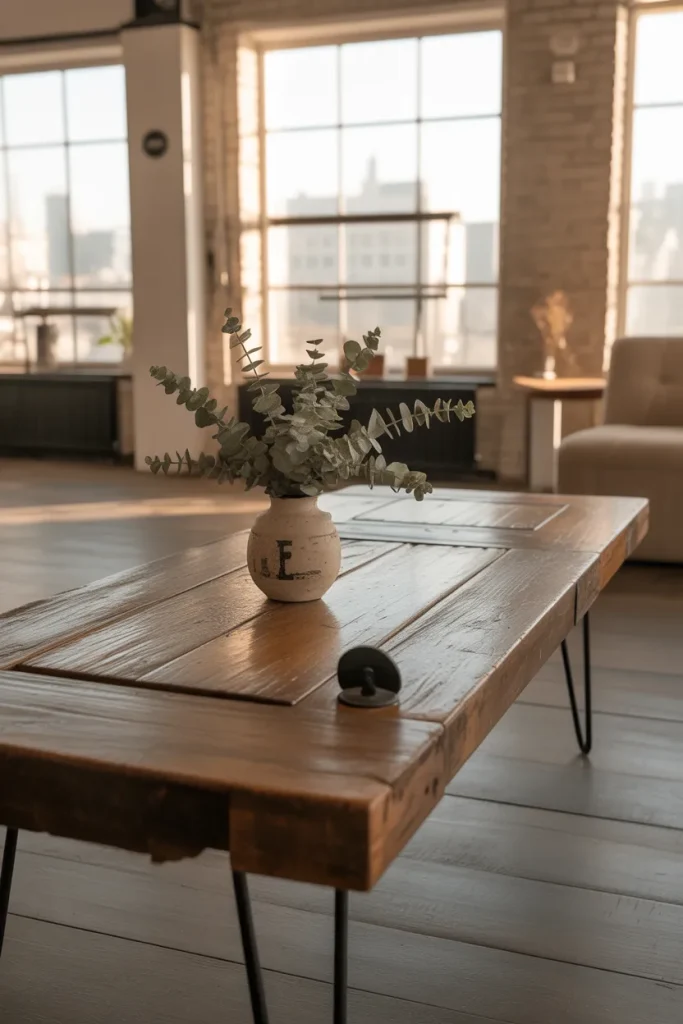
An old solid wood door makes a perfect tabletop. Find one at a salvage yard or a garage sale. Look for a door without holes or rot.
Lay the door flat. The doorknob hole becomes a place for a vase or a lamp. Do not worry about it. That hole adds character. Attach any legs you like. Hairpin legs work great. So do saw horses. Yes, saw horses. Paint them black and no one will notice.
The door already has a smooth finish. You might not even need to sand it. Just clean it with soap and water. Then seal it with wax.
Cost: 30 to 50 dollars for the door. Legs extra.
6. The Cable Spool Table
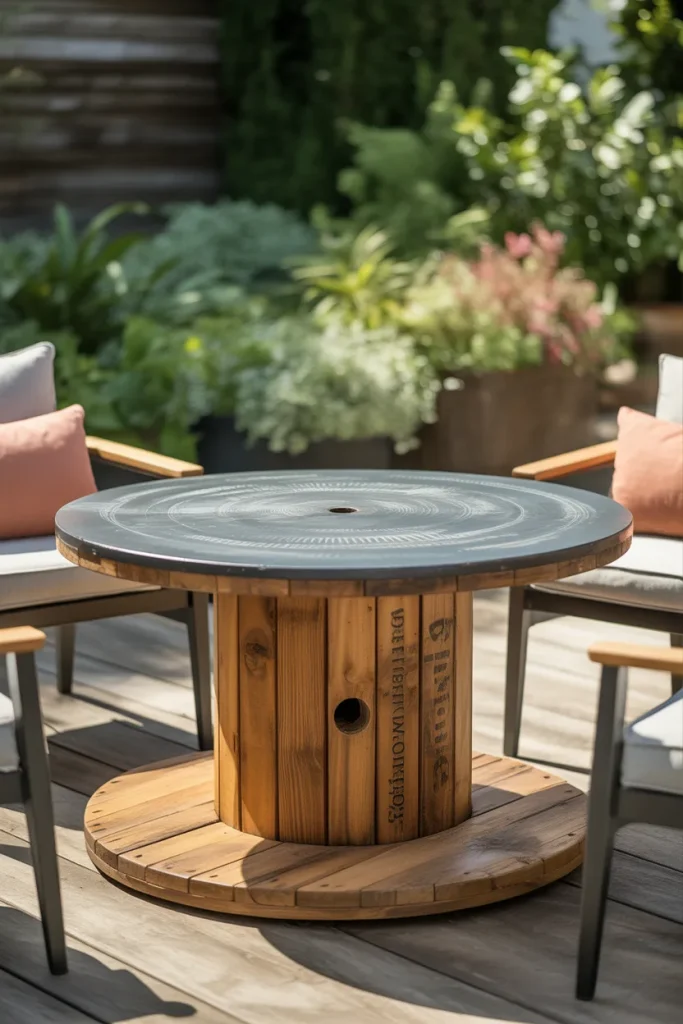
Electric companies throw away huge wooden spools. Those spools carried thick cable. Now they can carry your dinner. Find one for free. Call a local electrical supply store and ask.
The spool is round. That makes a great conversation starter. Flip it on its side. The round top is your table. The center hole is perfect for an umbrella if you eat outside. Sand the whole thing down. Splinters are no fun.
Paint the top with chalkboard paint. Then your kids can draw on the table. Or stain it dark and use it as a rustic patio table.
Cost: Free plus sandpaper and paint.
7. The Concrete Top Table
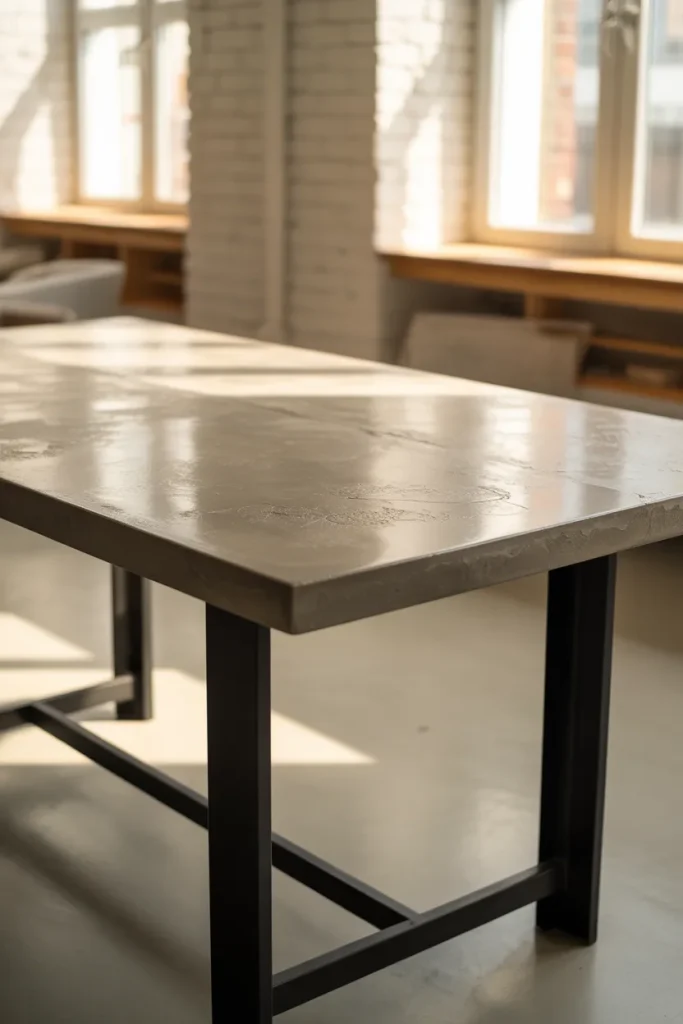
Concrete sounds heavy and hard. It is. But it also looks amazing. Build a simple wood frame in the shape of a rectangle. That frame is your mold. Mix bagged concrete from the hardware store. Pour it into the mold. Let it sit for three days.
Pop off the wood frame. Now you have a stone tabletop. Sand the surface with a diamond pad to make it smooth. Seal it with concrete sealer so food does not stain it. Attach sturdy legs. Metal legs work best because concrete is heavy.
This table will last forever. Your grandkids could eat off it. Just do not drop it on your foot.
Cost: 50 to 80 dollars for concrete and mold wood.
8. The Tree Slice Table
Find a fallen tree. Ask a friend with a chainsaw to cut a thick slice. Make the slice at least two inches thick and three feet wide. Let the slice dry in your garage for two months. If you skip drying, it will crack.
Once dry, sand both sides until smooth. The bark might fall off. That is fine. Fill any cracks with epoxy resin. Clear resin looks like glass. It also keeps bugs out.
Screw three legs into the bottom. Or leave it on the floor as a giant sitting table. This table brings the outdoors inside.
Cost: Free if you have a tree and a chainsaw.
9. The Crate Table
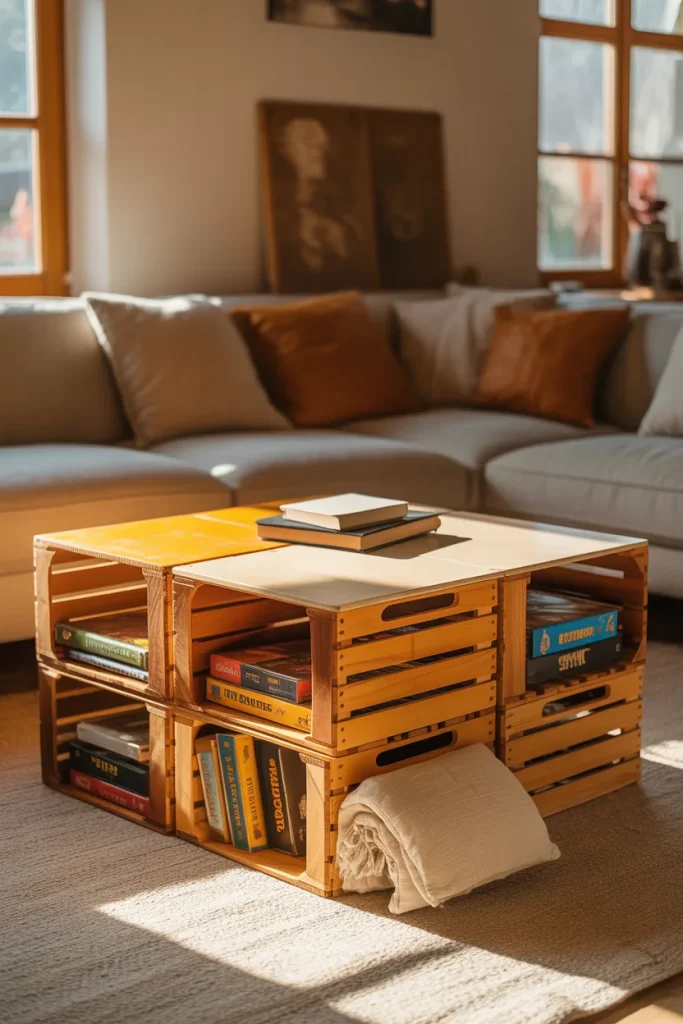
Wooden crates are cheap or free. Grocery stores get fruit in them. Ask for the sturdy ones. Stack four crates in a square. Screw them together at the corners. Now you have a base.
For the top, use a single piece of plywood. Paint it or stain it. Then screw the plywood down onto the crates. The crates become shelves underneath. Store napkins, placemats, or board games inside the crates.
This table is light and easy to move. When you need more space, take it apart in five minutes.
Cost: 20 dollars if you buy crates. Free if you find them.
10. The Butcher Block Table
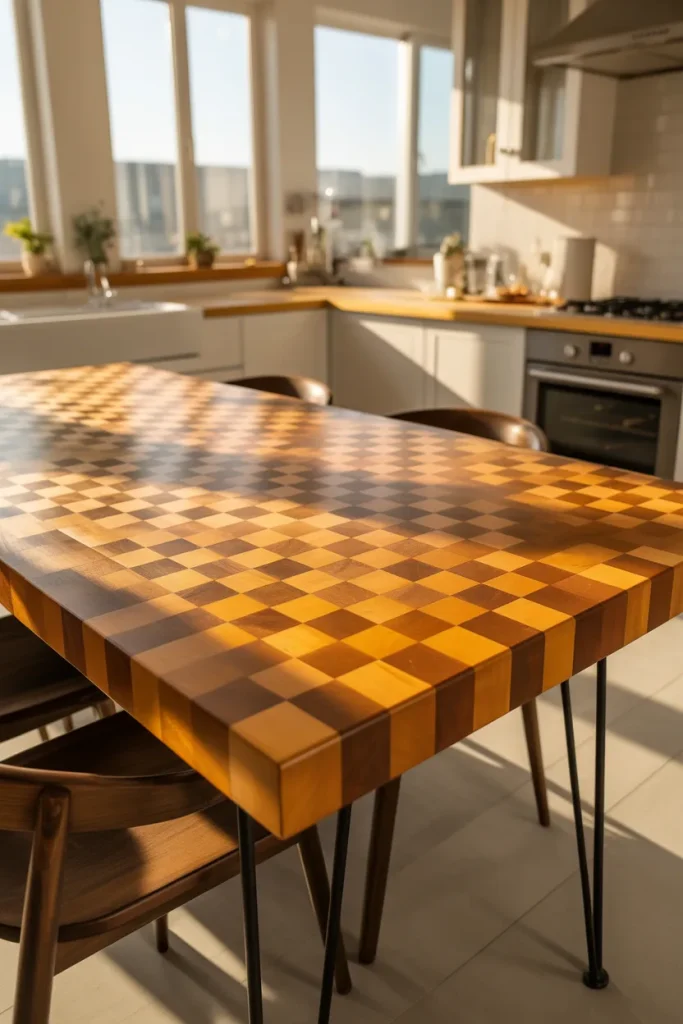
Butcher block is thick wood glued into a checkerboard pattern. You can buy precut butcher block countertops at home stores. A three-foot by five-foot piece costs about 150 dollars.
That piece is already smooth and sealed. All you have to do is add legs. Buy any legs you like. Hairpin, pipe, or wood legs all work. Screw them in. Done.
This table looks expensive because it is. But you saved hundreds by not buying a finished table from a fancy store.
Cost: 150 to 200 dollars.
11. The Sawhorse Table
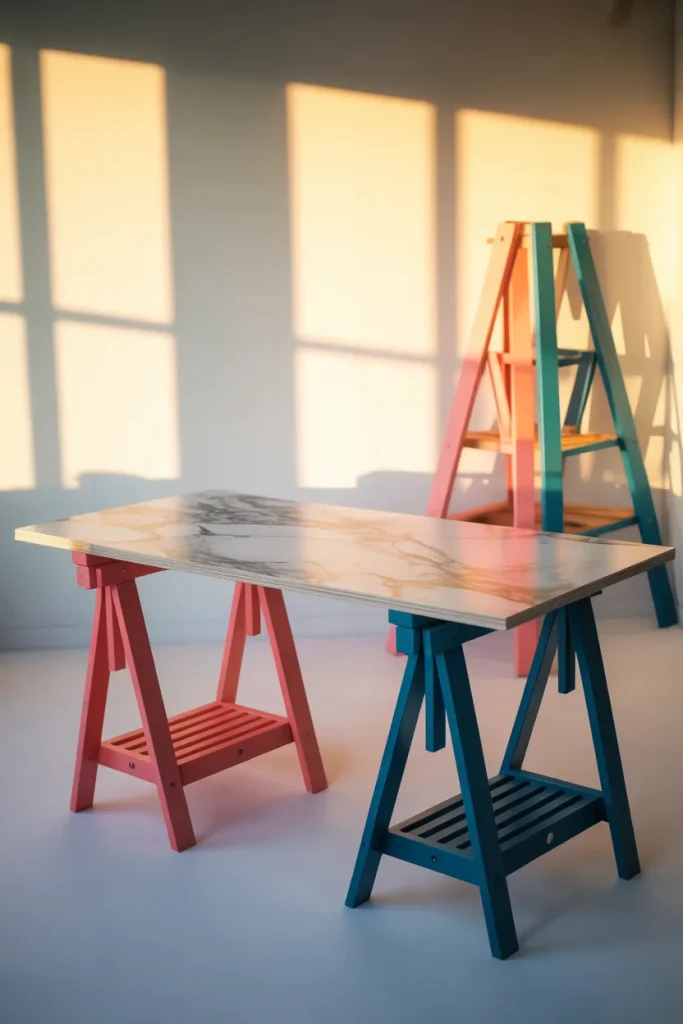
Sawhorses are folding stands that carpenters use. Two of them cost about 40 dollars. Set them up four feet apart. Lay a flat door or plywood across the top. That is your table.
But you can make it prettier. Paint the sawhorses gold or bright blue. Cover the plywood with adhesive vinyl that looks like marble. Then no one knows your table cost less than a pizza party.
When guests leave, fold the sawhorses and lean the top against the wall. Instant space.
Cost: 50 dollars.
12. The Ladder Table
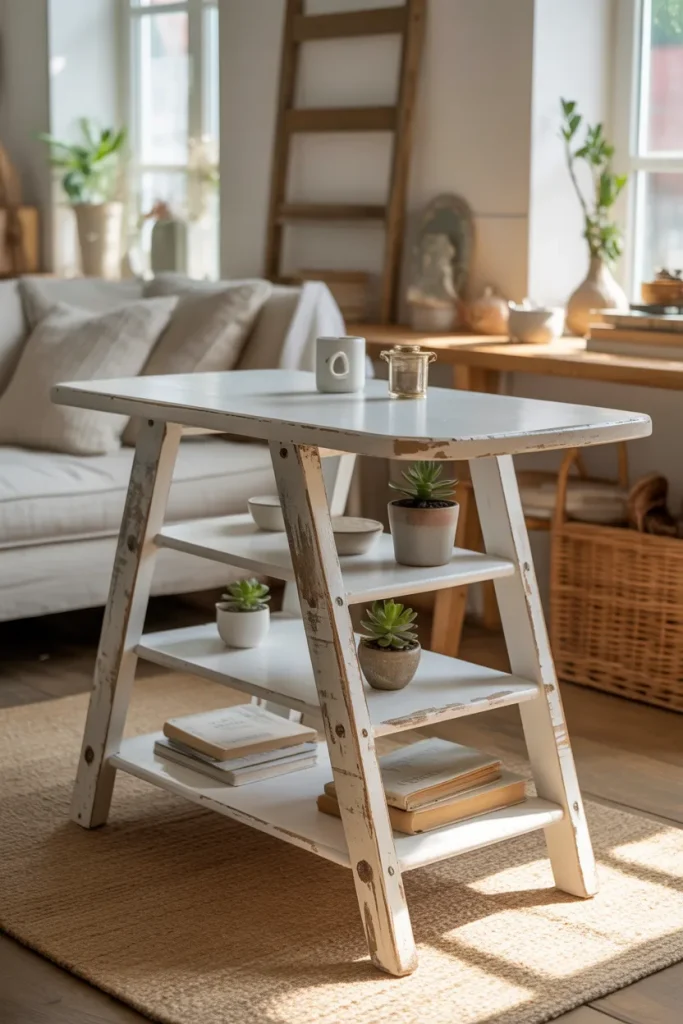
Find an old wooden ladder. A straight one, not an extension ladder. Cut the ladder in half so you have two pieces. Each piece becomes a leg on one side. Lay a board across the rungs of both halves.
Screw the board to the ladders. The rungs become shelves for cookbooks or small plants. Paint the whole thing white to hide the fact that it used to be a ladder. This table looks shabby chic. Very popular right now.
Cost: 20 dollars for a used ladder.
13. The Plywood Folding Table
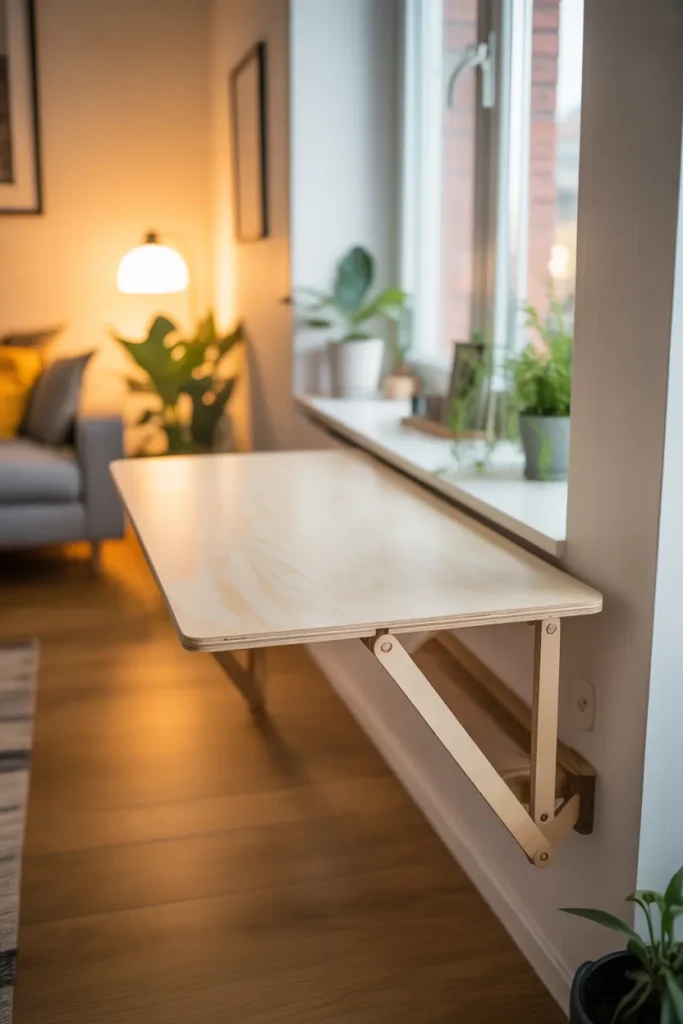
Plywood is cheap and strong. Buy one 4×8 foot sheet. Cut it into three pieces. One piece is the top. Two pieces become folding legs. Attach the legs with hinges so they fold flat.
This table lives against the wall. When you need it, pull it out and flip the legs down. Great for small apartments or camper vans. Paint the top with dry erase paint. Then you can write grocery lists right on the table.
Cost: 40 dollars for plywood and hinges.
14. The Mosaic Tile Table
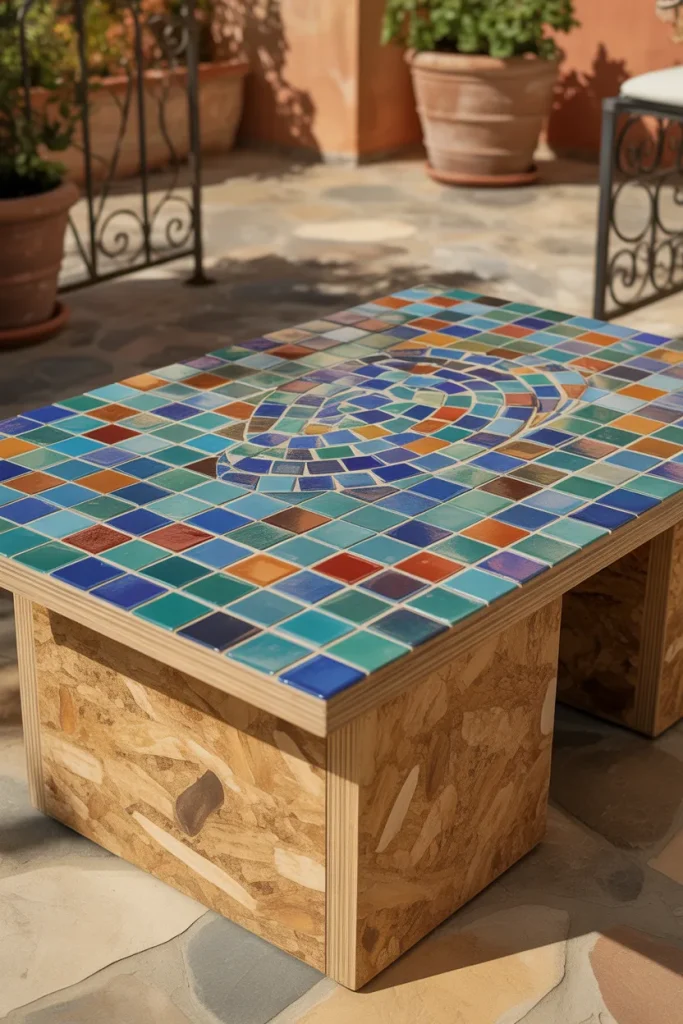
This one is for the artist in you. Build a simple plywood top. Frame the edges with thin wood strips so tiles do not fall off. Then buy cheap ceramic tiles at a restore store. Different colors and shapes work best.
Spread tile adhesive on the plywood. Press the tiles into the adhesive in a pattern. Maybe a spiral. Maybe a checkerboard. Let it dry. Then spread grout between the tiles. Wipe off the extra grout with a damp sponge.
The result is a table that looks like a work of art. Use it outside or inside. Just put coasters under drinks.
Cost: 30 to 60 dollars.
15. The Shipping Pallet Coffee Table
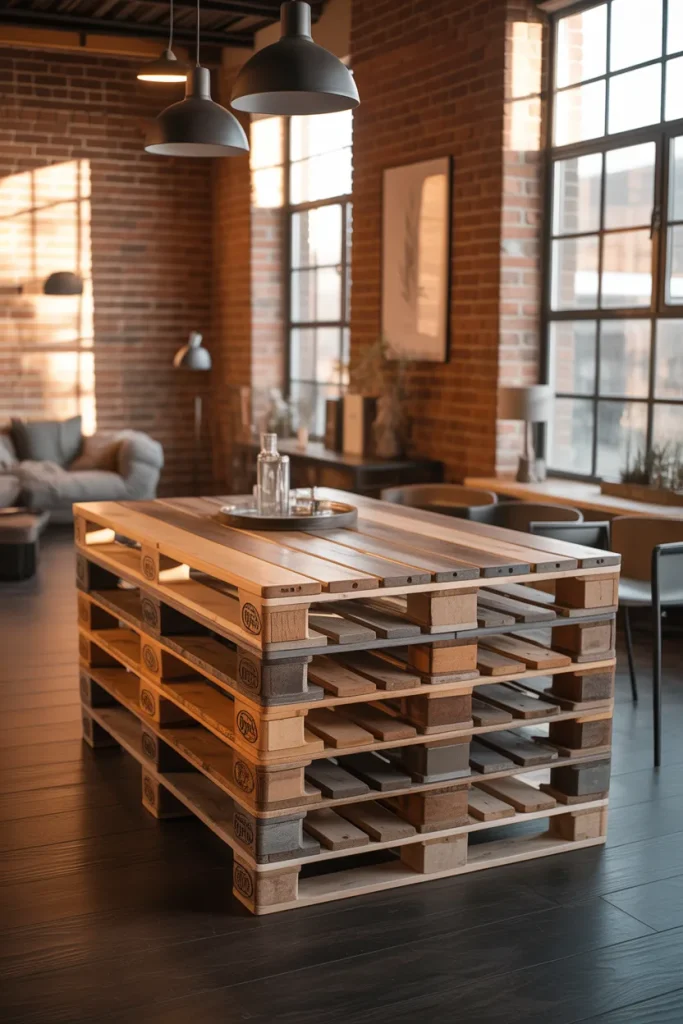
Wait, this is for a dining table. But you can make it taller. Take two shipping pallets. Stack them. Screw them together. Now you have a 16-inch tall base. Add four furniture legs to raise it to 30 inches.
The pallet slats have gaps. Fill the gaps with thin wood strips. Or leave them open for a rustic look. Sand the whole thing until it feels soft. Stain it grey or leave it natural.
This table weighs a lot but costs almost nothing. Plus, you can tell people you built it from garbage. They will be impressed.
Cost: Free pallets plus 20 dollars for legs.
Conclusion
You do not need to be a master woodworker. You do not need a garage full of fancy tools. You need an idea and a willingness to try. Every table on this list has been built by regular people just like you.
Start small. Pick the easiest idea. Maybe the hairpin leg table. Or the sawhorse table. Build it over a weekend. Make mistakes. Learn from them. Then show it off at your next dinner.
The best part is not saving money. The best part is sitting down to eat on something you made with your own hands. That feeling never gets old.
So go ahead. Pick one idea. Drive to the hardware store. Buy the wood. And build yourself a table that tells a story. Your story.