17 Creative Ideas for Building a Garden Gate with Wire

Your garden gate is the first thing people see. But new ones cost a fortune. And most store‑bought gates look exactly the same as your neighbor’s. Here is the good news. You can build a stunning gate yourself using wire. Not chicken wire junk. Real wire that bends, holds tight, and lasts for years. This article gives you seventeen fresh ideas. Each one is simple enough for a weekend. Each one costs less than dinner out. Let us get started.
Why Wire Works So Well for Garden Gates
Before we jump into ideas, let me explain why wire is your secret weapon. Wood rots. Metal bars rust and get heavy. But wire is light, tough, and easy to shape. You can twist it into loops, diamonds, waves, or even animal shapes. Wire lets air and light pass through while keeping rabbits and nosy neighbors out. You do not need fancy tools. A pair of wire cutters, some pliers, and a roll of wire will do. Most hardware stores sell galvanized wire. That means it will not rust in the rain. You can also use copper wire for a fancy look or baling wire for a farmhouse feel. Ready to get your hands dirty? Here are seventeen ways to build a garden gate that will make your whole block jealous.
Idea 1 – The Woven Willow and Wire Gate
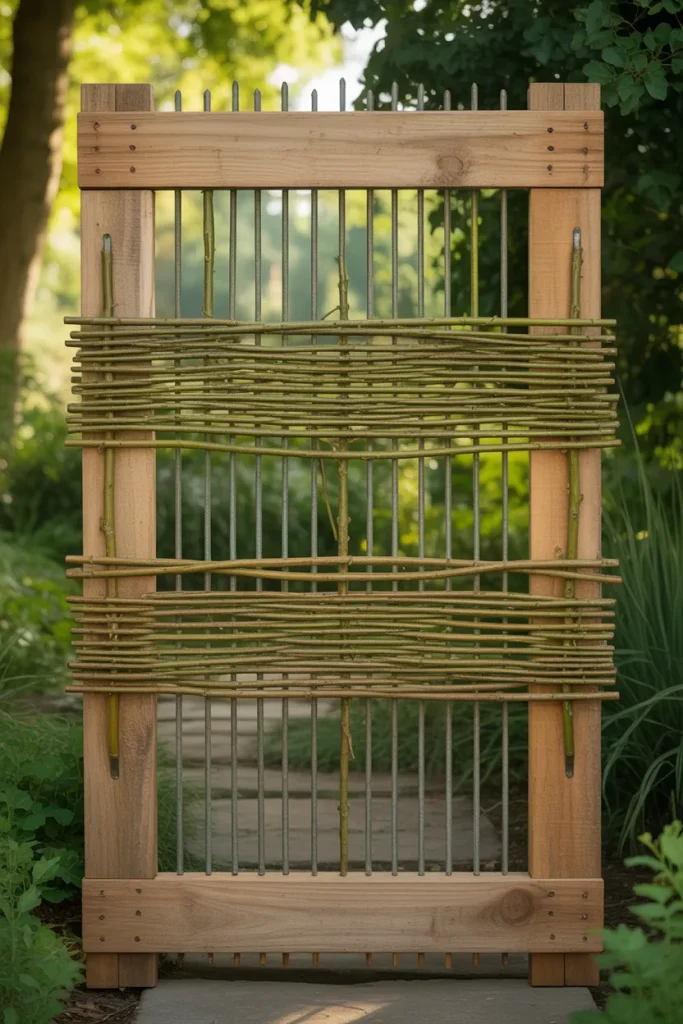
Start with a simple wooden frame. Use two by fours to make a rectangle about three feet wide and four feet tall. That size fits most garden paths. Now grab a roll of twelve‑gauge galvanized wire. This wire is thick enough to hold its shape but thin enough to bend with your hands. Cut ten pieces of wire the same length as your gate’s height. Stretch each piece from top to bottom of the frame. Space them about four inches apart. So far, so good. Here is the creative part. Take thin willow branches from your yard or a craft store. Weave them over and under the wires like a basket. The willow gives a soft, natural look. The wire keeps everything tight. When you finish weaving, trim the ends of the willow flush with the frame. Your gate will look like something from a fairy tale. Bonus: Willow bends without snapping, so you can make curved patterns too.
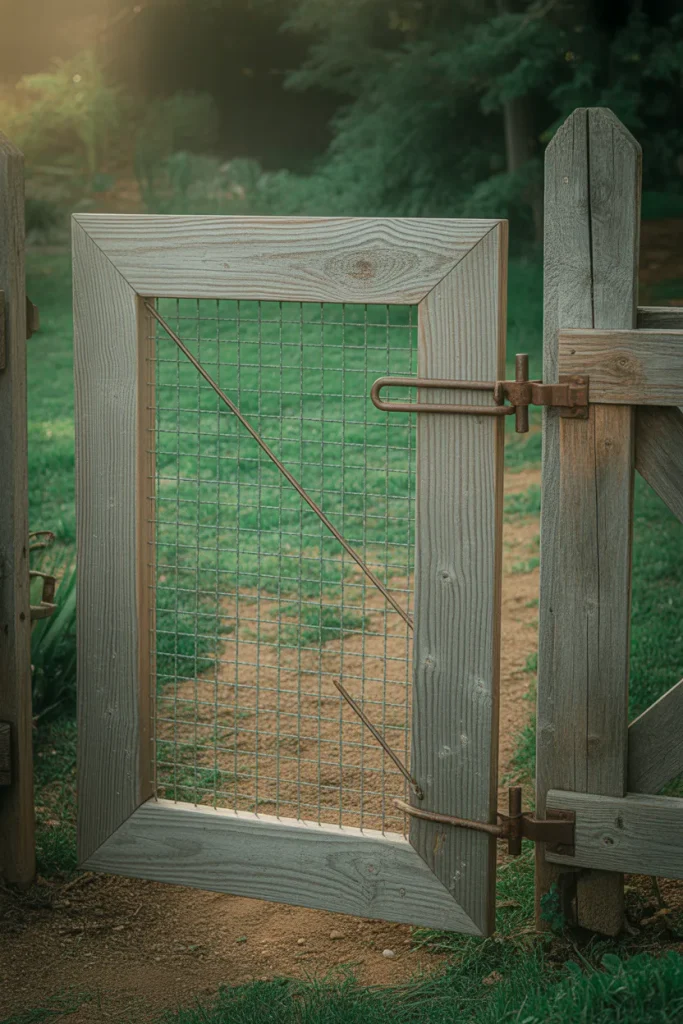
Idea 2 – The Diamond Mesh Gate
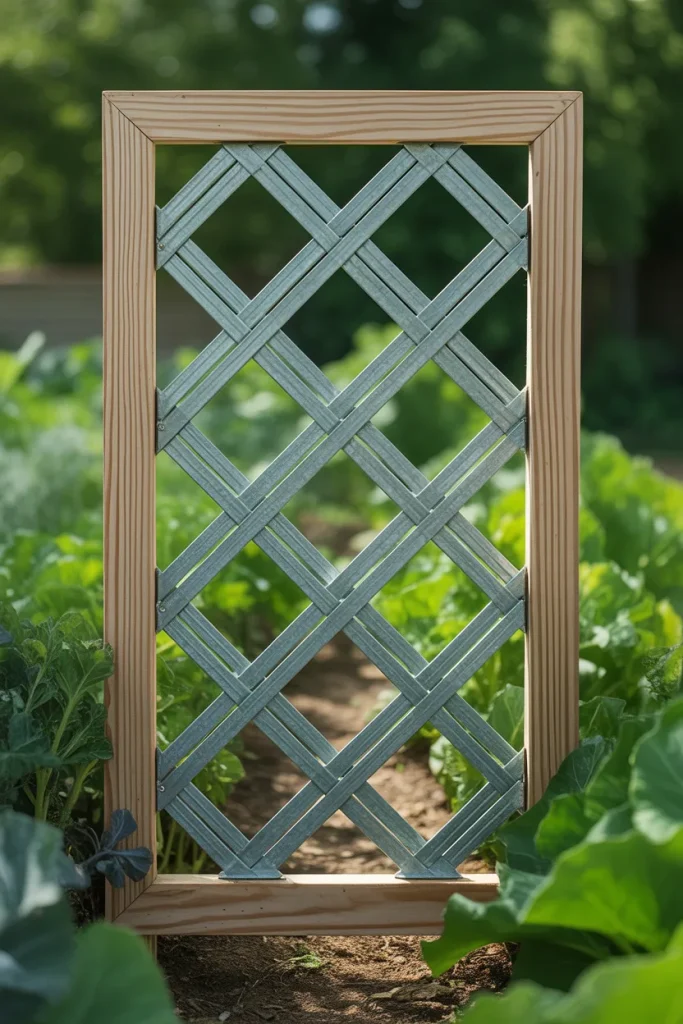
Diamond patterns look sharp and professional. You can make one without buying expensive mesh. Build a square frame from one‑by‑three lumber. Pine is cheap and light. Now run horizontal wires across the frame every five inches. Then run vertical wires every five inches. You have a grid. To make diamonds, take a long piece of wire and weave it diagonally from top left to bottom right. Then weave another wire from top right to bottom left. Where the diagonal wires cross, twist them together once with your pliers. Repeat this every two inches along the diagonal. The result is a tight diamond mesh that feels solid. Paint the wood frame white or leave it natural. This gate works great for vegetable gardens because the holes are small enough to stop squirrels but big enough to see through.
Idea 3 – The Spiral Swirl Gate
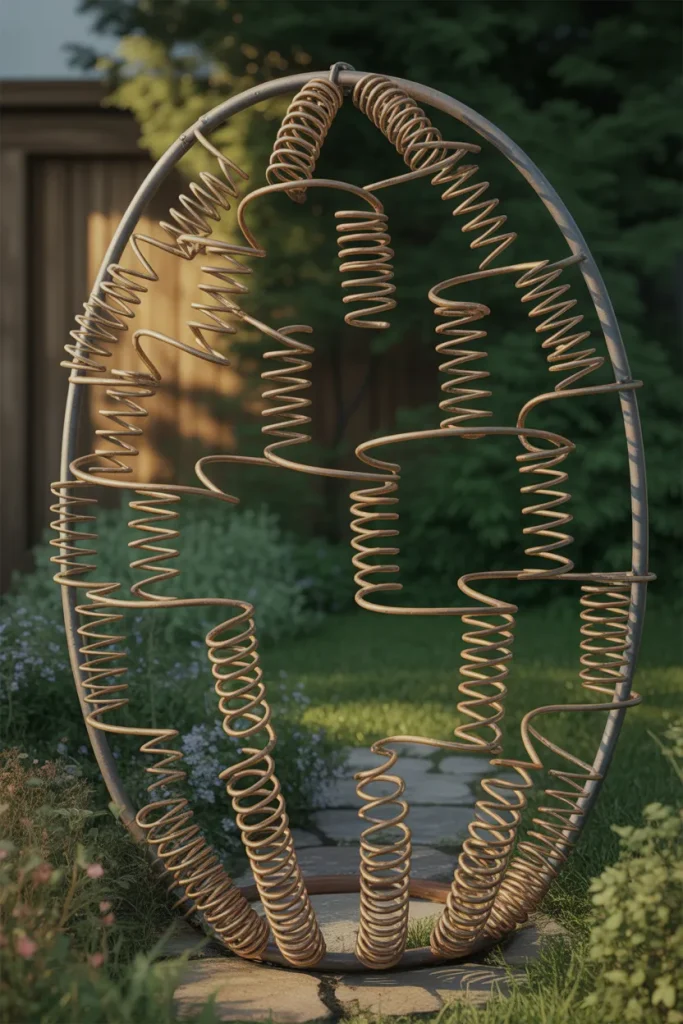
This idea turns your gate into art. Start with a round frame. Yes, round. Buy a galvanized hoop from a farm supply store or bend a thick steel rod into a circle. Four feet across is perfect. Now take a roll of sixteen‑gauge wire. This is softer and easier to twist into spirals. Cut a four‑foot piece and wrap it around a broom handle to make a tight coil. Slide the coil off the broom handle and stretch it slightly so it looks like a spring. Attach one end of the spring to the bottom of the hoop. Stretch it up to the top and attach the other end. Repeat this process with ten more springs, spacing them evenly around the hoop. When you stand back, the gate looks like a giant spider web made of spirals. Sunlight dances through the curves. This gate is lightweight enough to hang on a simple hook. Pro tip: Use copper wire instead of galvanized for a warm, reddish glow that ages beautifully.
Idea 4 – The Rustic Star Gate
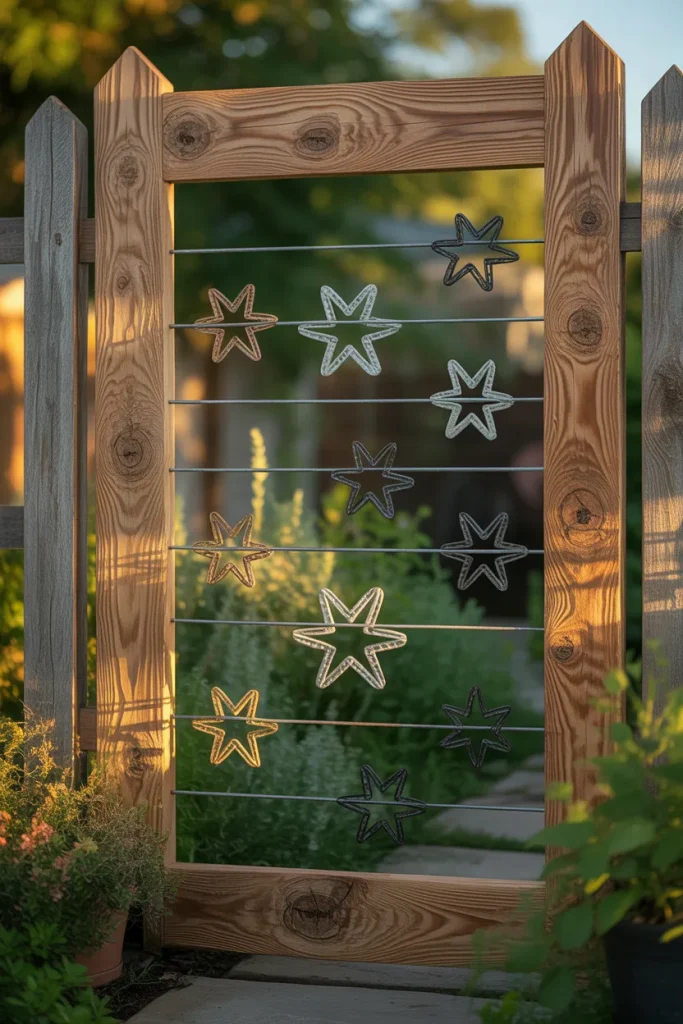
Farmhouse style never goes out of fashion. Build a rectangular frame from rough‑cut cedar. Cedar resists bugs and rain. Do not sand it. Keep the rough texture. Now stretch five horizontal wires across the frame. These are your base lines. The magic happens with stars. Cut twelve pieces of wire, each about two feet long. Bend each piece into a five‑pointed star. How? Make a loop at one end, then twist the wire back and forth until you see five points. It takes practice, but watch a short video online and you will get it. Attach the stars to the horizontal wires by wrapping the ends of each star around the wire. Place three stars on each horizontal line. Stagger them so they do not line up perfectly. The final look is a night sky full of stars. Paint the stars black or leave the wire silver. Your gate will feel cozy and handmade.
Idea 5 – The Living Vine Gate
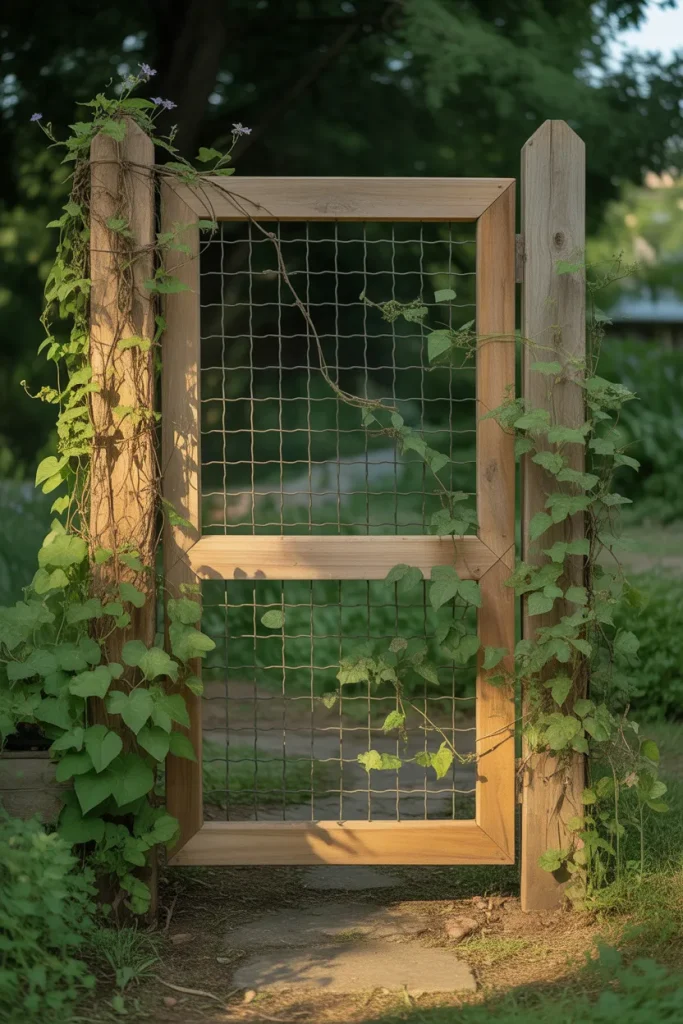
This gate changes with the seasons. Build a simple wooden frame, but leave the bottom six inches open. No wire at the bottom. Stretch wire across the rest of the frame in a random zigzag pattern. Do not make it neat. The messier, the better. Now plant a climbing vine like morning glory or clematis at the base of each gate post. Train the vines to grow up the posts and onto the wire zigzags. Within one summer, the vines will cover the wire completely. You will have a gate made of leaves and flowers. The wire disappears into the greenery. In winter, the vines drop their leaves, and the wire pattern shows again. Two gates in one. Make sure to use galvanized wire so the vines do not rust it. This idea works best in warm climates where vines grow fast.
Idea 6 – The Curtain of Rings
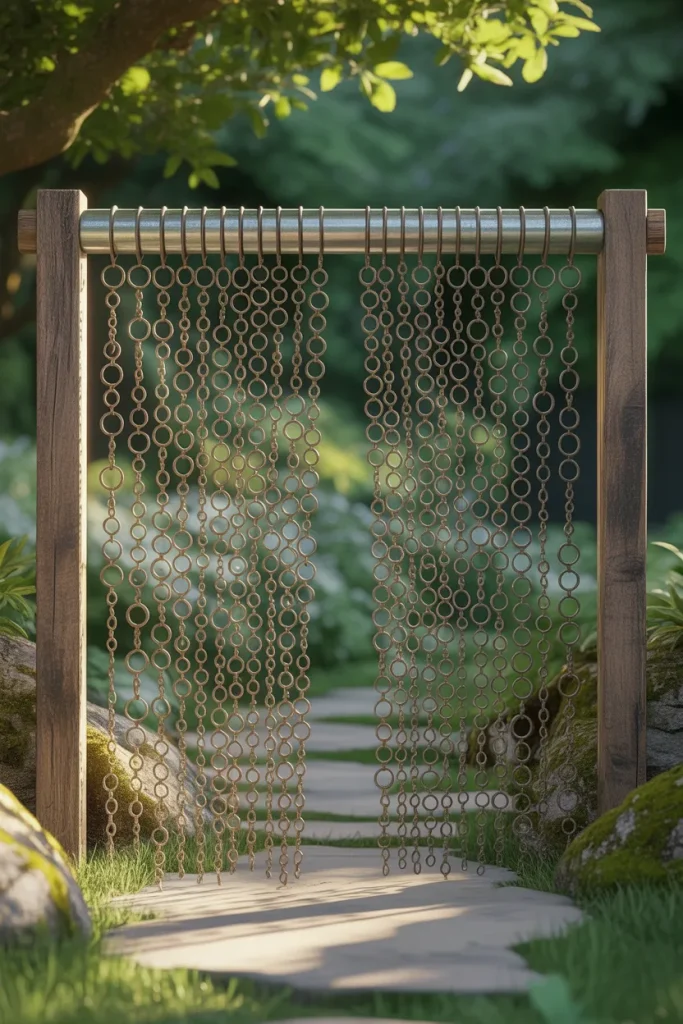
Remember those metal rings you see on shower curtains? Use them here. Build a wide frame, about five feet across. Stretch a thick wire across the top of the frame like a curtain rod. Now collect fifty to one hundred small metal rings. You can buy key rings or use old curtain rings. Thread each ring onto individual pieces of wire that are eight inches long. Fold each wire in half so the ring sits at the fold. Attach the folded end to the top rod. Let the two wire tails hang down. Space the rings about an inch apart. When the wind blows, the rings clink gently against each other. They also reflect sunlight. To open the gate, push the rings aside like a beaded curtain. Animals cannot push through, but you can walk right in. This is the only gate on our list that does not need hinges. Just hang it from the top of your opening.
Idea 7 – The Hexagon Honeycomb Gate
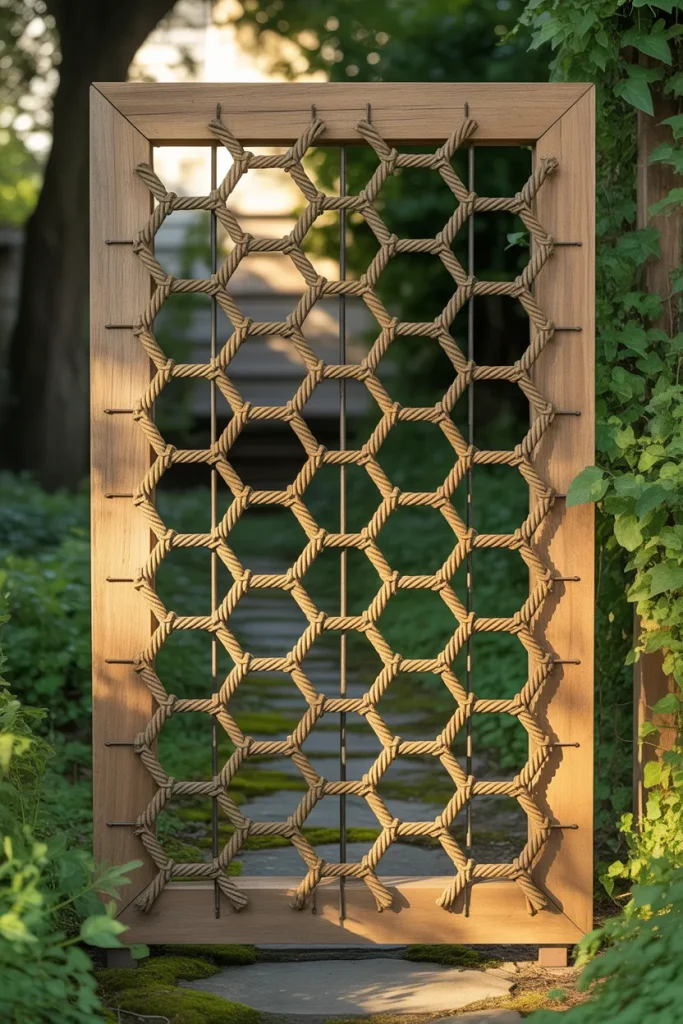
Hexagons are the strongest shape in nature. Bees figured that out long ago. You can build a wire honeycomb gate that looks incredible. Start with a wooden frame. Inside the frame, stretch a piece of wire from top to bottom every three inches. Now the tricky part. Cut dozens of six‑inch wire pieces. Bend each piece into a hexagon. A hexagon has six sides, like a stop sign but with six edges. Attach these hexagons to the vertical wires by twisting the corners together. Fill the entire frame with hexagons packed side by side. The result is a rigid, lightweight gate that feels scientific and artsy at the same time. Paint the hexagons gold or leave them silver. This gate stops even the smallest critters because the gaps are tiny. It also looks stunning when backlit by the afternoon sun.
Idea 8 – The Wavy Ribbon Gate
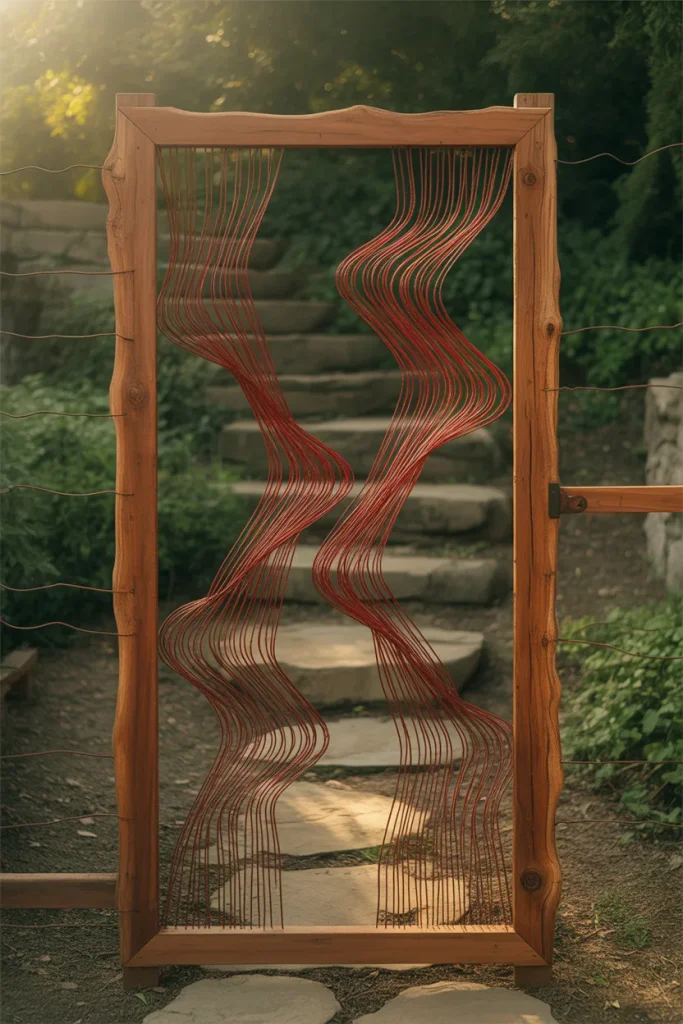
Straight lines are boring. Give your gate some curves. Build a tall, narrow frame, maybe three feet wide and five feet tall. Now take a single very long piece of wire. Start at the bottom left corner. Stretch the wire to the top right corner, but instead of going straight, make a giant S‑curve. Loop it up and down like a roller coaster. Secure the wire at the top right. Do the same thing with a second wire from bottom right to top left, also in an S‑curve. Now you have two wavy ribbons crossing each other. Fill the rest of the frame with more S‑curves, each one starting and ending at the frame edges. When you stand back, the wires look like ribbons blowing in the wind. This gate wins the award for most playful design. Use bright red wire if you can find it.
Idea 9 – The Hidden Hinge Gate
Most gates show their hinges. Not this one. Build a wooden frame that is slightly wider than your garden opening. Stretch wire across the frame in a diagonal pattern. Now here is the secret. Attach one side of the gate to your fence post using not metal hinges but loops of thick wire. Wrap the wire around the post and through the gate frame three times. These wire loops act just like hinges, but they blend into the design. No one sees them. On the other side of the gate, make a simple latch from a bent wire hook. Bend a thick piece of wire into a J shape. Screw an eye hook into the fence post. Lift the J hook out of the eye to open the gate. This hardware‑free approach keeps your gate looking rustic and handmade. It also saves you twenty dollars on store hinges.
Idea 10 – The Mosaic Tile and Wire Gate
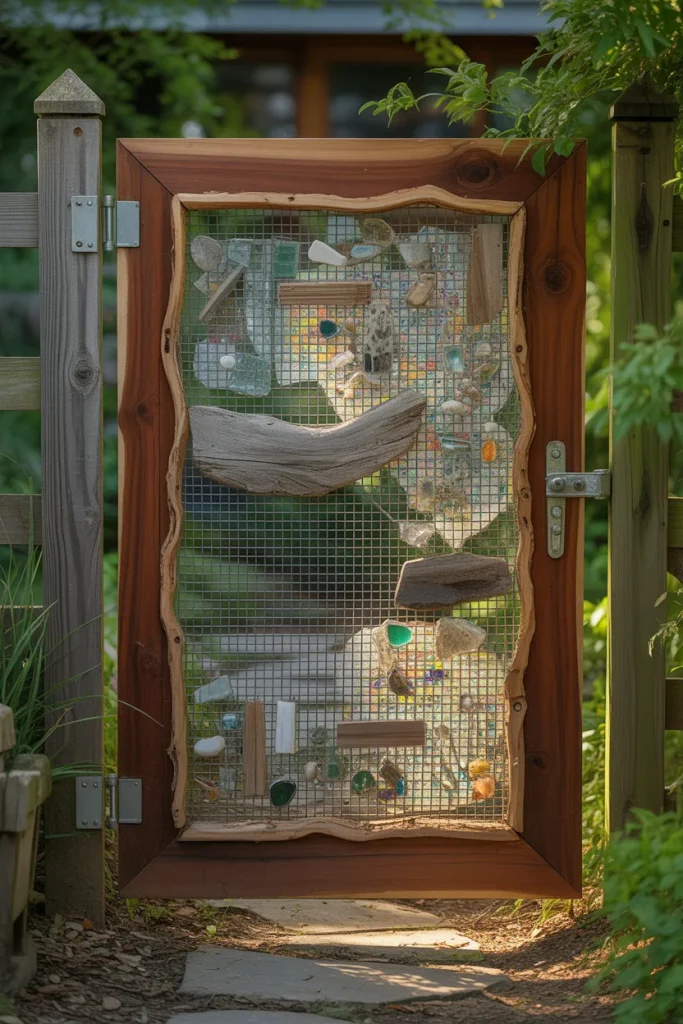
Here is where we mix materials. Build a deep frame, at least three inches thick. Stretch a double layer of wire across the back of the frame. The two layers should be one inch apart. Now collect broken ceramic tiles, sea glass, or colorful pebbles. Push these pieces between the two wire layers. The wires hold each piece in place without glue. Arrange the pieces to spell a word like “grow” or “welcome.” Or just make a random rainbow pattern. When sunlight hits the tiles, colors bounce everywhere. This gate is heavy, so use strong hinges. But the beauty is worth the extra work. Every time you walk through, you see a different sparkle. Neighbors will ask where you bought it. Tell them you made it.
Idea 11 – The Minimalist Single Strand Gate
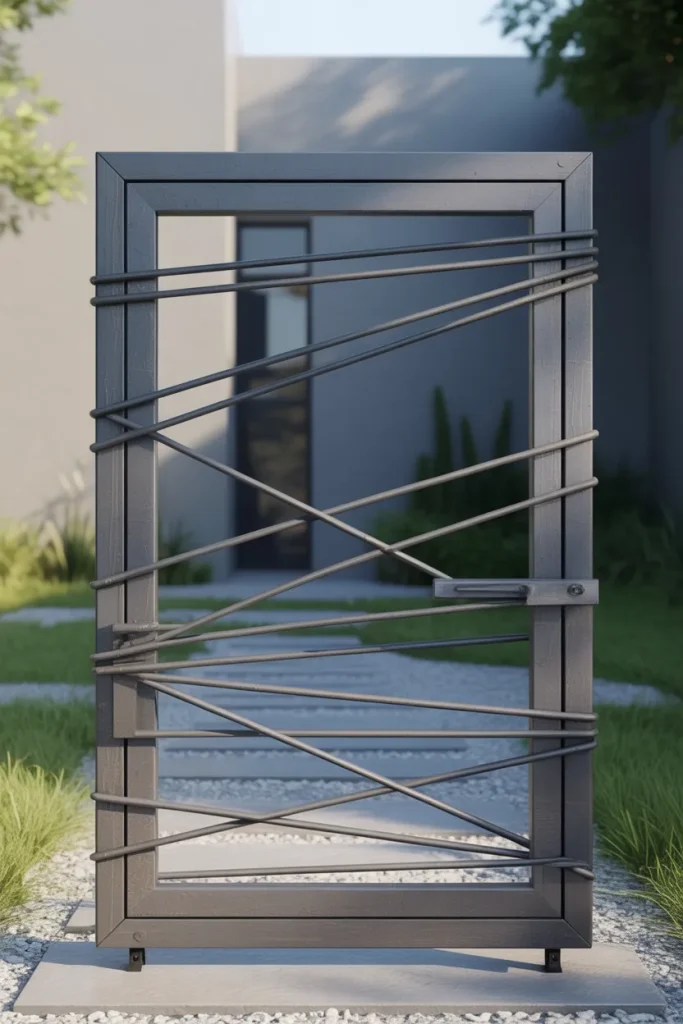
Sometimes less is more. Build a very light frame from one‑by‑two inch wood strips. Do not add any crossbars or braces. Now take a single strand of thick wire, ten‑gauge or heavier. Wrap one end around the top left corner. Stretch the wire diagonally to the bottom right corner and wrap it there. Then go back up to the top right corner, then down to the bottom left. Keep zigzagging until you have only four or five diagonal lines across the whole frame. That is it. No filling. No mesh. Just a few bold lines. This gate looks modern and airy. It will not keep out rabbits, but it marks the entrance beautifully. Paint the wood matte black and use black wire for a sleek look. This is the fastest gate on our list. You can finish it in under an hour.
Idea 12 – The Birdcage Gate

Remember old birdcages with their curved bars and little doors? Steal that look. Build a round frame like we did in idea number three. But this time, add vertical ribs. Cut six pieces of thick wire, each one four feet long. Attach them evenly around the hoop, all meeting at the top like an umbrella. Bend the ribs outward slightly so the gate bulges in the middle. Now weave thin wire horizontally around the ribs, spacing the rows two inches apart. The result is a dome‑shaped gate that sticks out from your fence. It looks like a giant birdcage lying on its side. Hang a small bell from the top inside. When you open the gate, the bell rings. This gate needs a strong post because of its weight. But once it is up, children will love it.
Idea 13 – The Scrap Wood and Barbed Wire Gate
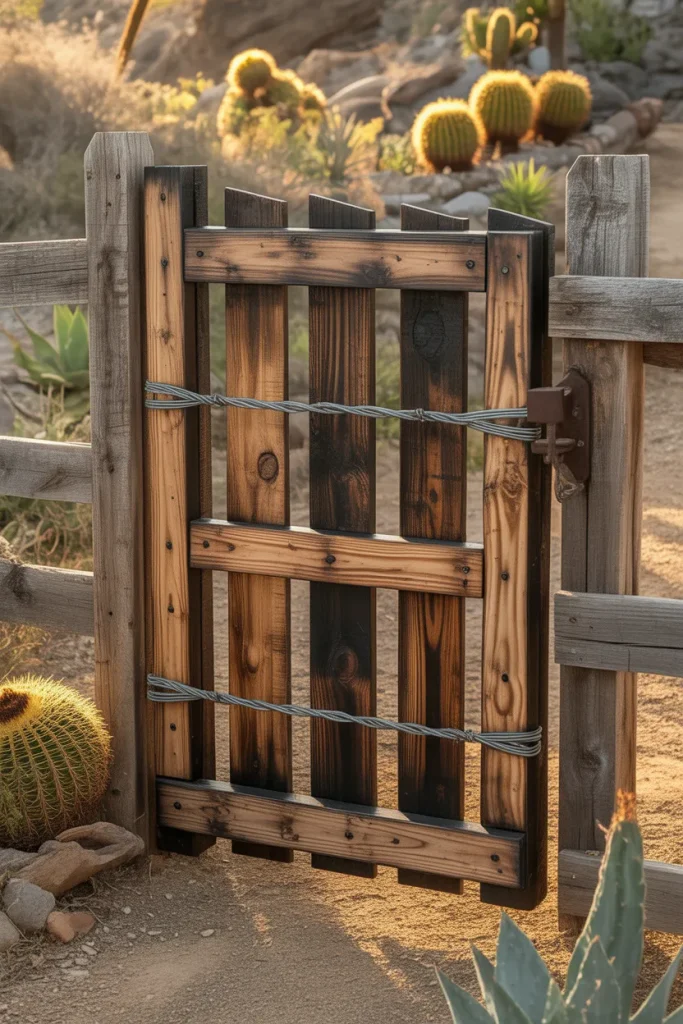
Do not use real barbed wire. That is dangerous. But you can buy decorative twisted wire that looks like barbed wire without the sharp points. Build a gate from old pallet wood. Pallets are free behind many stores. Pull the boards off and nail them into a rectangle. Do not worry about gaps. Gaps add character. Now stretch three rows of twisted barbed‑style wire across the frame. Space the rows evenly. The rough wood mixed with the tough wire gives a western ranch feel. This gate works perfectly for a cactus garden or a dry, rocky yard. To make it even more authentic, burn the wood lightly with a propane torch before adding the wire. The dark, charred wood makes the silver wire pop.
Idea 14 – The Stained Glass Wire Gate
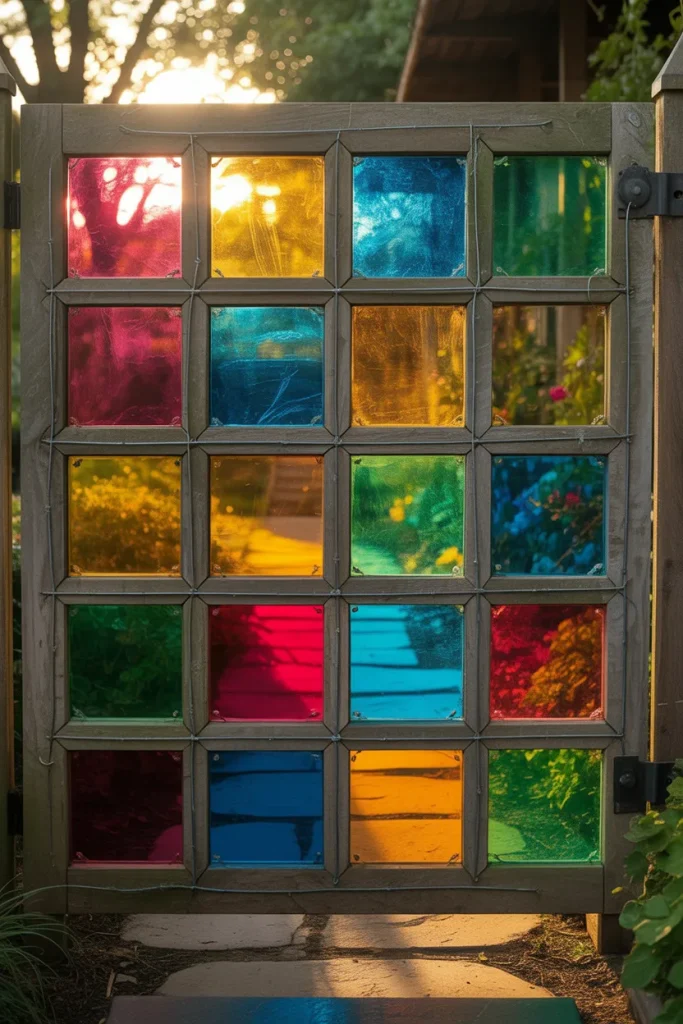
You cannot make real stained glass without special tools. But you can fake it wonderfully. Build a wooden frame with many small squares, like a window pane. Each square should be four by four inches. Stretch wire across the frame to create those squares. Now buy a roll of colored cellophane or translucent plastic report covers. Cut squares of cellophane slightly larger than each wire square. Place a cellophane square behind each wire opening. Hold it in place by taping or stapling the edges to the wood. When sunlight shines through, the cellophane glows red, blue, yellow, and green. It looks exactly like stained glass from ten feet away. The wire grids hold the cellophane flat. This gate will not survive heavy rain unless you cover it with a clear plastic sheet. But for a covered patio or a dry climate, it is magical.
Idea 15 – The Twisted Pair Rope Gate
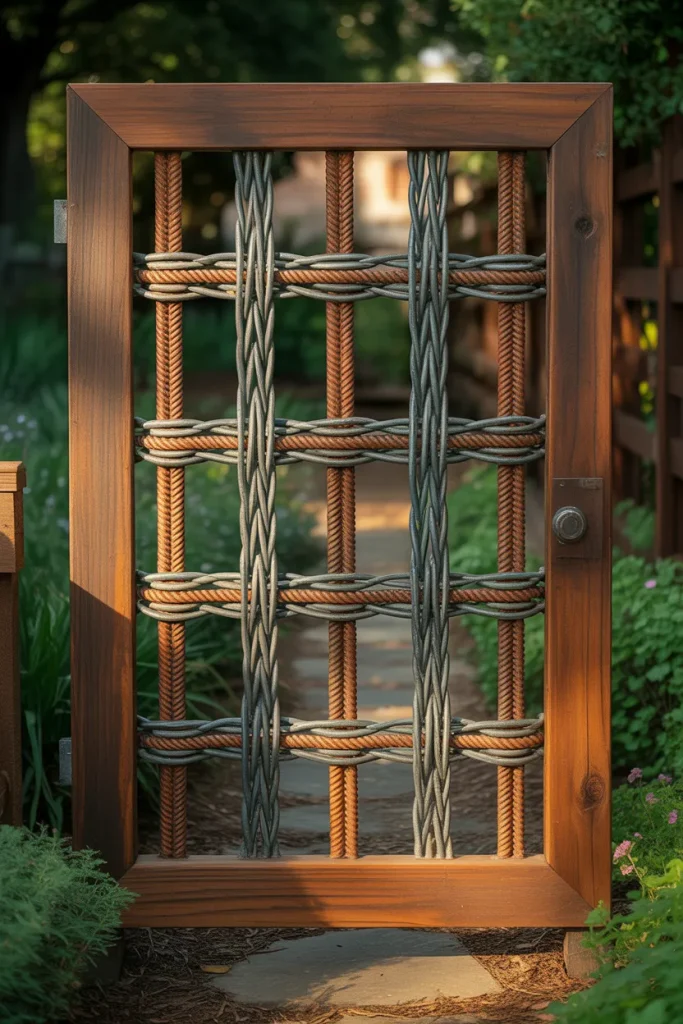
Wire does not have to be straight. Twist two thinner wires together to make a rope pattern. Cut a dozen pairs of sixteen‑gauge wire, each pair twice as long as your gate is tall. Twist each pair tightly using a drill. Hook one end of the twisted pair into the drill chuck, hold the other end with pliers, and run the drill slowly. The wires will wrap around each other beautifully. Now attach these twisted ropes vertically across your gate frame, spaced three inches apart. For extra style, weave a horizontal twisted rope over and under the vertical ones. The final texture looks like braided metal. This gate feels heavy and expensive even though it cost almost nothing. Use one bare copper wire and one galvanized wire twisted together for a two‑tone effect.
Idea 16 – The Night Light Gate
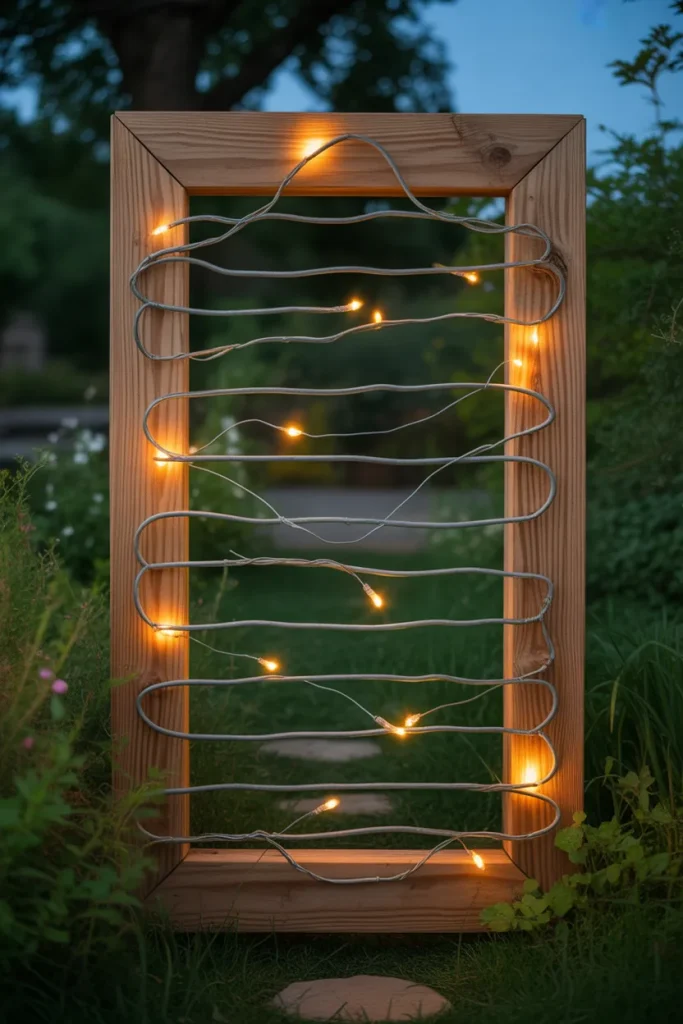
This idea needs a little electricity, but it is safe and simple. Build a wooden frame and fill it with a loose zigzag of wire. Leave plenty of open spaces. Now buy a string of outdoor solar lights. The kind with small bulbs on a thin wire. Weave the light string through your wire zigzag. Let the bulbs hang at different depths. Some close to the front, some near the back. Secure the light string by wrapping a tiny piece of wire around it every few inches. During the day, the solar panel charges the lights. At night, your gate twinkles like a thousand fireflies. The wire holds everything in place while looking like part of the design. This gate turns your garden into a wonderland after dark. Make sure the solar panel faces south for maximum charge.
Idea 17 – The Found Object Gate
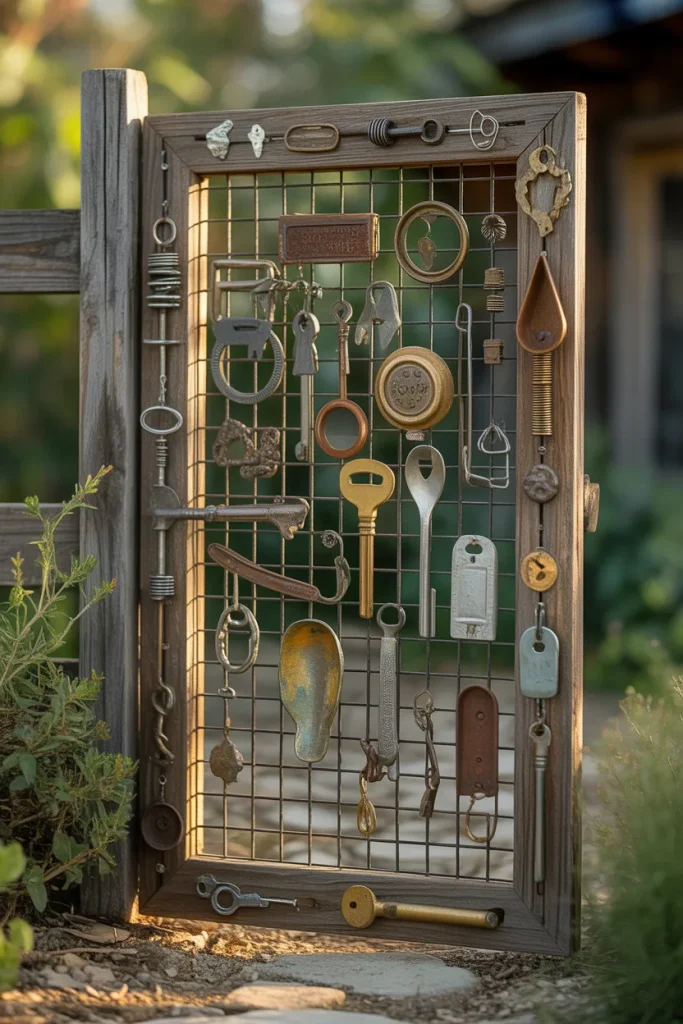
This is my personal favorite. Build a basic wire mesh gate using any of the ideas above. But leave a few open spaces. Now walk around your house and yard. Look for small metal objects. Old keys. Washers. Rusty spoons. Broken jewelry. Bottle caps. Springs from a broken mattress. Use your wire to attach these found objects to the gate. Hang a key from a loop. Wire a washer to look like a flower center. Let a spoon dangle so it clinks against the gate. Each object tells a story. That key came from your first apartment. That bottle cap is from a soda you drank on vacation. Over time, you can add more objects. Your gate becomes a collage of your life. No one else will ever have a gate like yours. Wire makes all of this possible because you can attach anything with a few twists.
How to Hang Your Wire Gate So It Lasts
You built a beautiful wire gate. Now do not ruin it with bad hinges. Buy heavy‑duty gate hinges rated for at least fifty pounds. Most wire gates are light, but wood frames add weight. Attach the hinges to your fence post with three‑inch screws. Not two inches. Three inches grabs the post solidly. For the latch, use a simple hook and eye. The hook is a bent piece of thick wire. The eye is a screw with a loop. Position the latch so the gate hangs level. If your gate sags after a few months, add a diagonal wire from the top hinge corner to the bottom opposite corner. Tighten that wire with a stick twisted in the middle. That trick straightens any sagging gate.
Keeping Your Wire Gate Beautiful for Years
Galvanized wire resists rust, but nothing lasts forever in rain and snow. Once a year, wipe your gate with a rag dipped in boiled linseed oil. This oil stops rust and keeps the wire shiny. For copper wire, let it turn green. That green layer is actually protection. Do not clean it off. Wood frames need paint or stain every two years. Use outdoor paint only. If a wire breaks, do not panic. Cut a new piece and twist it onto the broken ends. The repair will blend in after a few weeks of weather. The best part about wire gates is that damage never ruins them. You just add more wire.
Why Your Garden Gate Matters More Than You Think
A gate is not just an opening. It is a greeting. When you come home tired from work, walking through a beautiful gate lifts your mood. When guests arrive, the gate tells them you care about small things. A handmade wire gate says “someone creative lives here.” Store gates say “someone with a credit card lives here.” Which message do you want to send? Plus, building your own gate saves money. You can finish any of these ideas for under fifty dollars. The cheapest wooden gate at the home store costs one hundred fifty dollars and looks boring. You can make something better for one‑third the price. And you get the pride of saying “I built that.”
A Final Tip Before You Start
Pick one idea from this list. Just one. Do not try to combine them yet. Gather your wire, your pliers, and your wood. Build a small test piece first, maybe a one‑foot square. Practice the weaving or twisting on that small piece. Once you feel confident, build the full gate. Invite a friend to help hold things while you attach wires. Play music. Have a snack. Building should be fun, not a chore. And remember, your first gate will not be perfect. That is fine. Imperfections make it handmade. A crooked wire here, a loose twist there—that is character. Your garden will love it anyway.
Conclusion
You now have seventeen solid ideas for building a garden gate with wire. None of them require special skills or expensive tools. Each idea lets you express your own style, from rustic stars to glowing night lights to found object collages. Wire is forgiving, cheap, and beautiful. It bends to your will but holds strong against wind and weather. Pick the idea that makes you smile the most. Start this weekend. In a few hours, you will have a gate that no store can sell. And every time you walk through it, you will remember that you built it with your own two hands. That feeling never gets old. Now go make some loops and twists. Your garden is waiting.