15 Backyard Paver Walkway Ideas
You step outside. The sun is warm. You want to walk to your garden, your shed, or that old tree where you drink coffee. But your feet sink into mud. Or you dodge weeds. Or you just have a boring strip of dirt. That stops today.
A paver walkway changes everything. It gives your feet a clear path. It makes your yard look pulled together. And you do not need a construction crew or a pile of cash. I will show you 15 real-world ways to lay pavers that fit your space, your skill level, and your style. No fancy words. No fluff. Just clear ideas you can use this weekend.
Let me tell you why pavers beat poured concrete every time. Concrete cracks. It stains. And once it is down, you are stuck with that shape forever. Pavers? You can pull one up, fix a dip, or change the whole pattern next year if you want. They let water drain through the gaps instead of puddling up. And they come in colors that look like natural stone, old brick, or even wooden slices.
This list gives you fifteen distinct walkway ideas. Some take two hours. Some take a full weekend. But every single one works for a regular person with basic tools. I will tell you what each idea looks like, what pavers to grab, and one pro tip that makes the job easier.
Let us walk through them one by one.
1. The Stepping Stone Swoop
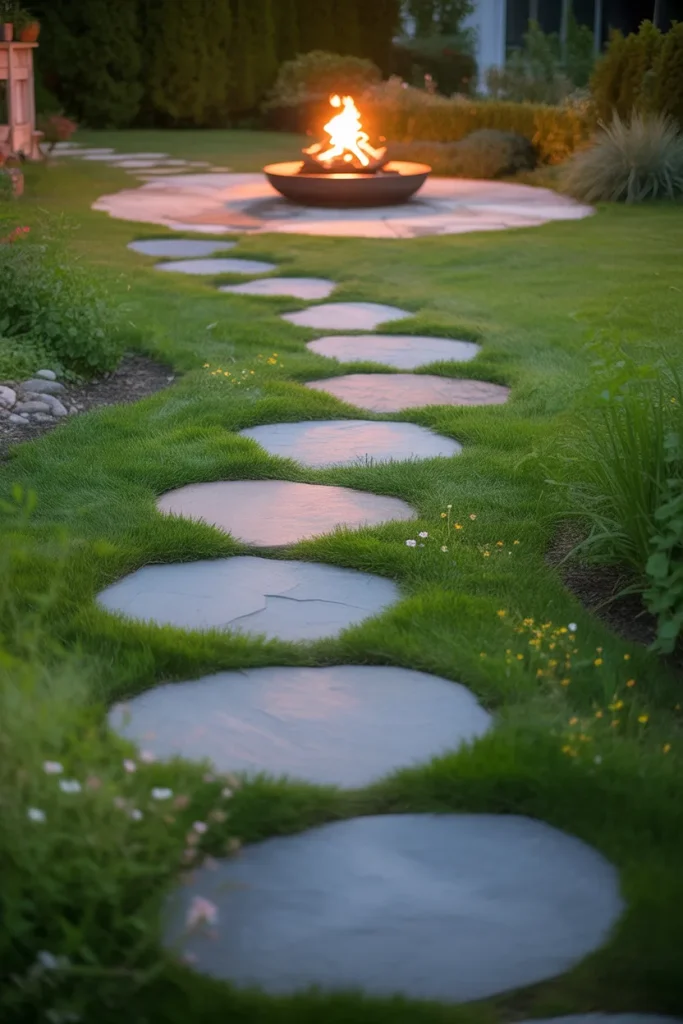
You know those big round or square pavers that sit all by themselves? That is the stepping stone swoop. Instead of a solid line of bricks, you leave grass or small rocks between each stone. Your feet go from one to the next like a game of hopscotch.
Use this for a low-traffic area. Maybe from your deck to a fire pit. Or from the gate to your vegetable beds. The trick is to space the stones one regular step apart. Too close and you shuffle. Too far and you stretch. A good rule? Lay them on the ground first and walk the path three times. Move any stone that feels wrong.
Pick pavers at least sixteen inches wide. Smaller ones tip when you step on the edge. Concrete stepping stones from a home store work fine. But if you want a richer look, grab twelve-inch square bluestone pieces. Set each one half an inch below the grass level. That way your mower blade passes right over the top without chipping the stone.
Pro tip: Dig a shallow hole for each paver. Fill the hole with an inch of sand. Tap the paver down with a rubber mallet. Then pour extra sand over the whole walkway and sweep it into the cracks. The sand locks everything in place.
2. The Herringbone Path
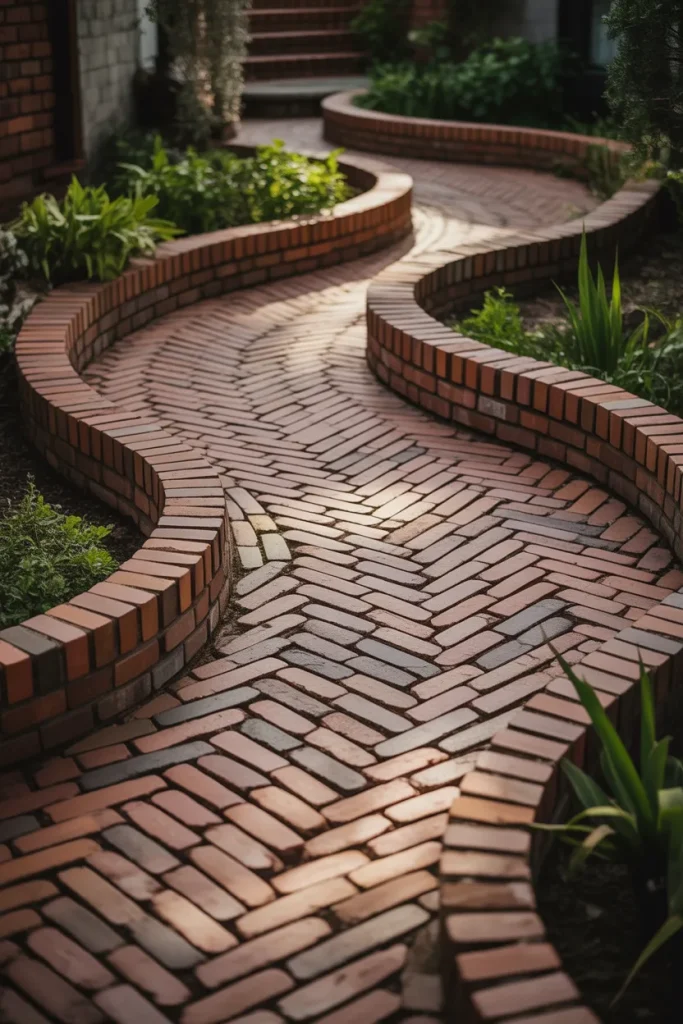
Herringbone sounds fancy. It is not. You just lay bricks at forty-five degree angles so they form a zigzag pattern that looks like fish bones. This pattern locks together tight. It does not shift or spread apart like straight rows. That makes it perfect for hills or spots where you roll a garden cart.
You need rectangular pavers. Standard clay bricks work great. Or buy concrete pavers shaped like bricks. Lay a solid base of crushed stone first—about four inches deep. Compact it with a hand tamper. Then put down one inch of sand. Start laying your herringbone from the middle of the path and work outward. Keep each brick snug against its neighbor.
The final look feels old-world. Like a courtyard in Europe. But the best part? Water runs straight through the gaps. No puddles. No ice patches in winter.
Pro tip: Run a string line down both sides of your path before you lay a single brick. The string keeps your edges straight. Without it, herringbone wanders like a drunk snake.
3. The Mosaic Muddle
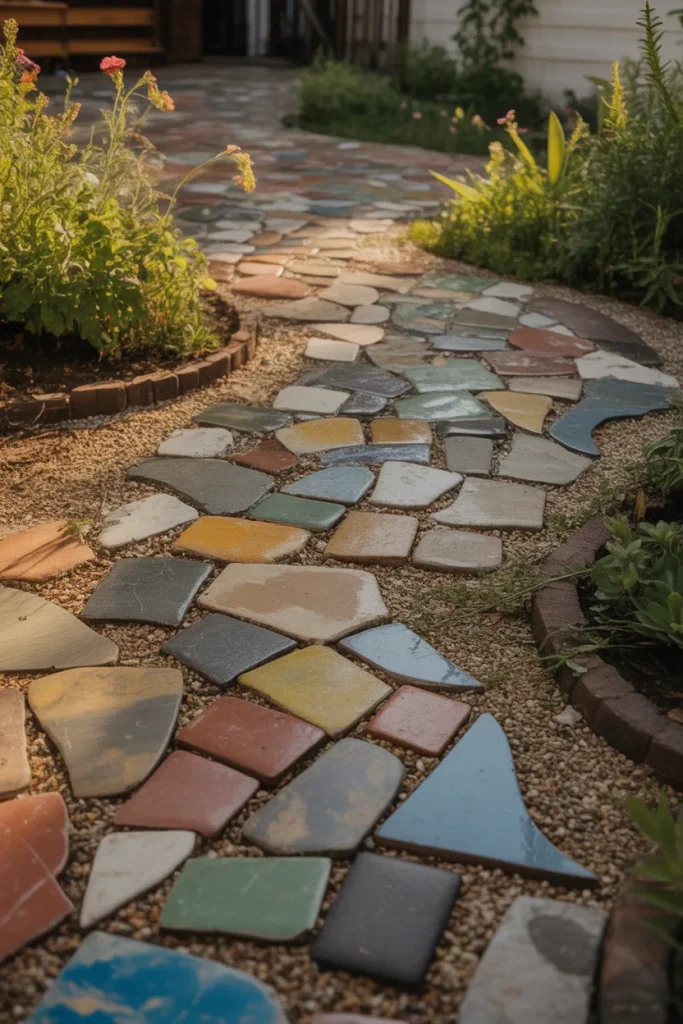
Got leftover pavers from other projects? Broken pieces? Odd shapes? Do not throw them away. Make a mosaic muddle walkway. You just fit together different sizes and colors like a puzzle. The path ends up looking artsy and one of a kind.
This works best for short paths. Maybe ten feet from a patio door to a bench. Dig your base like normal. Then start placing your biggest pieces first. Fill the gaps with medium chunks. Use small broken bits for the last spaces. Do not worry about perfect edges. The roughness is the whole point.
Once every piece sits flat, pour dry sand over the whole walkway. Sweep it deep into every crack. Then spray everything with a garden hose. The sand settles and hardens. Your mismatched pavers become a solid mat.
Pro tip: Keep a bucket of gravel handy. When you hit a gap too big for sand, pour in small pebbles. They add texture and keep the big pieces from wobbling.
4. The Long Timber Plank
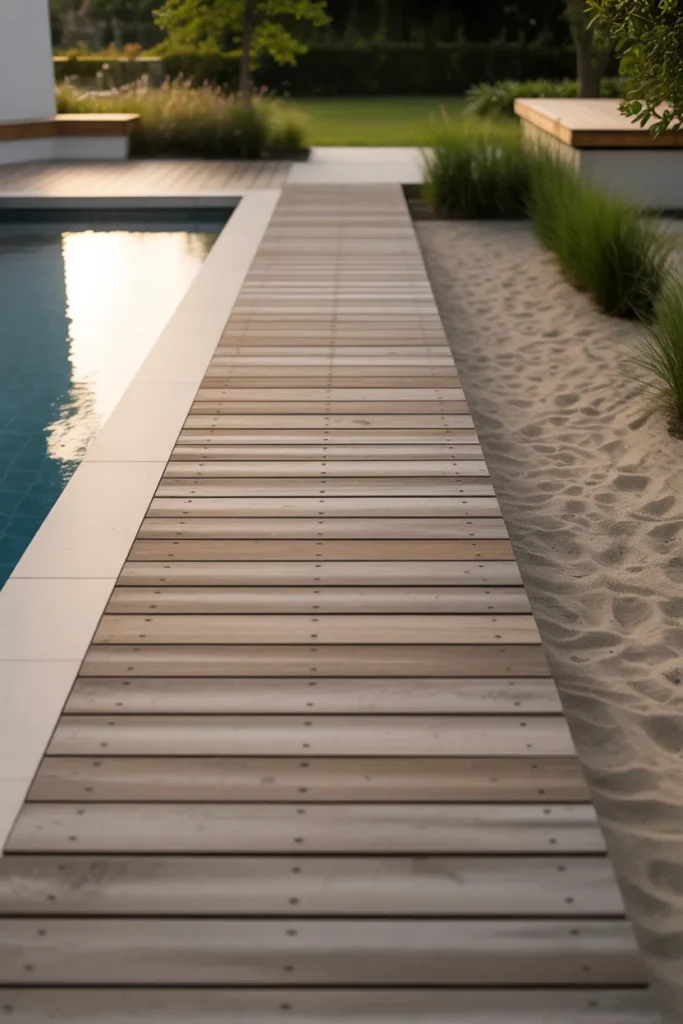
Some pavers look exactly like wood planks. They are made of concrete but stamped with grain lines and cut into long skinny rectangles. You lay them in straight rows like a wooden boardwalk. But unlike real wood, they never rot, splinter, or need sealing.
Use this look for a modern house. Or for a walkway that runs along a pool. The clean lines feel crisp and intentional. Lay the planks with a tiny gap—about a quarter inch—between each one. Fill those gaps with light gray polymeric sand. The sand hardens after you wet it, so weeds never pop through.
You can run the planks longwise down the path for a runway feel. Or turn them sideways like a ladder. Either way, the fake wood fools every guest until they touch it.
Pro tip: Buy one extra box of these plank pavers. Manufacturers change colors every two years. If you need a repair down the road, that extra box saves you from mismatched tones.
5. The Gravel-Filled Frame

Here is a money saver. Instead of paving the whole walkway, you just lay two lines of pavers as borders. Then you fill the middle with loose gravel. The border keeps the gravel from spreading into your grass. The gravel drains instantly and crunches under your feet.
Use rectangular pavers for the border. Set them on edge like little walls. Make each border paver stick up one inch above the gravel. That keeps the stones inside. For the middle, use pea gravel or crushed marble chips. Avoid sharp crushed limestone—it tracks into the house and scratches floors.
This walkway costs half of what a full paver path costs. And it takes half the time. Just dig a shallow trench for your border pavers. Set them in place. Then dump gravel inside and smooth it flat.
Pro tip: Lay landscape fabric under the gravel. The fabric stops weeds but lets water pass. Without it, you will pull grass from your walkway every single spring.
6. The Circle Stone Spiral
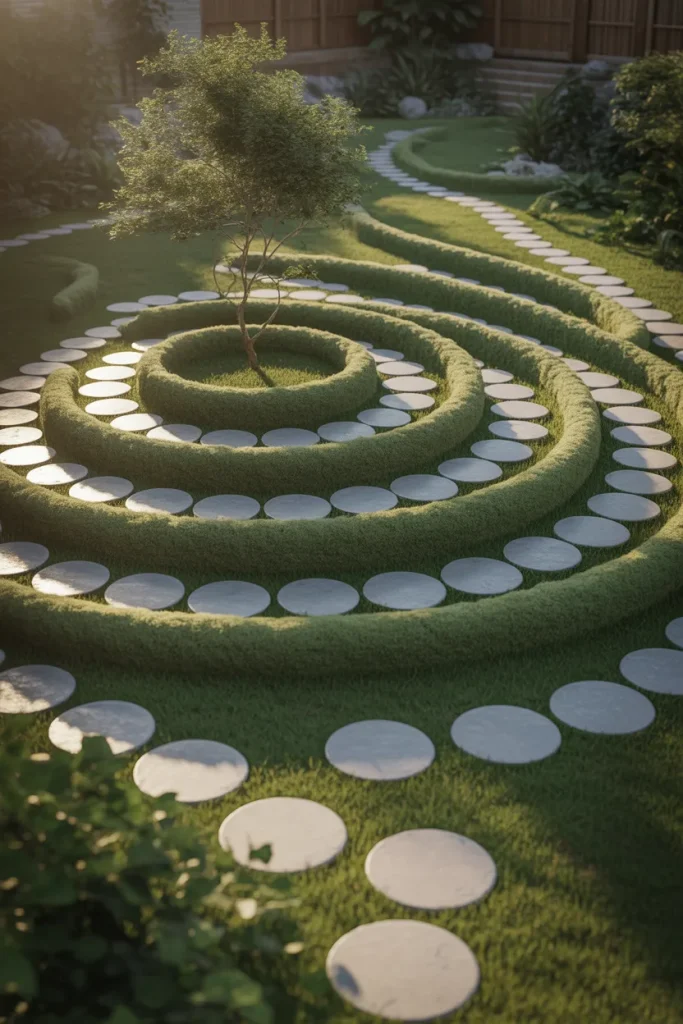
Round pavers arranged in a spiral pattern make your brain happy. You start with one big circle stone in the middle. Then you ring it with smaller curved pieces. Then another ring. And another. The path widens as you walk toward the center.
This works best for a destination spot. Put a birdbath or a small tree in the middle of the spiral. Your walkway becomes a slow, thoughtful path to that focal point. You can buy actual spiral paver kits from garden stores. Or you can cut your own using a rented concrete saw.
The spiral shape slows people down. They step carefully. They look around. If you have a small yard, this one trick makes the space feel twice as big because the eye keeps moving in circles instead of hitting a wall.
Pro tip: Draw your spiral on paper first. Then lay a garden hose on the ground in that same shape. Walk the hose path a few times. Adjust the curves until they feel natural. Then dig.
7. The Grass Grid

Imagine plastic honeycomb cells that you fill with dirt and grass seed. That is a grass grid. You lay the honeycomb down first, then plant grass right inside each little cell. The plastic protects the grass roots from being crushed when you walk on them. Your feet stay dry. The grass stays green. And the walkway almost disappears into the lawn.
Use this for a path you only use once a week. Maybe to a compost bin or a garden shed. The grass grid holds up to car tires too, so you can drive over it if needed.
Installation is easy. Roll out the honeycomb mats on flat ground. Peg them down with landscape staples. Fill each cell with topsoil. Sprinkle grass seed. Water daily for two weeks. That is it.
Pro tip: Buy black honeycomb, not green. The black plastic absorbs heat and helps grass grow faster in spring. Green plastic just sits there doing nothing.
8. The Sawcut Slab
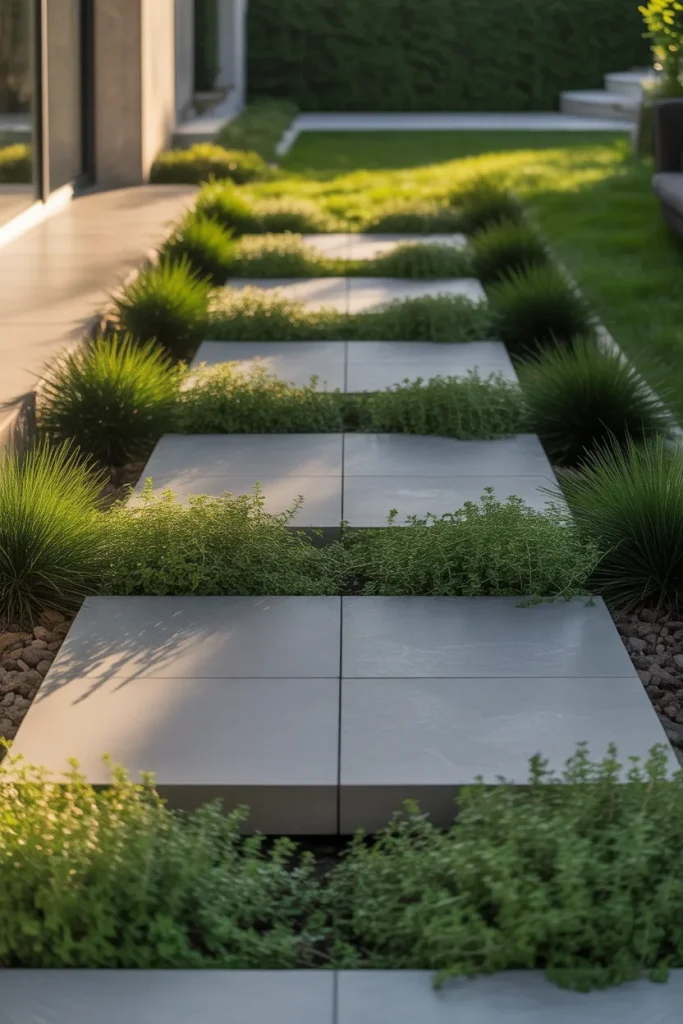
Big square concrete pavers cut into sharp, modern shapes. Each slab measures two feet by two feet. You lay them with fat half-inch gaps. Then you plant creeping thyme or dwarf mondo grass in those gaps. The green plants soften the hard concrete edges.
This look screams expensive. But it is not. Large concrete pavers cost less per square foot than small bricks because there are fewer pieces to make. The work goes fast too. You only set fifteen or twenty slabs instead of three hundred little bricks.
Space your slabs so you can take a natural step from the center of one to the center of the next. For most people, that means two and a half feet apart. Fill the gaps with soil and tuck in your plants. The thyme smells like lemon when you step on it.
Pro tip: Rent a plate compactor for one hour. Run it over your entire walkway after you lay the slabs. The machine settles everything flat. Without compaction, big slabs tilt and rock.
9. The Running Bond Brick
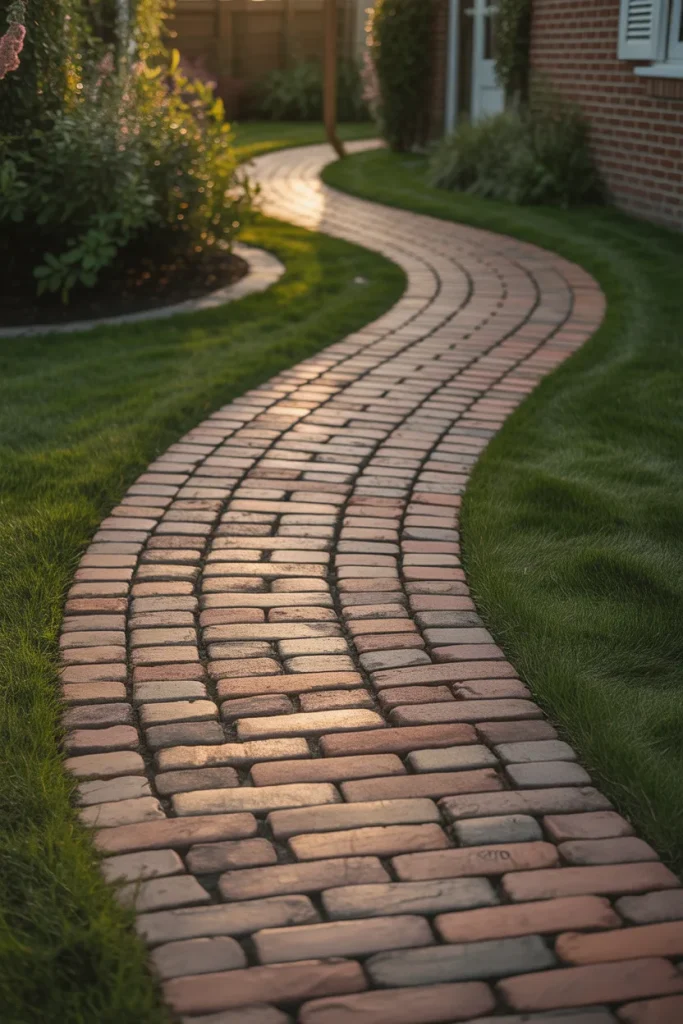
This is the simplest walkway humans have made for five hundred years. You lay bricks in straight rows. Each row shifts over by half a brick compared to the row next to it. Like a running track. No cutting. No angles. Just stack and go.
Use old reclaimed bricks if you can find them. They have worn edges and faded colors that new bricks lack. Lay them right on top of packed sand. No base gravel needed if your soil drains well. The running bond pattern spreads your weight across multiple bricks so none of them sink.
This walkway works anywhere. Front yard. Back yard. Side yard. You can curve it gently by flaring the gaps on one side. For a tight curve, you do need to cut bricks. But for a lazy S shape, just push the bricks closer together on the inside of the curve and wider apart on the outside.
Pro tip: Spray your finished walkway with a garden hose every day for a week. The water washes sand deep into the joints. That sand locks the bricks tighter than any glue.
10. The Flagstone Wander
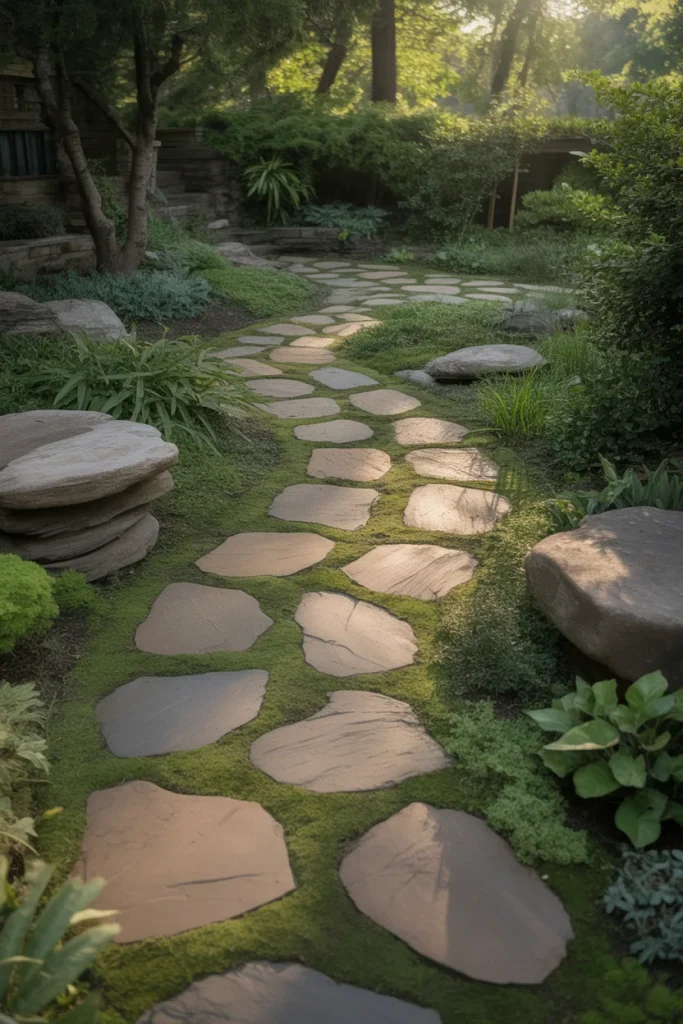
Flagstones are flat, uneven rocks that look like they fell off a mountain. You set them in a loose path that meanders left and right. No straight lines. No right angles. The path goes where the stones want to go.
Buy flagstone by the pallet from a stone yard. Tell them you want two-inch thick pieces for a walkway. Thinner stones break under heel pressure. Thicker stones weigh too much to carry.
Lay each stone so it rocks just a little when you stand on it. Then lift it back up and scrape dirt underneath until it sits flat. The finished walkway feels bouncy and natural. Like a deer trail through the woods.
Flagstone pairs well with moss. Brush buttermilk on the stones in spring. Moss grows in the scratches and turns gray rock into green velvet in one rainy season.
Pro tip: Do not use a level on flagstone. Levels make you crazy because no flagstone is truly flat. Instead, trust your feet. Walk the path. Wiggle any stone that feels wrong. Your feet are better judges than any tool.
11. The Lighted Edge Path
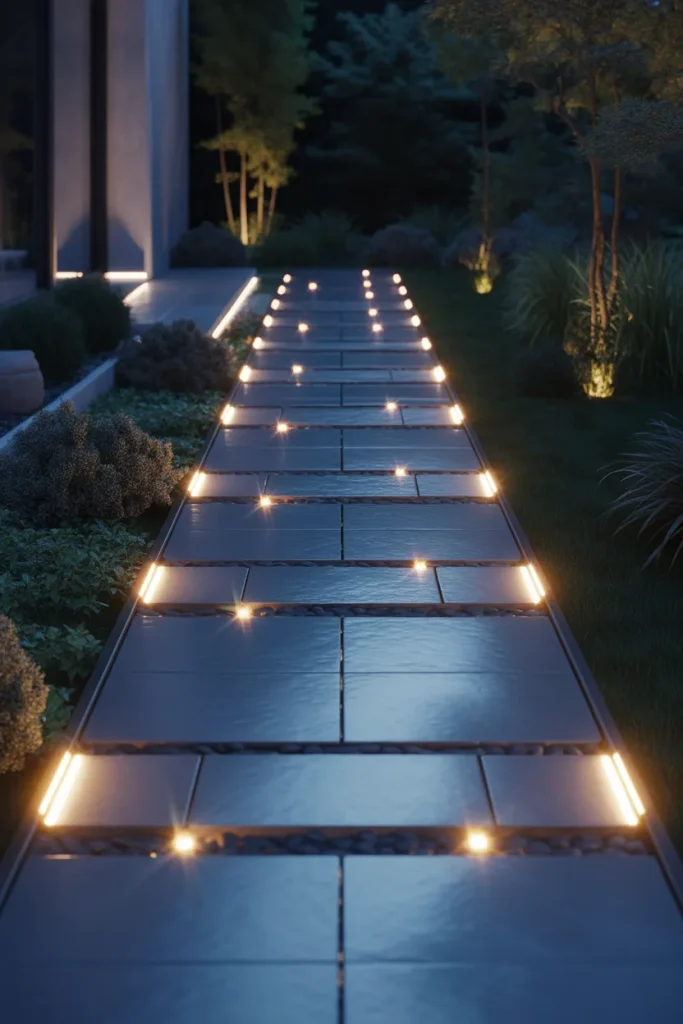
A walkway is useless if you cannot see it after dark. So add lights. But not big floodlights. Small paver lights that sit flush with the surface. You drill a hole through the side of each border paver and pop in a little LED puck. A low-voltage wire runs underneath the path to a transformer near the house.
At night, the lights glow upward through the gaps between pavers. The whole walkway looks like it floats on a bed of fireflies. You can buy paver lights online for three dollars each. They last for years.
This idea works best with dark gray pavers. The contrast between dark stone and warm light makes every shadow sharp. Use a light every four feet on both sides of the path.
Pro tip: Bury your low-voltage wire inside PVC pipe. If you ever need to dig near the walkway, the pipe warns the shovel before the wire gets cut. Without the pipe, you will find your broken wire by accident one rainy night.
12. The Hexagon Honeycomb
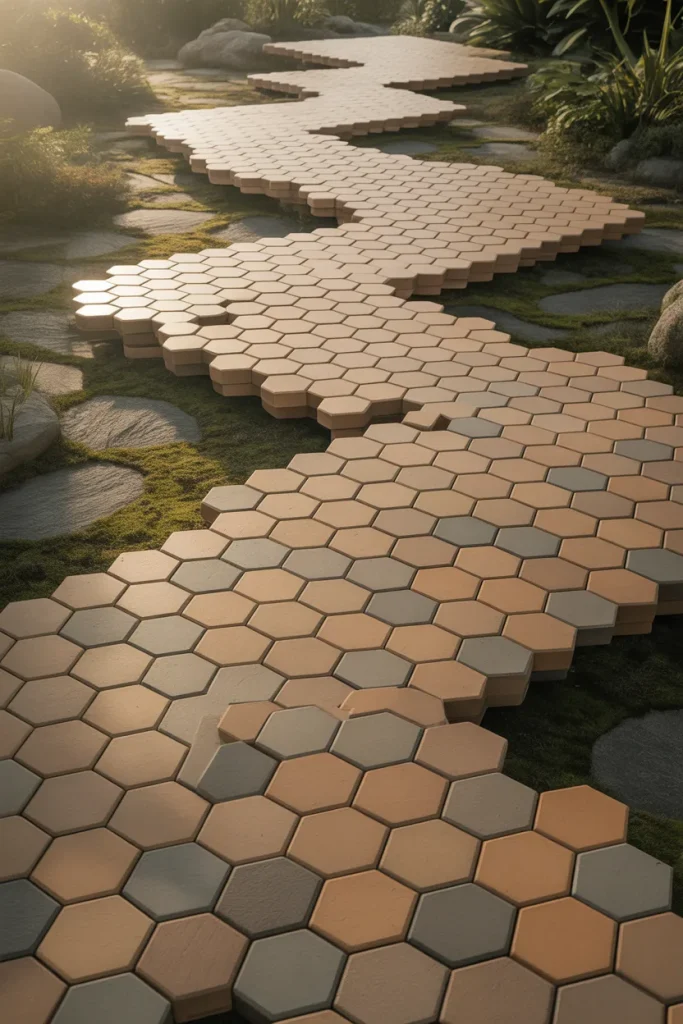
Hexagon pavers look like beehive cells. Six sides. Sharp angles. When you fit them together, there are no straight lines anywhere. Just endless zigzags.
These pavers cost more than rectangles because the molds are complicated. But you use fewer of them because each hexagon covers more area. Buy them in earth tones—terracotta, sand, olive. Bright colors look like a cartoon.
Lay hexagons on a thick sand bed. Two inches of sand at least. The weird shapes need extra wiggle room to fit together. Use a rubber mallet to tap each one level with its neighbors. The finished path feels futuristic and ancient at the same time. Like something from another planet that has been there for a thousand years.
Pro tip: Number each hexagon with chalk before you lift them to add sand. Hexagons only fit one way. If you scramble the order, you spend an hour playing puzzle instead of working.
13. The Cobblestone Rumble
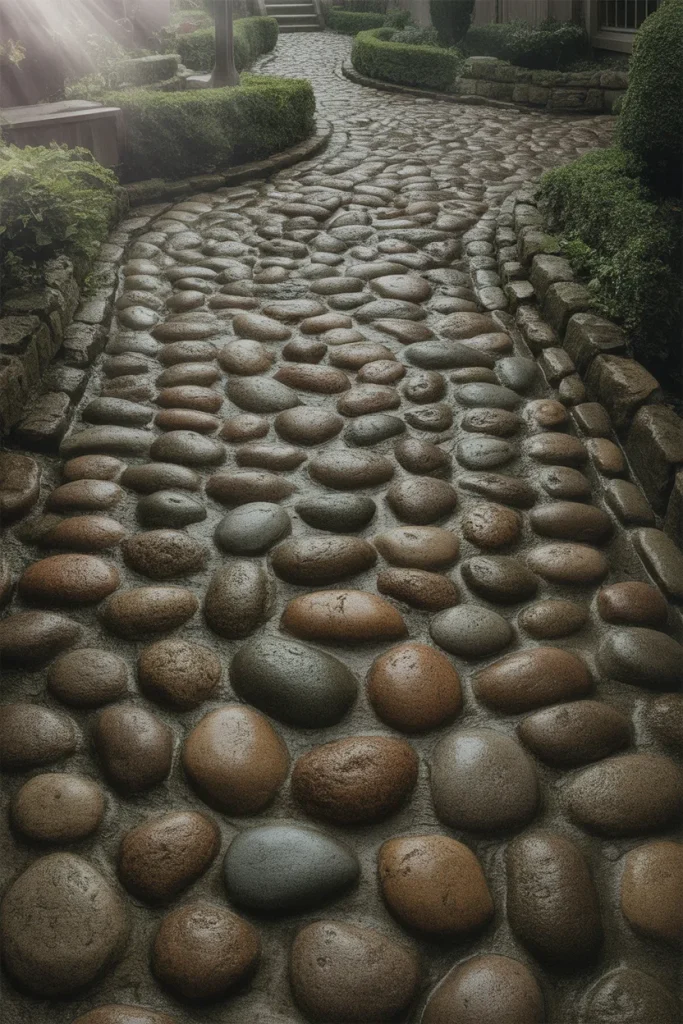
Real cobblestones are small, hard, round rocks pulled from riverbeds. They feel lumpy underfoot. That is the point. A cobblestone walkway announces every step. Thump. Thump. Thump. Your whole body knows you are on a serious path.
You can buy cobblestones from landscape supply yards. Or you can gather your own from creek beds if local laws allow. Each stone should be the size of a big apple. Set them in a bed of mortar, not sand. Sand lets cobblestones roll. Mortar locks them in place forever.
Mix one part cement to three parts sand. Add just enough water to make damp gravel. Press each cobblestone halfway into the wet mix. Leave the tops exposed. After two days, brush off excess mortar and reveal the stone tops.
This walkway hurts bare feet. Do not put it near a pool or a kids’ play area. But for a rugged garden path that says “I have been here for a hundred years,” nothing beats cobblestone.
Pro tip: Wear heavy gloves. Cobblestones are slippery when wet and sharp when dry. And they weigh more than you think. A five-gallon bucket full of cobblestones weighs fifty pounds.
14. The Stamped Concrete Lie
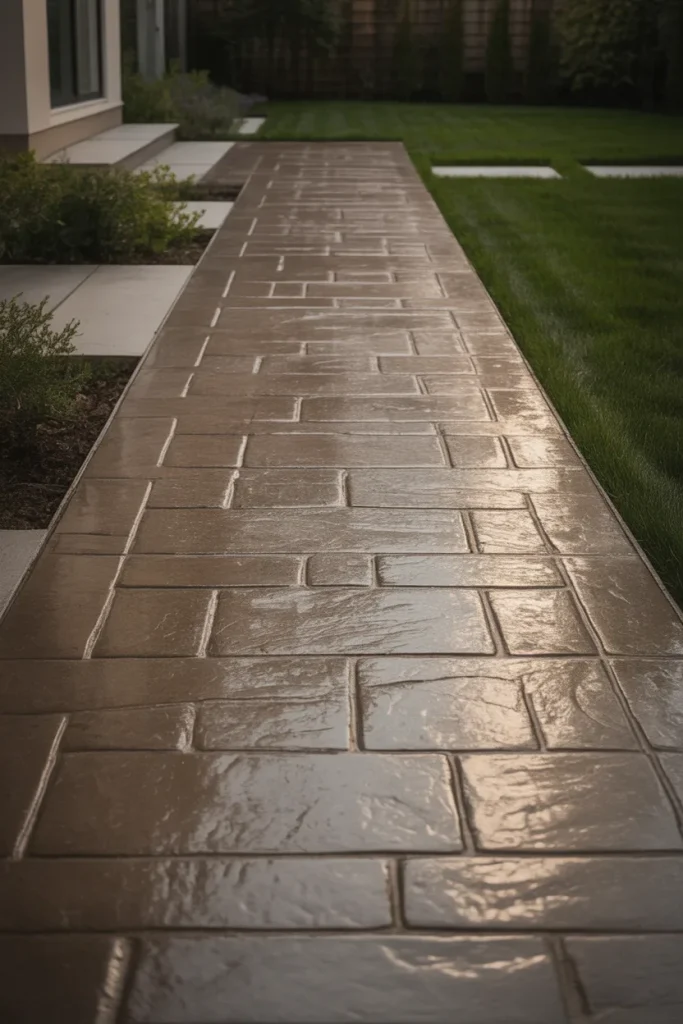
Here is a cheat. You pour regular concrete but you press a rubber mat into it while it is still wet. The mat has a paver pattern molded into it. When you pull the mat away, the concrete looks exactly like expensive brick or stone.
Stamped concrete costs less than real pavers because there are no individual pieces to lay. But it still cracks like regular concrete. That is the trade off. Cheap upfront. Cracked later.
Use this for a walkway that does not get freezing winters. Cold weather makes stamped concrete heave and shatter. But in warm climates, a stamped path lasts twenty years. Pick a pattern that matches your house. Ashlar slate works with everything.
Color the concrete before you pour it. Add liquid color to the truck mix. Then after stamping, brush on a second color with a sponge. The two tones make the fake stones look real.
Pro tip: Stamp your concrete within one hour of pouring. If you wait two hours, the surface hardens and the mat leaves no impression. Set a timer. Do not get distracted.
15. The Recycled Rubber Walkway
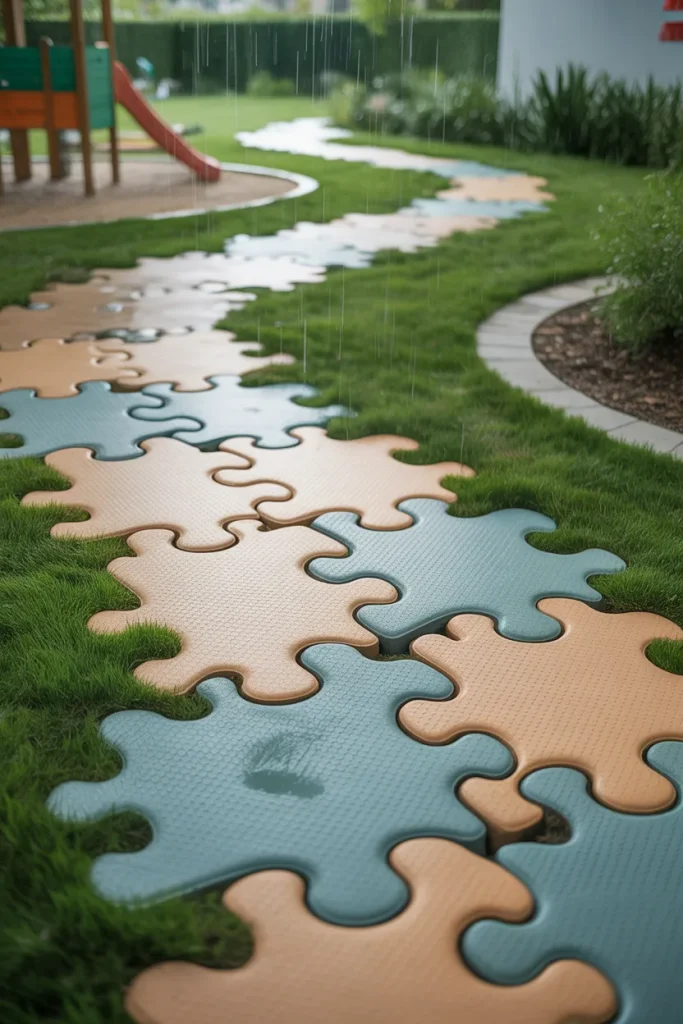
Old tires get ground up and pressed into soft rubber pavers. These pavers feel spongy underfoot. They never freeze. They never crack. And they come in colors like brick red, slate gray, and forest green.
Rubber pavers snap together like puzzle pieces. No sand. No gravel. No mortar. You just lay them right on top of compacted dirt. Each paver has little tabs that lock into the next one. The whole walkway floats.
Use this for a path to a kids’ swing set or a dog run. Rubber does not hurt when you fall on it. And rain runs right through the gaps so you never get puddles.
The downside? Rubber fades in direct sun. After three summers, a red walkway turns pink. Pick a light color like tan or gray. Fading turns tan into cream and gray into silver. Both still look good.
Pro tip: Wash rubber pavers with dish soap once a year. Mold grows in the texture. Mold gets slippery. Dish soap kills the mold and leaves the rubber grippy.
Conclusion
You now have fifteen solid walkway ideas. Each one works. Each one fits a different yard, budget, and skill level. You do not need to be a contractor. You do not need a truckload of special tools. You just need to pick one idea and start this Saturday.
Remember these three things before you buy a single paver. First, always call your utility locator service before you dig. Hitting a gas line ruins your whole month. Second, buy ten percent more pavers than you think you need. Returns are easy. Running out of pavers on a Sunday afternoon is not. Third, invite a friend to help. Lifting pavers alone hurts your back. Lifting pavers with a buddy turns work into a cookout.
Your backyard walkway is not just a path. It is an invitation. It says “come this way” to your family, your guests, and even to you when you are tired after work. A good walkway pulls you outside. And outside is where the good stuff happens—fresh air, homegrown tomatoes, and the sound of birds instead of news alerts.
So grab a shovel. Pick your favorite idea from this list. And build something that makes your feet happy every single time you step outside. You have got this.