15 Patio Table Glass Replacement Ideas

You just heard it happen. That loud crack from the backyard. Your favorite drink tips over. Or a falling branch finds its target. Now your patio table has a spiderweb of cracks right in the middle. The glass top is ruined.
Don’t drag that heavy table to the curb. And please, do not spend hundreds on a custom glass shop. I have been there myself. Last summer, my kid’s football flew straight through our round glass top. I felt stuck. But then I learned there are so many clever ways to replace that broken piece. Some cost almost nothing. Others look even better than the original glass.
In this guide, I will walk you through fifteen real-world ideas. Each one is simple enough for a Saturday afternoon. You do not need special tools or a fancy workshop. Just a measuring tape, a few dollars, and twenty minutes of patience. Let us turn that broken table into a backyard hero again.
Why Bother Replacing Just the Glass?
First, let me explain why you should not throw away the whole table. The metal or wood frame is still good. The legs are sturdy. The shape works fine. Only the top is shot. Buying a brand new patio set costs a small fortune. Replacing just the glass top costs way less. Plus, you get to choose something unique. Your neighbors will ask where you bought it. You get to say, “I made it myself.” That feels great.
Also, regular glass is dangerous when broken. Small shards hide in the grass. They cut bare feet and paws. Replacing it fast keeps your family safe. So let us jump into the fifteen best ideas. I saved the cheapest for first, but keep reading until the end. The last idea is my personal favorite.
Idea One – Plexiglass or Acrylic Sheet

Plexiglass is the easiest swap. It looks like glass but never shatters. You can buy a sheet at any hardware store. They cut it to your table’s size right there. Ask for “acrylic sheet” or “plexiglass.” It costs about half of real glass. And it weighs almost nothing.
I tried this for my round table. The store cut a perfect circle in five minutes. I brought it home, laid it on the frame, and done. The best part? My kids dropped a metal water bottle on it last week. The plexiglass just bounced. No crack. No chip. It does scratch easier than real glass, so do not drag sandpaper across it. But for most families, this is the smartest choice.
One tip: go for 1/4 inch thickness. Thinner than that bends in the middle. Thicker than that costs too much. Also, ask for “UV resistant” so it does not turn yellow in the sun.
Idea Two – Tempered Glass from a Scrap Yard

Do not buy new glass. Look for a local architectural salvage yard. These places sell old windows, shower doors, and glass shelves for almost nothing. I found a huge tempered glass sliding door for eight dollars. I broke it down with a glass cutter (carefully!) and got three table tops out of one door.
Tempered glass is the strong stuff. It breaks into tiny pebbles, not sharp knives. That makes it safer for patios. Measure your table’s shape. Then walk around the salvage yard with a tape measure. Look for glass shelves from old bookcases. Look for shower doors. Look for commercial display cases. You might pay two dollars per piece.
The only hard part is drilling holes if your table needs umbrella holes. Skip that. Buy a freestanding umbrella instead. Or use a table without an umbrella. Simple.
Idea Three – Painted Plywood with Outdoor Varnish

Maybe you do not want clear glass at all. Maybe you want color. Plywood is cheap and tough. Buy a 1/2 inch sheet of sanded plywood. Have the store cut it to your table’s shape. Sand the edges smooth so no splinters catch your arm.
Now the fun part. Paint it any color you like. I used bright turquoise for my side table. My wife painted a sunflower in the middle. Then seal it with two coats of outdoor polyurethane or marine varnish. That makes it waterproof and UV proof. Rain rolls right off. Sun does not fade the paint.
This idea costs about fifteen dollars. It looks like a custom art piece. And it never breaks. The only downside is you lose the see-through look. But sometimes solid is better, especially if you eat messy foods like barbecue ribs. No one sees the sauce stains underneath.
Idea Four – Old Window Frame with Wavy Glass
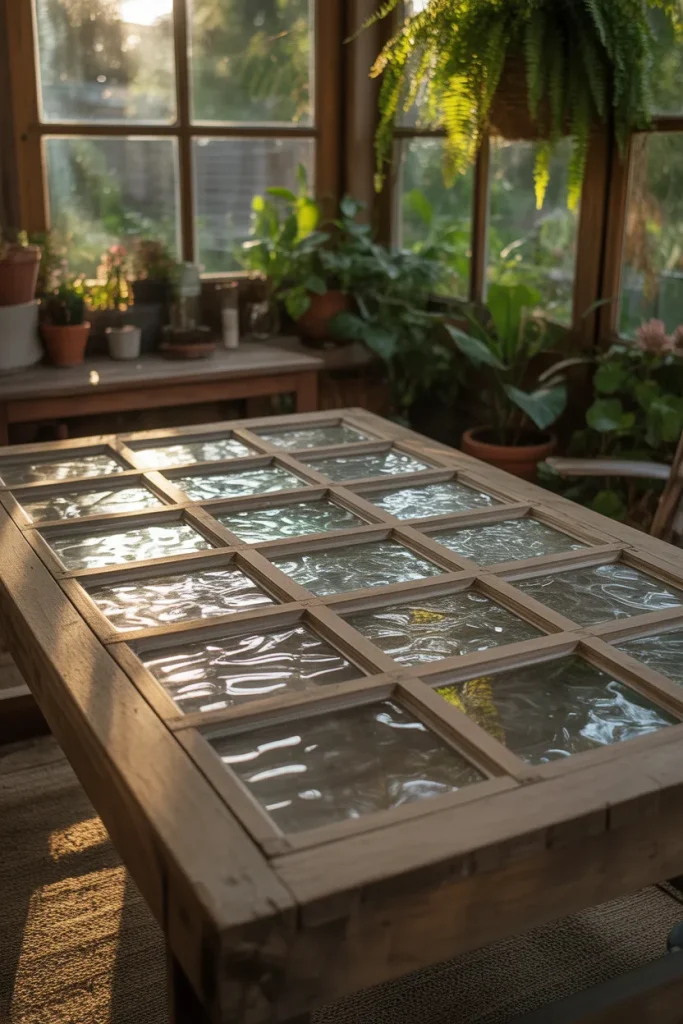
Drive around on bulk pickup day. People throw away old wooden windows. Grab one. The glass in old windows is often wavy and thick. It has character. You can pop out the glass panes and rearrange them to fit your table.
I did this for a rectangular table. The window had six small panes. I laid them side by side on the table frame. The wavy glass made the sunlight dance on my deck. Plus, old glass is usually thicker than new cheap stuff. It does not crack easy.
You will need to secure each pane with silicone caulk. Run a bead along the table frame. Press the glass down. Let it dry overnight. The caulk holds tight but stays a little flexible. That handles wind and wobble. Cost? Zero dollars if you found the window free. Even buying one from a flea market costs five or ten bucks.
Idea Five – Polycarbonate Sheet (The Unbreakable Choice)

Polycarbonate is like plexiglass’s tougher cousin. You cannot break it with a hammer. I am not joking. I watched a video where a guy shot a polycarbonate sheet with a pellet gun. The pellet bounced off. This stuff is used for bulletproof windows.
It costs more than plexiglass. But for a family with wild kids or clumsy friends, it pays for itself. One sheet for a four foot table runs about sixty dollars. That still beats custom glass by two hundred dollars. Buy it online or at a big hardware store.
Cutting polycarbonate is tricky. Have the store cut it for you. They use a special saw. Then drill your own umbrella hole if needed. Use a regular drill bit but go slow. The material heats up and melts if you rush. Also, polycarbonate scratches even easier than plexiglass. So clean it with soap and water only. Never use a dry paper towel.
Idea Six – Mosaic Tile Pattern

This one takes a weekend. But the result is stunning. You take a piece of plywood cut to size. Then you cover it with small tiles. You can buy mesh-backed tile sheets at any home store. One sheet costs a few dollars. Choose glass tiles, stone tiles, or even broken china plates.
Spread thin-set mortar on the plywood. Press the tile sheets down. Let dry overnight. Then mix grout and spread it over the tiles. Wipe off the extra with a damp sponge. Seal the grout so rain does not wash it away.
My neighbor did this with blue and green glass tiles. It looks like an expensive boutique table. She spent forty dollars total. The table weighs more now, but it will last forever. No glass to break. No paint to peel. And every guest touches the tiles and says, “Wow, you made this?”
Idea Seven – Mirror Tiles for a Funhouse Look

Mirror is glass, but it is coated on the back. A full mirror sheet on a table is risky because one crack ruins everything. But small mirror tiles are different. They come in squares. If one tile cracks, you just pop it out and glue a new one.
Buy a pack of mirror tiles from a craft store. They are usually four inches by four inches. Arrange them on your table frame like a checkerboard. Or leave small gaps between each tile. Glue them down with mirror adhesive or outdoor silicone.
The sun reflects off the tiles and lights up your whole patio. At night, candles on the table look like there are twice as many. The only warning is direct hot sun. A focused beam of reflected sunlight can get very hot. Do not leave plastic cups on the mirror on a June afternoon. They might melt. But otherwise, this is a cheap and flashy fix.
Idea Eight – Bamboo or Wood Slats

Wood never shatters. And bamboo is the toughest wood for outdoors. Buy a roll of bamboo fencing from a garden center. Unroll it. Cut slats to the length of your table. Or buy thin wood lattice strips.
Lay the slats side by side over the table frame. Leave a tiny gap between each for water to drain. Screw or nail them down from underneath. Or just lay them loose if the frame has a lip to hold them.
This gives a resort feel. Think of those fancy hotel pool tables. You can stain the bamboo any color. Natural looks warm. Dark walnut looks rich. White looks beachy. Rain runs right through the gaps, so no puddles. And when a branch falls, the wood just bends a little. No crack. No replacement needed.
Idea Nine – Cement Board with Outdoor Fabric

Cement board is what tile installers use behind showers. It is gray, rough, and ugly by itself. But cover it with outdoor fabric, and it becomes a soft, clean table top. Cut the cement board to shape. It cuts with a utility knife. Score it deep then snap it.
Then pick a fun outdoor fabric. Think bright stripes or palm leaves. Wrap the fabric over the cement board like a gift. Staple it underneath. The cement board gives weight so the table does not blow over. The fabric gives a soft spot to rest your arms.
When the fabric gets dirty, you just unscrew the board, unwrap the fabric, wash it, and staple it back. Or swap for new fabric each season. This costs less than twenty dollars. And you never worry about glass again.
Idea Ten – Sealed Cork or MDF Board

Cork is that soft brown stuff on bulletin boards. You can buy cork sheets online or at office supply stores. Glue two sheets together for thickness. Then cut to your table shape. Seal the cork with several coats of clear polyurethane.
The result looks like leather from a distance. It feels warm, not cold like glass. Plates do not slide around. Glasses do not sweat rings. And if you drop a knife, it just thuds. No ding. No crack.
MDF board is similar but harder. It is made of wood fibers glued tight. Paint it any color. Seal it well because MDF swells in rain. Keep an umbrella over it. Or bring it inside during wet months. Both cork and MDF cost under fifteen dollars for a typical table.
Idea Eleven – Tin Ceiling Tiles

Old tin ceiling tiles are making a comeback. You can buy new reproductions at hardware stores. Or find real vintage ones at flea markets. They are thin, stamped metal with pretty patterns. Cut them with tin snips to fit your table.
Lay the tin tiles right on the table frame. They are already flat and sturdy. No need for a base board. The metal reflects light like a mirror but with an antique pattern. Rust is not a problem if you buy new tin. Vintage ones might have rust, which some people like. You can spray paint them any color too.
I used gold spray paint on mine. It looks like a fancy Victorian table. Cost was twenty dollars for four tiles. One downside: metal gets hot in direct sun. Use a placemat for your phone or laptop. But for casual drinks and snacks, it works fine.
Idea Twelve – Repurposed Acrylic Shower Walls
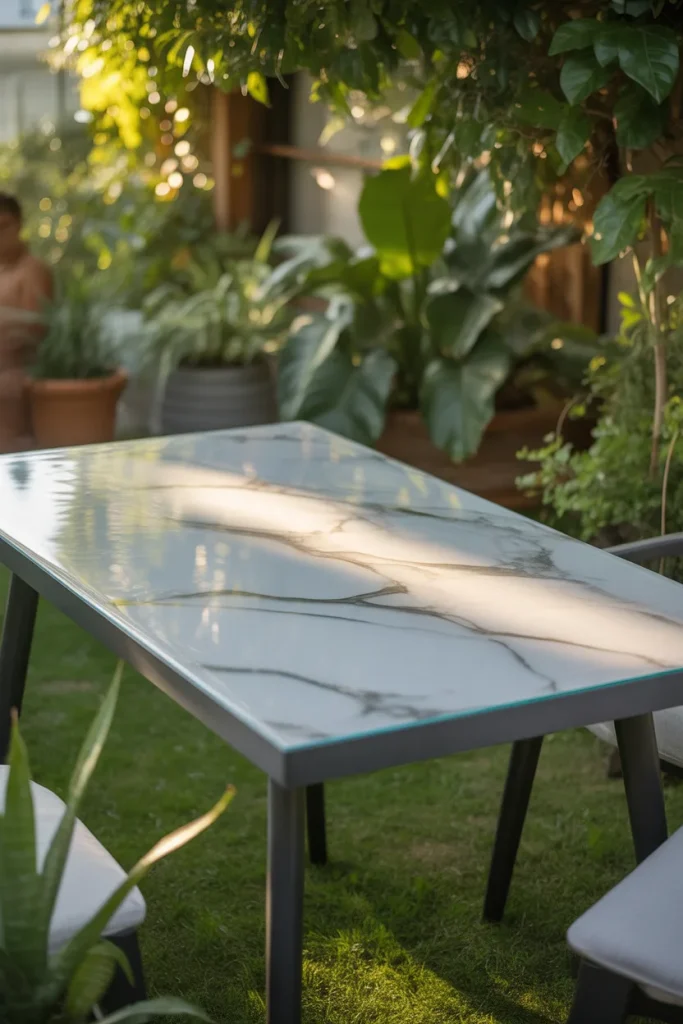
Home improvement stores sell acrylic wall panels for showers. They are large, thin, flexible sheets. Usually they have a fake marble or stone pattern. Cut a piece to your table size. It takes scissors or a utility knife.
These panels are not as clear as glass. But they are waterproof, stain proof, and nearly unbreakable. Lay one directly on your table frame. The fake marble pattern hides crumbs and scratches. And the glossy surface wipes clean with one swipe of a rag.
A full four by eight foot panel costs about forty dollars. That gives you enough for two or three table tops. Share with a neighbor. The only trick is the panel might curl up at the edges in full sun. So glue it down with outdoor double-sided tape or silicone. Problem solved.
Idea Thirteen – Live Edge Wood Slab

If you want to go rustic, find a live edge wood slab. That means a slice of a tree trunk with the bark still on the edges. Sawmills sell these cheap because they are odd shapes. You can also cut your own if you have a fallen tree.
Dry the slab for a few weeks in a garage. Then sand it smooth. Fill any cracks with epoxy resin. Seal the whole thing with spar varnish (the kind for boats). Then set it on your table frame. The frame just holds the slab up. The slab does not need glass on top.
This makes a statement piece. It says, “I am a person who builds things.” No two slabs are alike. Your table becomes one of a kind. And solid wood laughs at falling branches. The only hard part is keeping the slab flat. If it warps, flip it over and let it sit with weights on top for a week.
Idea Fourteen – Colored Acrylic for a Pop of Fun

Clear glass is boring. Clear plexiglass is boring too. But colored acrylic? That is a party. You can buy acrylic sheets in bright orange, deep blue, lime green, or even glow in the dark. Look online for “colored acrylic sheet.”
Have it cut to your table size. Then lay it on the frame. The sun shines through and paints your patio floor with colored light. At night, put a string of fairy lights under the table. The whole top glows like a lantern.
I made a bright yellow one for my kid’s outdoor play table. She draws on it with dry erase markers. Then wipes it clean. The color has not faded in two years. Cost was thirty dollars for a three foot round sheet. That is cheaper than a trip to the movies, and the fun lasts way longer.
Idea Fifteen – Upcycled Car Windshield (Yes, Really)

This is my favorite idea. Go to a junkyard that sells used car parts. Find a windshield from a car that is not cracked. Windshields are laminated glass. That means two layers with plastic in between. If they break, they stay stuck to the plastic. No dangerous shards.
You ask the yard to cut the windshield into a square or circle. Some yards have water jet cutters. They charge a small fee. Then you take that curved piece of glass and flip it upside down. The curve becomes a shallow bowl shape. Now you have a table top that also holds water.
Pour two inches of water in the bowl. Float candles or flowers. Or put soil and grow tiny succulents right on your table. The glass is super tough. A windshield stops rocks at highway speed. Your patio table is nothing.
Cost varies. I paid fifteen dollars for a used rear windshield from a Ford truck. The yard cut it for an extra ten. I sanded the edges smooth with wet sandpaper. Now my round patio table has a built in garden. People cannot believe it came from a car.
How to Choose the Best Idea for Your Table
You have fifteen solid options now. But which one is right for you? Ask yourself three short questions.
First, do you need to see through the top? If yes, pick plexiglass, polycarbonate, or real glass from a salvage yard. If no, you can choose wood, tile, or fabric.
Second, how wild is your backyard? Kids and dogs mean you want unbreakable like polycarbonate or bamboo slats. Quiet adult patios can handle real glass or mirror tiles.
Third, what is your budget? Under ten dollars goes to scrap plywood or old windows. Under thirty dollars goes to acrylic sheets or tin tiles. Under fifty dollars goes to polycarbonate or a windshield from a junkyard.
A Quick Word on Safety
I have to say this because I care. When you remove broken glass from your old table, wear thick gloves and shoes. Wrap the broken pieces in old newspaper or cardboard. Tape the bundle shut. Write “BROKEN GLASS” on it. Then put it in the trash. Never put loose glass in a bag. It cuts through and hurts someone.
Also, any new top you make should not have sharp edges. Sand or file down wood, metal, and acrylic edges. For glass edges, ask the store to “seam” them. That means they grind the sharpness off. Most places do it free.
Keeping Your New Table Top Clean
Each material cleans differently. For acrylic or polycarbonate, use dish soap and a soft sponge. Never use Windex or anything with ammonia. It makes the plastic cloudy. For wood, wipe with a damp cloth and dry right away. For tile, scrub with a brush and outdoor cleaner. For the car windshield, soap and water is fine.
Once a month, check for loose screws or lifting glue. A little maintenance keeps your table looking new for years.
Conclusion
You do not need to be a handyman to fix a broken patio table. You just need one good idea from this list. Start with what you have in the garage. An old window. A scrap of plywood. Leftover tiles from a bathroom project. Then build from there.
I hope you try the windshield idea. That one still makes me smile every time I see it. But even the simplest swap—a sheet of plexiglass from the hardware store—will get your table back in action this afternoon. No waiting weeks for a custom glass order. No spending three hundred dollars. Just you, a tape measure, and fifteen minutes of work.
Now go outside. Take a look at that broken table. See it not as trash, but as a chance to build something better. Pick your favorite idea from above. Get the materials. And turn that cracked eyesore into the nicest spot in your yard. You have got this.