15 Shower Niche Ideas for a Clutter-Free Bathroom

You know the mess. Shampoo bottles fall over. Wire caddies get rusty. Soap scum builds up on every corner.
You want a shower that feels like a spa. But your storage looks like a mess.
There is a better way. A shower niche is a recessed shelf built right into your wall. It keeps bottles off the floor. It looks clean. And it can be beautiful.
In this guide, you will learn 15 smart niche ideas. Some are simple and cheap. Others have LED lights or bold colors. You will also learn the right size, height, and waterproofing steps.
Let’s fix your shower storage for good.
Quick Cheat Sheet (Read This First)
- Standard size: 12”x12”, 12”x24”, or 16”x20”
- Depth: 3.5 inches (fits most bottles)
- Height from floor: 48 to 60 inches
- Cost for custom tiled niche: $180 – $450
- LED upgrade cost: $120 – $300
- Best tile for wet areas: Porcelain (absorbs less than 0.5% water)
Section 1: How to Plan a Shower Niche (The Basics)

Before you pick a style, you need to know the rules. A niche that leaks or is too small will make you angry. Let’s avoid that.
What size works best?
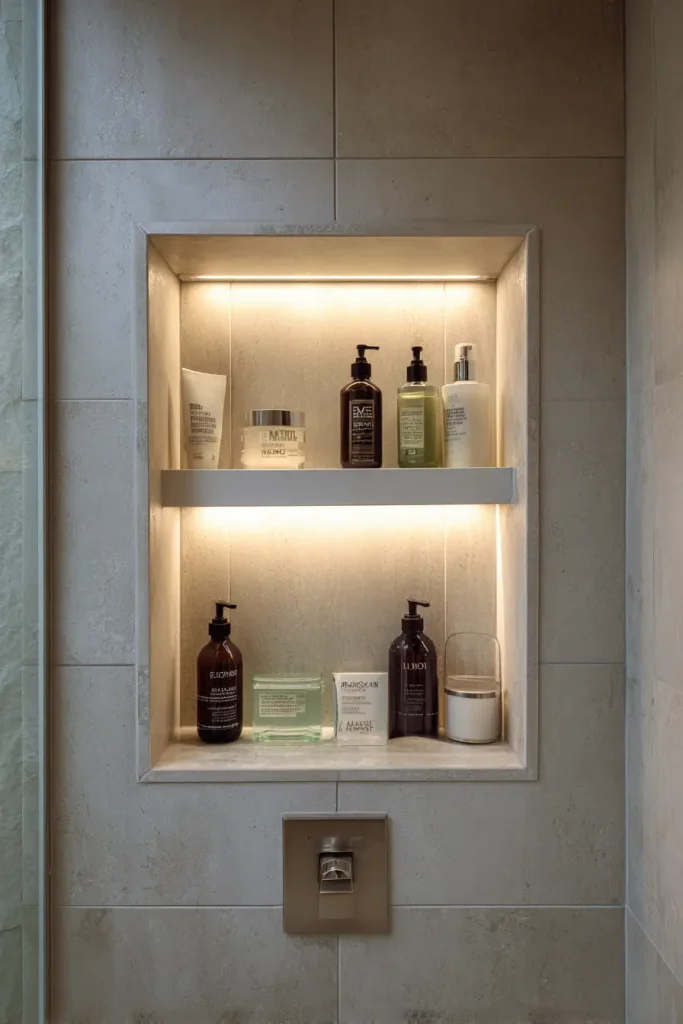
Most standard niches are 12 inches wide and 12 inches tall. That fits one or two bottles. For a family, go bigger. A 12”x24” niche holds four to six bottles. Depth should be 3.5 inches. That matches most 2×4 wall studs.
Pro tip: Do not go deeper than 4 inches. Water pools in deep niches. Mold grows there.
Where to place the niche?
Put the bottom of the niche between 48 and 60 inches from the floor. That is elbow height for most adults. Kids can reach it too. Keep it away from the shower head spray. Water should not hit the shelf directly.
Waterproofing is not optional.
You need a waterproof membrane. The Schluter KERDI-BOARD system is a good choice. It seals the entire recess. Skip this step, and water gets into your wall. Then rot and mold follow.
What tile should you use?
Porcelain tile is the winner. It absorbs almost no water. Glossy finishes are easy to clean. Natural stone looks great but needs sealing every year. That is extra work.
Cost reality check: A DIY niche kit costs $100 to $200. Hiring a pro adds $180 to $450 for labor. LED lights add $120 to $300. Worth it? Most homeowners say yes.
Section 2: Minimalist Shower Niche Ideas (Clean and Simple)
These ideas hide the niche. They make your shower look bigger and calmer.
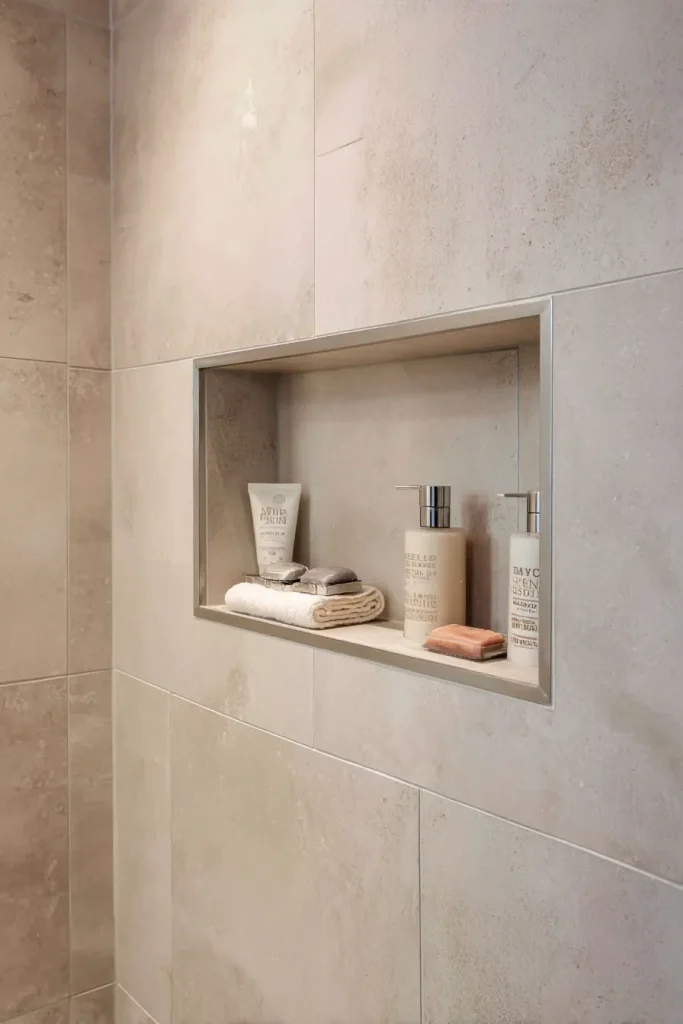
Idea #1: The Zero-Visibility Same-Tile Niche

Use the exact same tile inside the niche as on the main wall. No border. No contrast. The niche disappears. You only see the bottles.
Who this is for: People who hate clutter and want a seamless look.
Pro install tip: Line up the grout lines inside and outside the niche. This makes the illusion perfect.
Idea #2: Mitered Corner Niche

Instead of cutting a rectangle into a flat wall, use a corner. Cut the tiles at 45 degrees so they fold around the corner. This uses dead space that usually holds nothing.
Who this is for: Small showers where every inch counts.
Pro install tip: A wet saw with a diamond blade is required for miters. Do not try this with manual cutters.
Idea #3: The Horizontal Racetrack
Make the niche long and low. Think 24 inches wide and 6 inches tall. It runs along the wall like a shelf. This looks modern and holds flat bars of soap, razors, and washcloths.
Who this is for: People who want a visual break in a tall tile wall.
Pro install tip: Slope the bottom shelf slightly toward the shower. Water runs off instead of pooling.
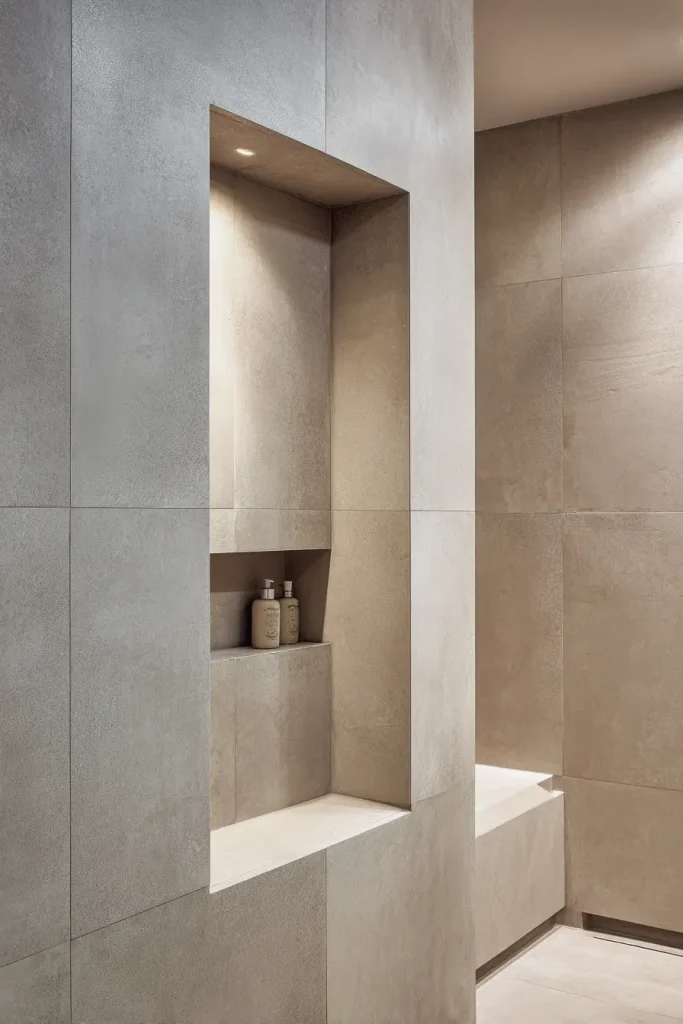
Idea #4: Large-Format Slab Niche
Skip grout lines entirely. Use one solid piece of stone or large tile for the niche back, floor, and ceiling. The whole niche is just three or four big pieces.
Who this is for: Luxury bathrooms and people who hate cleaning grout.
Pro install tip: Use a marble or quartz remnant from a countertop job. These are cheap because shops sell leftovers.
Section 3: Smart Geometry and Space-Savers (For Small Bathrooms)

Your bathroom is small. You need storage but have no room for a big niche. These ideas solve that problem.
Idea #5: The Vertical Skinny Niche
Make the niche tall and narrow. For example, 6 inches wide and 24 inches tall. It fits between two wall studs without cutting them. This is a huge win because cutting studs requires structural work.
Who this is for: Tight spaces and renters who can do small DIY changes.
Pro install tip: Use a stud finder to locate the gap between studs. Most are 16 inches apart. That leaves a 14.5-inch gap for your niche.
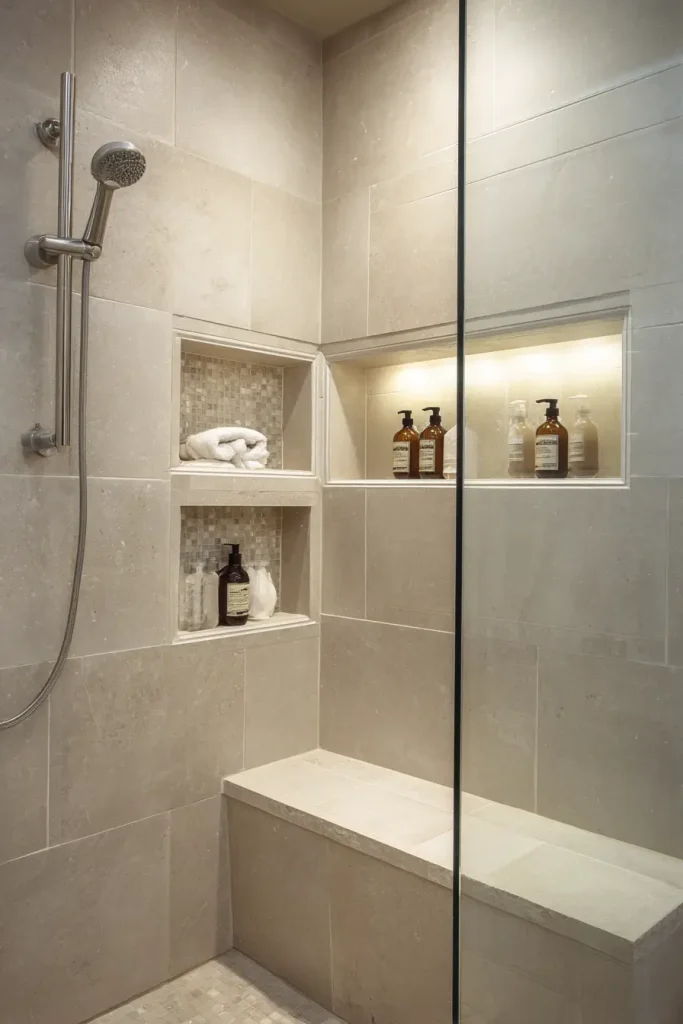
Idea #6: The Double-Stacked Duo
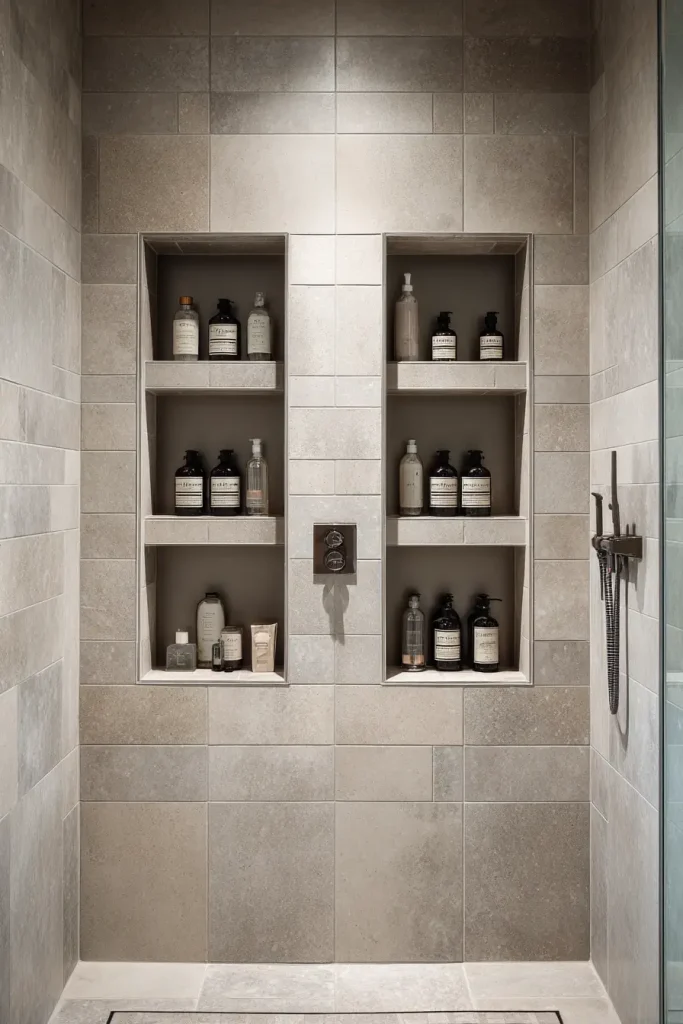
Instead of one big niche, put two niches side by side. Each person gets their own shelf. No fighting over space.
Who this is for: Couples or families sharing one shower.
Pro install tip: Leave at least 4 inches of tile between the two niches. That keeps the wall strong.
Idea #7: The Corner Shelf Niche
This is not a recess. You bond a glass, stone, or tile shelf directly into the corner. No cutting into the wall. It sits on top of the tile.
Who this is for: People who cannot cut into their walls (renters or concrete walls).
Pro install tip: Use silicone adhesive and let it cure for 24 hours before putting weight on it.
Idea #8: The L-Shaped Wrap Niche

This niche goes around a corner. It starts on one wall and wraps to the next. The shelf is continuous. It looks like a single L-shaped line.
Who this is for: Walk-in showers with a bench on one side.
Pro install tip: Use a flexible grout (like epoxy) at the corner joint. Walls move over time, and rigid grout cracks.
Section 4: Bold Accents and Statement Niches (Fun and Artistic)

Do you want your niche to stand out? Try these ideas. They turn storage into art.
Idea #9: The Contrasting Color Pop
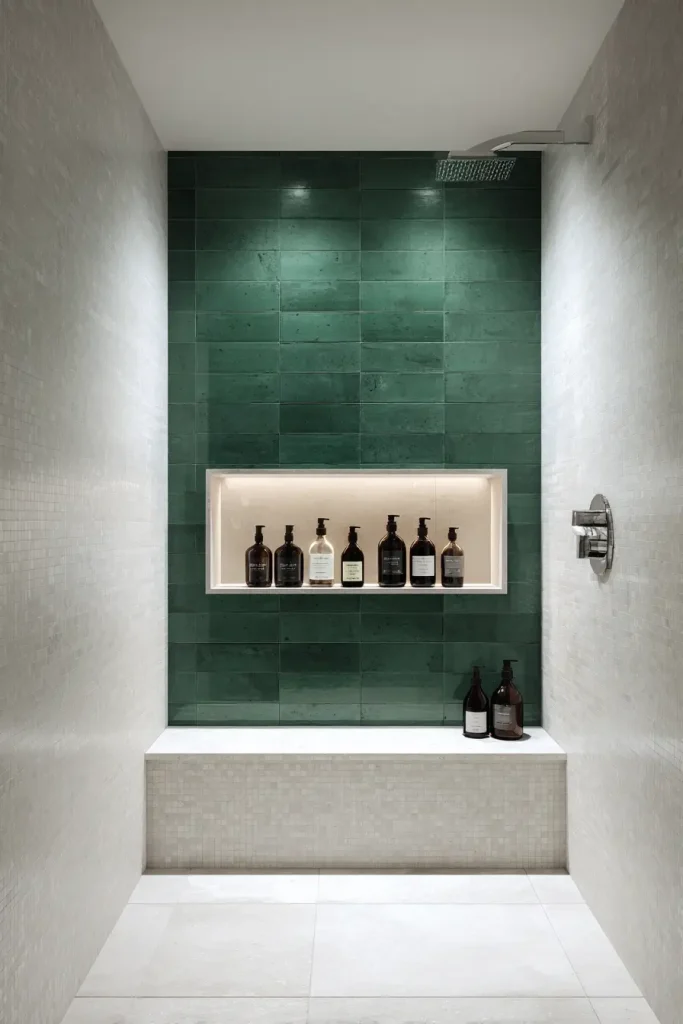
Paint the back of the niche a bright color. Or use a tile that is completely different from the wall. Think black tiles on a white wall. Or emerald green on a gray wall.
Who this is for: People who want a focal point without changing the whole shower.
Pro install tip: Keep the color pop to one niche only. Multiple bright niches look chaotic.
Idea #10: The Arched Euphoria
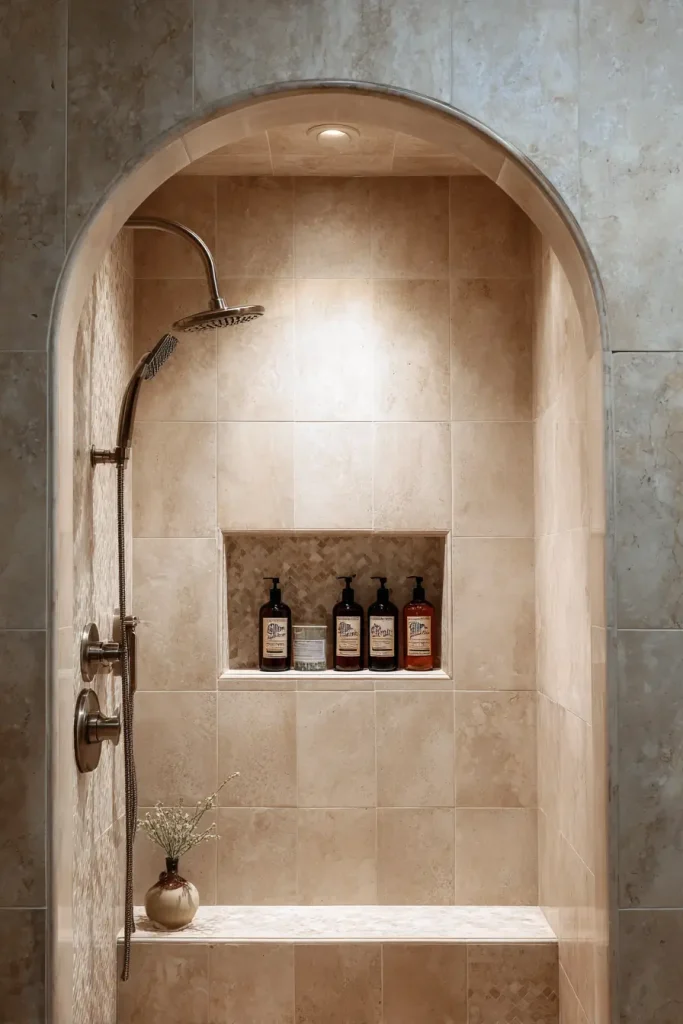
Instead of a square or rectangle, cut the niche into an arch shape. Roman arches (rounded top) or Moroccan (pointed top) both look amazing.
Who this is for: Vintage or Mediterranean style bathrooms.
Pro install tip: Use mosaic tile sheets inside the arch. Large tiles are hard to cut into curves. Mosaics flex easily.
Idea #11: Herringbone and Chevron Accents
Tile the back of the niche in a herringbone pattern. Keep the main wall straight. The contrast in direction draws the eye.
Who this is for: People who love detail and patterns.
Pro install tip: Herringbone requires more cuts. Budget an extra hour for this step.
Section 5: Backlit and High-Tech Niches (LED Lights)
Lighting in the shower changes everything. You can see better. It feels like a spa. And it helps you shave or wash without shadows.
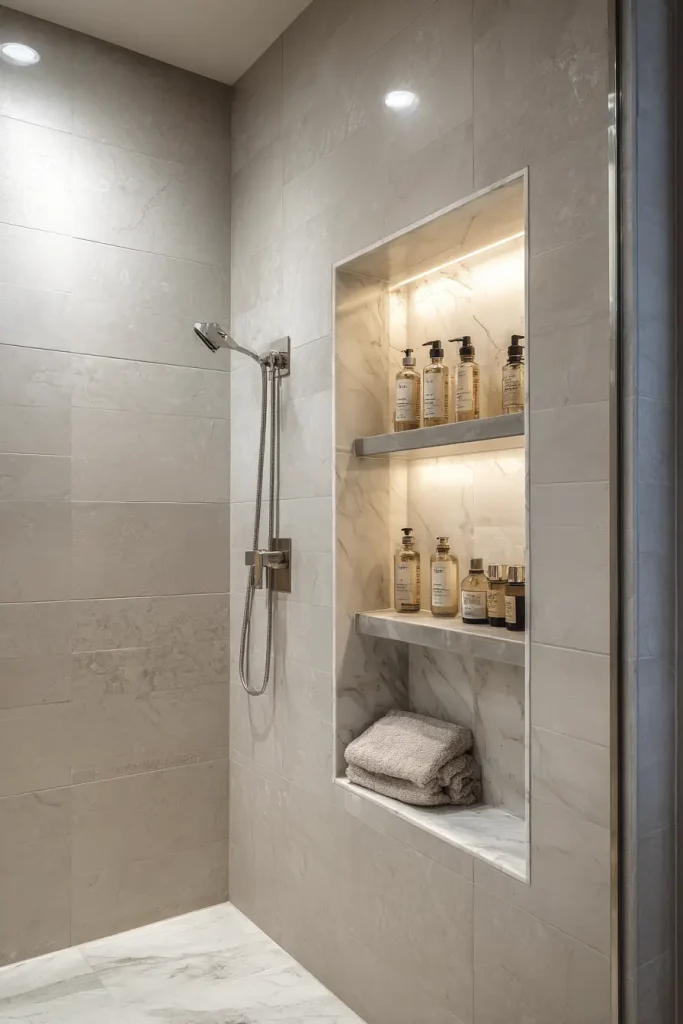
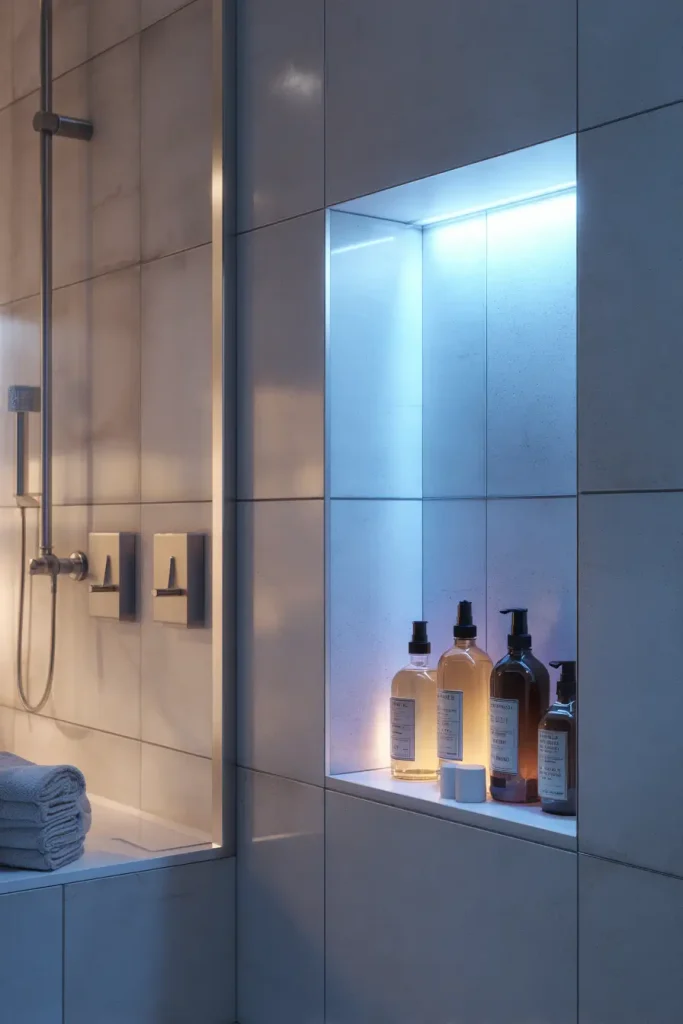
Idea #12: The Schluter KERDI-BOARD-SNLT Niche

This is a pre-made niche with an LED strip built in. The LED is IP68 rated. That means it is fully waterproof. You can spray water directly on it. The light is warm white or cool white.
Who this is for: People who want a professional look without complicated wiring.
Pro install tip: You need a low-voltage transformer and a switch inside the bathroom. An electrician can do this for $150 to $300.
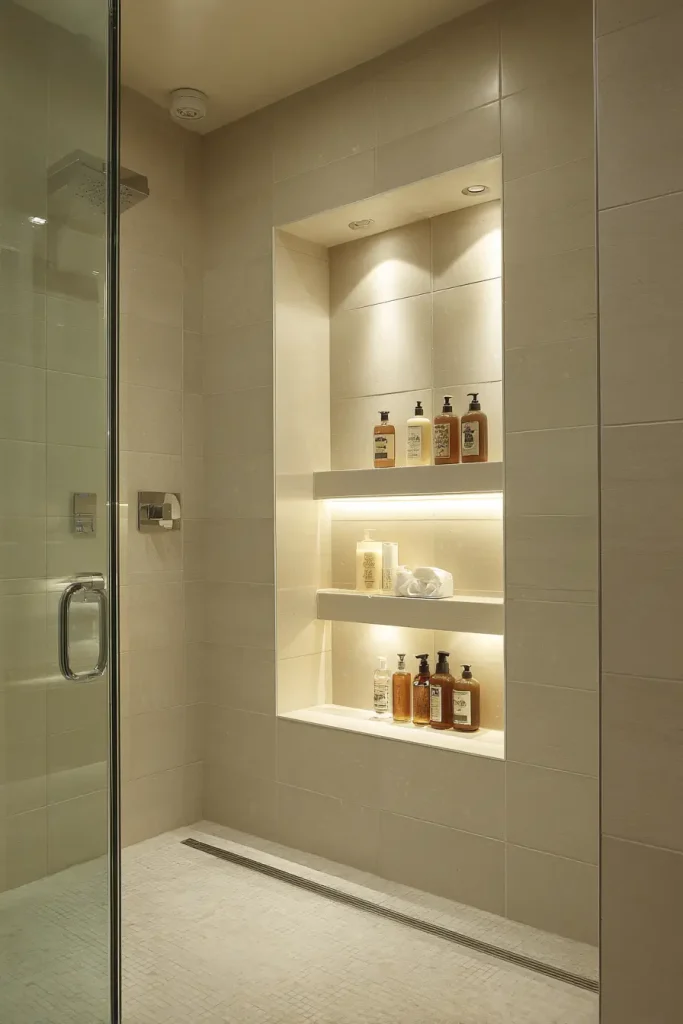
Idea #13: Under-Shelf Glow
Install a solid shelf inside the niche. Then attach an LED strip under that shelf. The light shines down onto the bottles. It looks like the shelf is floating.
Who this is for: People who already have a deep niche and want to add light later.
Pro install tip: Use an aluminum channel to hold the LED strip. It protects the lights and spreads the light evenly.
Idea #14: Color-Mood Chromotherapy
Some LED strips can change color. You pick red, blue, green, or purple from a remote or phone app. Chromotherapy (color therapy) claims that different colors affect your mood. Blue is calming. Red is energizing.
Who this is for: People who like gadgets and smart home features.
Pro install tip: Buy a waterproof RGBW strip, not just RGB. The W is for white light. White is useful for cleaning and shaving.
Idea #15: Backlit Natural Stone
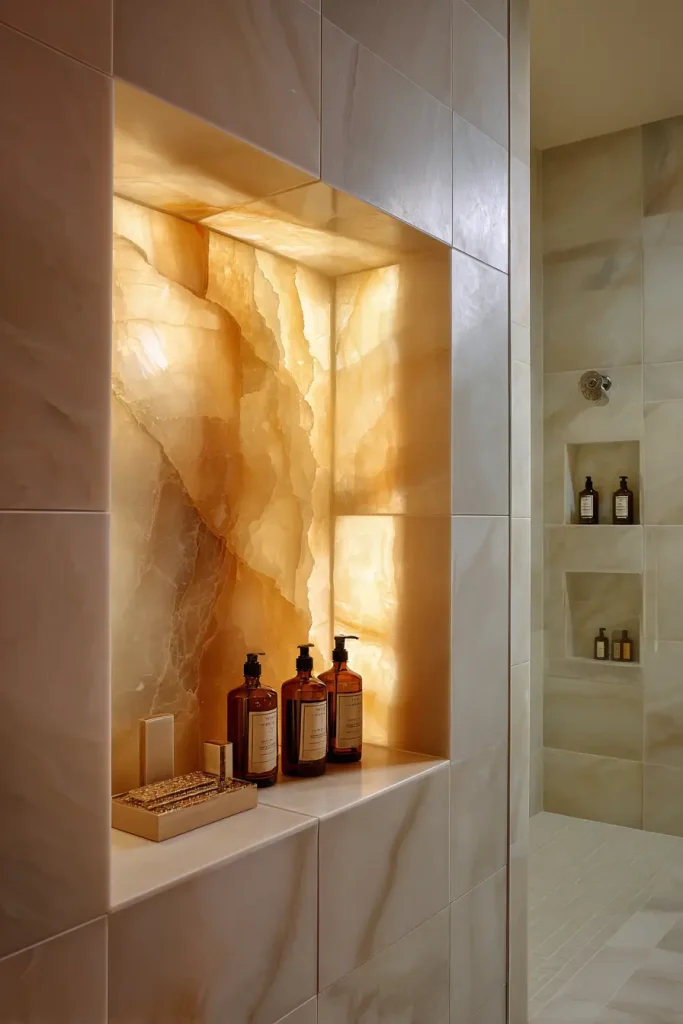
Use a thin slice of onyx or marble. Place an LED panel behind the stone. The light shines through the stone. It glows like a lantern.
Who this is for: Luxury bathrooms with a big budget.
Pro install tip: Onyx is soft and stains easily. Seal it twice before installing. Expect to pay $300 to $600 for the stone alone.
Conclusion: Pick One Idea and Start Measuring
You have 15 ideas. Some are cheap. Some are fancy. But they all solve the same problem: messy shower storage.
The best niche for you depends on your wall space, budget, and style. Start by measuring the gap between your wall studs. That tells you the maximum width you can use without cutting wood.
Then pick a style from this list. A simple same-tile niche costs almost nothing extra during a remodel. A corner shelf works for renters. LED lights are great if you hire an electrician anyway.
Remember to slope the bottom shelf. Use porcelain tile for low maintenance. And always waterproof the recess.
Ready to install your shower niche storage? These 15 ideas prove you can have both style and function.