14 Clever Ideas for Wooden Shelf Brackets That Actually Look Good

You screw a plain metal bracket into your wall. It holds the shelf fine. But every time you walk past, that shiny L-shaped steel stares back like a ugly scar on your nice room. You hide books in front of it. You angle the lamp to cover it. Nothing works.
I have been there. Cheap brackets ruin beautiful shelves. But here is the good news: wooden shelf brackets fix everything. They add warmth, strength, and style. You can buy them or build them. And they do not cost much.
Below are 14 practical ideas for wooden shelf brackets. Each one works for different rooms, different weights, and different skill levels. No fluff. Just smart designs you can use today.
1. The Classic Corbel Bracket

A corbel is a fancy word for a curved wooden bracket that looks old and rich. You see these in fancy kitchens and libraries. The top is wide where it meets the shelf. Then it curves down and tapers to the wall.
You can buy pine corbels for cheap at hardware stores. Paint them white for a farmhouse look. Stain them dark brown for a study. These brackets hold heavy weight because the curve distributes pressure. A pair of corbels under a twelve-inch deep shelf will hold your whole cookbook collection. No sagging.
2. The Triangular Scrap Wood Bracket
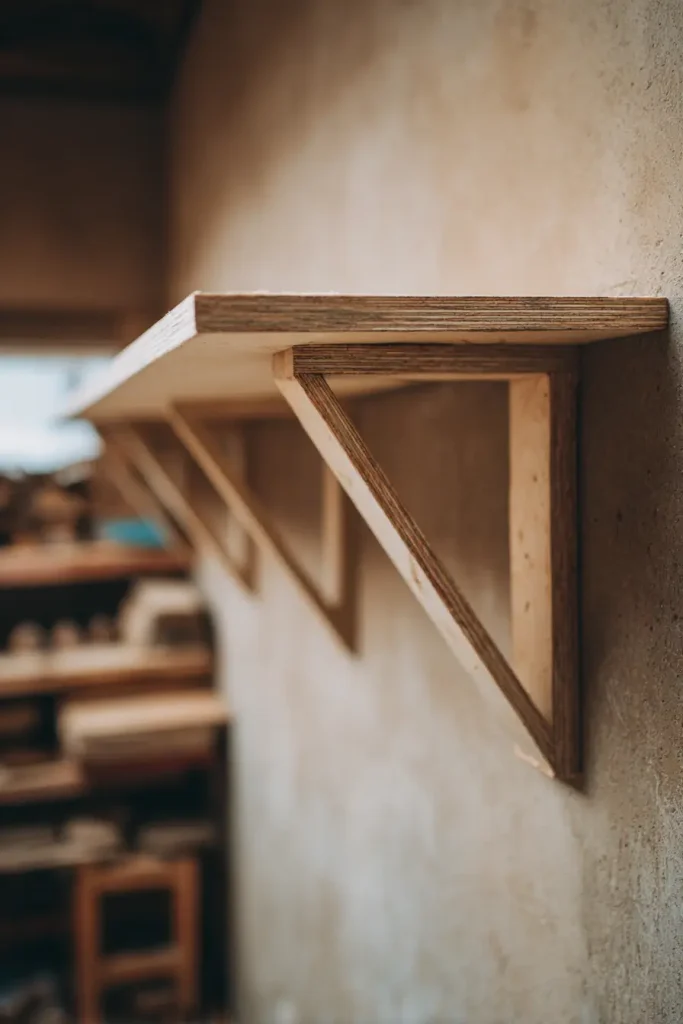
Do you have leftover plywood or board from another project? Cut two right triangles. Make each triangle five inches tall and six inches wide on the bottom. Screw one triangle to the wall. Then screw your shelf on top.
This is the cheapest idea for wooden shelf brackets. You can make twenty brackets in an hour with a circular saw. Paint them to match your wall so they disappear. Or leave them raw for a workshop feel. They are not pretty, but they are strong. Perfect for garages, sheds, or behind closet doors where nobody looks close.
3. The Floating Bracket Hidden Inside

This one tricks your eyes. You cannot see the bracket at all. You cut a thick piece of wood (two inches thick or more). Then you drill long holes into the back of the shelf. Slide steel rods or wooden dowels into those holes. Attach the other ends of the rods to the wall.
The shelf looks like it floats. But the hidden wooden bracket (the dowels) carries the load. You need a drill press or a steady hand for this. Use hard maple or oak for the dowels so they do not snap. This idea works great for a single floating shelf above a sofa or a desk. Clean. Modern. No visible hardware.
4. The Rustic Log Slice Bracket
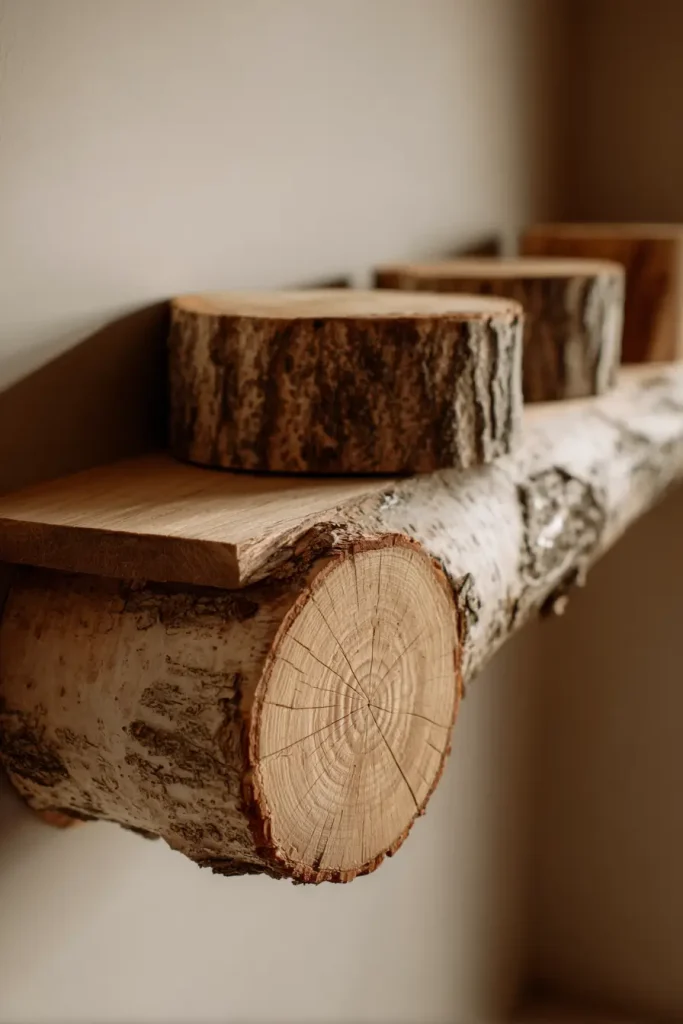
Find a fallen branch or a small log. Ask a neighbor with a chainsaw to cut one-inch thick rounds. Sand each round smooth. Screw one round to the wall with a long wood screw through the center. Then set your shelf on top.
These look like tree cookies growing out of your wall. Each bracket is unique with bark and rings. Seal them with clear polyurethane so the bark does not fall off. Use two or three slices under a long shelf. They hold light to medium weight. Perfect for a cabin, a rustic bedroom, or a kid’s nature-themed room.
5. The Stepped Bracket for Deep Shelves

Deep shelves (fourteen inches or more) need extra support. A normal triangle bracket might not reach far enough. So build a stepped bracket. Start with a tall vertical piece against the wall. Add a horizontal step at the bottom. Then another vertical. Then another step.
Think of stairs lying sideways. Each step gives more support under the shelf. You can cut these from a single two-by-six board. This design stops the front edge of a deep shelf from dipping down over time. Use these in a pantry or a craft room where you store heavy bins.
6. The Decorative Scroll Bracket

Scroll brackets look like vine tendrils or ocean waves. They are not straight triangles. They have S-curves and loops carved into the wood. You can buy these ready-made from online shops. But you can also make simple ones with a jigsaw.
Draw a wavy shape on a one-by-six board. Cut it out. Sand the edges smooth. These brackets are more art than structure. They hold light shelves with plants or picture frames. Use them in a living room or a bedroom where you want people to say “oh, that’s pretty.” Paint them cream or soft gray for a cottage feel.
7. The Wedge Bracket (No Screws on the Wall)

Here is a weird one. You do not screw anything into your wall. Instead, you cut a series of wedge-shaped blocks. You attach these wedges to your shelf bottom, pointing down. Then you attach matching wedges to a cleat on the wall, pointing up.
Slide the shelf on. The wedges lock together. The weight of the shelf pushes the wedges tighter. To remove the shelf, you lift it straight up. This is a French cleat but with wedges instead of a long strip. Use these for shelves you want to move around, like in a garage or a workshop. The wooden brackets are invisible from the top.
8. The Trestle Bracket for Two Shelves

Most brackets hold one shelf. But a trestle bracket holds two shelves at different heights. Picture an A-frame shape. The bottom of the A screws to the wall. The top of the A holds your upper shelf. The middle of the A holds your lower shelf.
You cut two identical leg shapes from a wide board. Connect them with a cross piece. Paint everything one color. This looks amazing in a kid’s room with books on the bottom and toys on top. Or in a bathroom with towels on both levels. One trestle replaces two separate brackets and saves wall holes.
9. The Reclaimed Fence Board Bracket

Old fence boards are gray, cracked, and full of holes. Perfect. Cut triangles from old cedar fence pickets. Do not sand them smooth. Leave every scratch and nail hole. Screw them to the wall with rusty screws on purpose.
These brackets tell a story. They look like they survived a hundred winters. Use them under a shelf in a man cave, a shed, or a country kitchen. Pair them with a rough pine shelf. The contrast between the worn brackets and a new shelf is beautiful. Clean the wood with a wire brush first so no splinters fall on your floor.
10. The Metal-and-Wood Hybrid Bracket

Sometimes wood alone bends. But wood wrapped around a metal core? That is a tank. Cut a piece of angle iron or flat steel bar. Drill holes in it. Then cut two wooden sleeves that slide over the metal. Screw the wood to the metal from the back.
The metal does the heavy lifting. The wood makes it look nice. You can shape the wood into any profile you want (curved, tapered, carved). Paint the wood. The metal stays hidden. These brackets hold stone countertops or heavy aquariums. They cost more time to build but never fail.
11. The Rope-Hung Bracket for Corner Shelves

Here is a playful one. You want a corner shelf but do not want to see brackets. Drill two holes in the shelf edge. Run a thick cotton rope through each hole. Tie a knot below the shelf. Then tie the other end of each rope to a wooden cleat mounted high on the wall.
The rope takes the weight. The wooden knot acts as the bracket. You can also use leather straps instead of rope. This setup only works for light shelves (spices, small plants, little trophies). But it looks like sailor magic. Every guest will ask how it stays up.
12. The Glued Lamination Bracket

Thin wood bends easily. Thick wood is hard to cut into curves. So glue several thin layers together. Cut five strips of one-eighth inch birch plywood. Coat each strip with wood glue. Stack them on top of each other and clamp them into a curved form (like a barrel shape or an S shape).
Wait overnight. The strips become one solid curved block. Now cut your bracket shape from this block. The layers make a stripe pattern like a zebra. These are the prettiest wooden shelf brackets you can make. Use them in a modern living room or an art studio. They hold medium weight if the glue is good.
13. The Modular Clip-In Bracket
Do you change your mind a lot? Build a bracket system that snaps in and out. Cut wooden blocks that look like giant Lego bricks. Attach one half of a heavy-duty drawer slide to each block. Attach the other half of the slide to the wall.
Now you can slide brackets up and down or swap them left and right. You can remove all brackets to paint the wall. This is overkill for most homes. But for a retail display, a craft fair booth, or a growing kid’s room, it is genius. The wooden blocks hold the shelf. The metal slides do the moving.
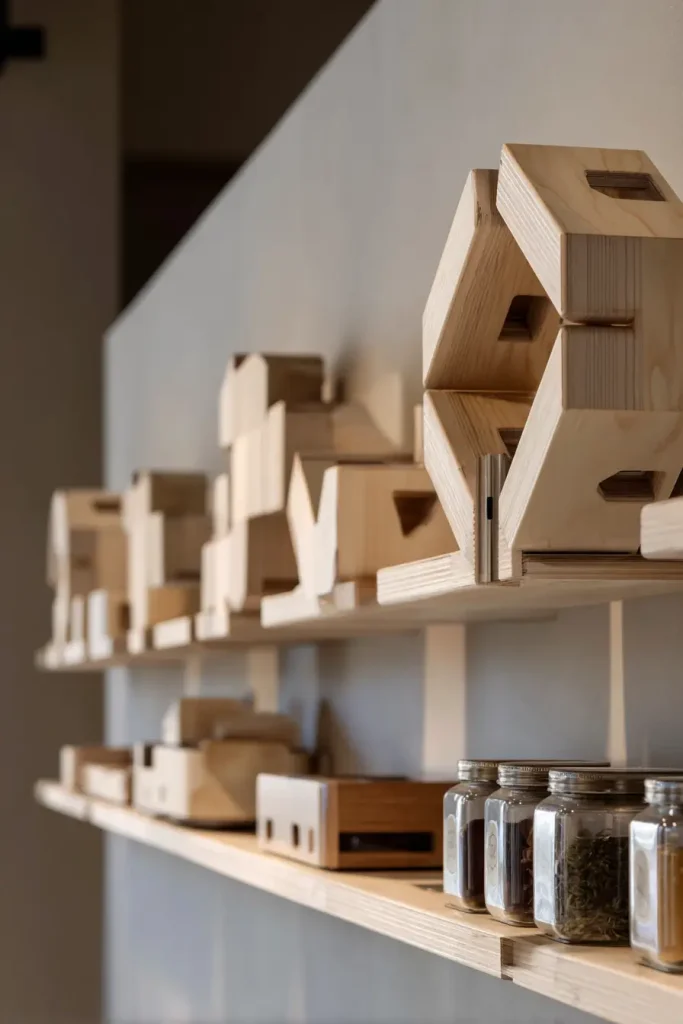
14. The No-Bracket Bracket (The Shelf Cleat)

This is the cheapest and fastest idea for wooden shelf brackets. You do not use brackets at all. Instead, you screw a long one-by-two inch strip of wood horizontally to the wall. Then you set your shelf on top of that strip. The strip is the bracket.
Add a second strip underneath the shelf front to hide the gap. Nobody sees the hidden cleat. This works for shelves less than eight inches deep. The only downside is you cannot easily remove the shelf without prying. But for a simple bookshelf or a display ledge, this is perfect. No fancy cutting. No curves. Just a stick on the wall.
How to Choose the Right Bracket for Your Shelf
Before you build or buy any of these ideas for wooden shelf brackets, ask yourself three questions. First, how heavy is your shelf load? Light means books or dishes. Heavy means cast iron pans or stone statues. Second, how visible are the brackets? If the shelf is eye level, pick pretty ones like scroll or lamination. If it is in a closet, pick triangles. Third, what is your tool setup? A jigsaw and drill cover most ideas. A bandsaw and router give you fancy curves.
Wood Types That Work Best
Pine is cheap and easy to cut. But it dents and bends under heavy weight. Oak and maple are hard and strong. But they cost more and dull your saw blades. Poplar is a middle ground. It paints well and holds screws tight. Cedar is light and resists rot, good for outdoors. For most home shelves, poplar or Douglas fir is the smart pick.
Fasteners Matter More Than You Think
Wooden shelf brackets fail at the screws, not the wood. Use at least two two-and-a-half inch wood screws per bracket. Screw into wall studs whenever possible. If you miss a stud, use heavy drywall anchors rated for fifty pounds each. Pre-drill every hole so the wood does not split.
Finishing Your Brackets
Raw wood soaks up grease and looks dirty fast. Always seal your brackets. Use polyurethane for a shiny tough coat. Use wax for a soft matte feel. Use paint for a uniform color. Sand between coats. A thirty minute finish makes your brackets last ten years instead of ten months.
Conclusion
You do not need ugly metal L-brackets that ruin your room. Wooden shelf brackets come in fourteen smart styles, from hidden floating rods to rustic log slices. Some cost nothing but scrap wood. Others take a weekend and a jigsaw. All of them beat shiny steel.
Pick one idea from this list. Start small. Make a pair of triangles for your garage shelf. If that feels easy, try a curved corbel for your kitchen. Before long, you will look at every blank wall and see a shelf waiting to happen. And the best part? Your brackets will look like they belong there. Not like a mistake you covered up.
Now go grab some wood and start cutting. Your walls are ready.