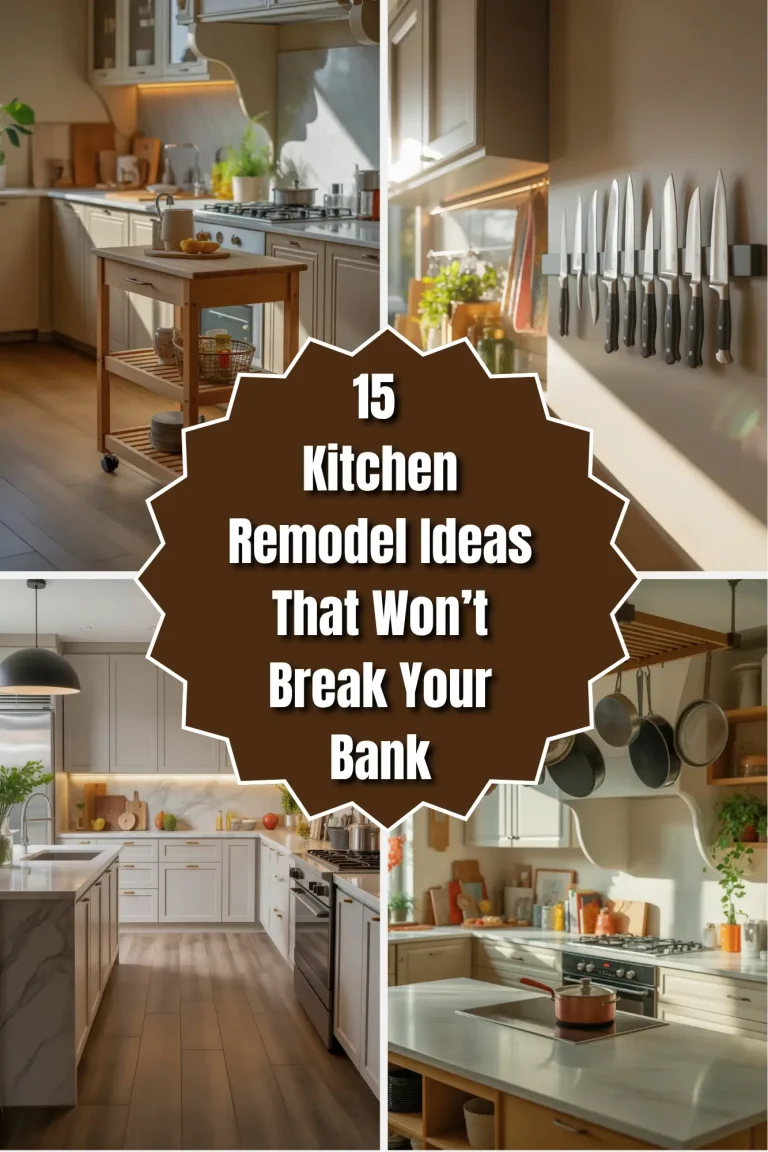
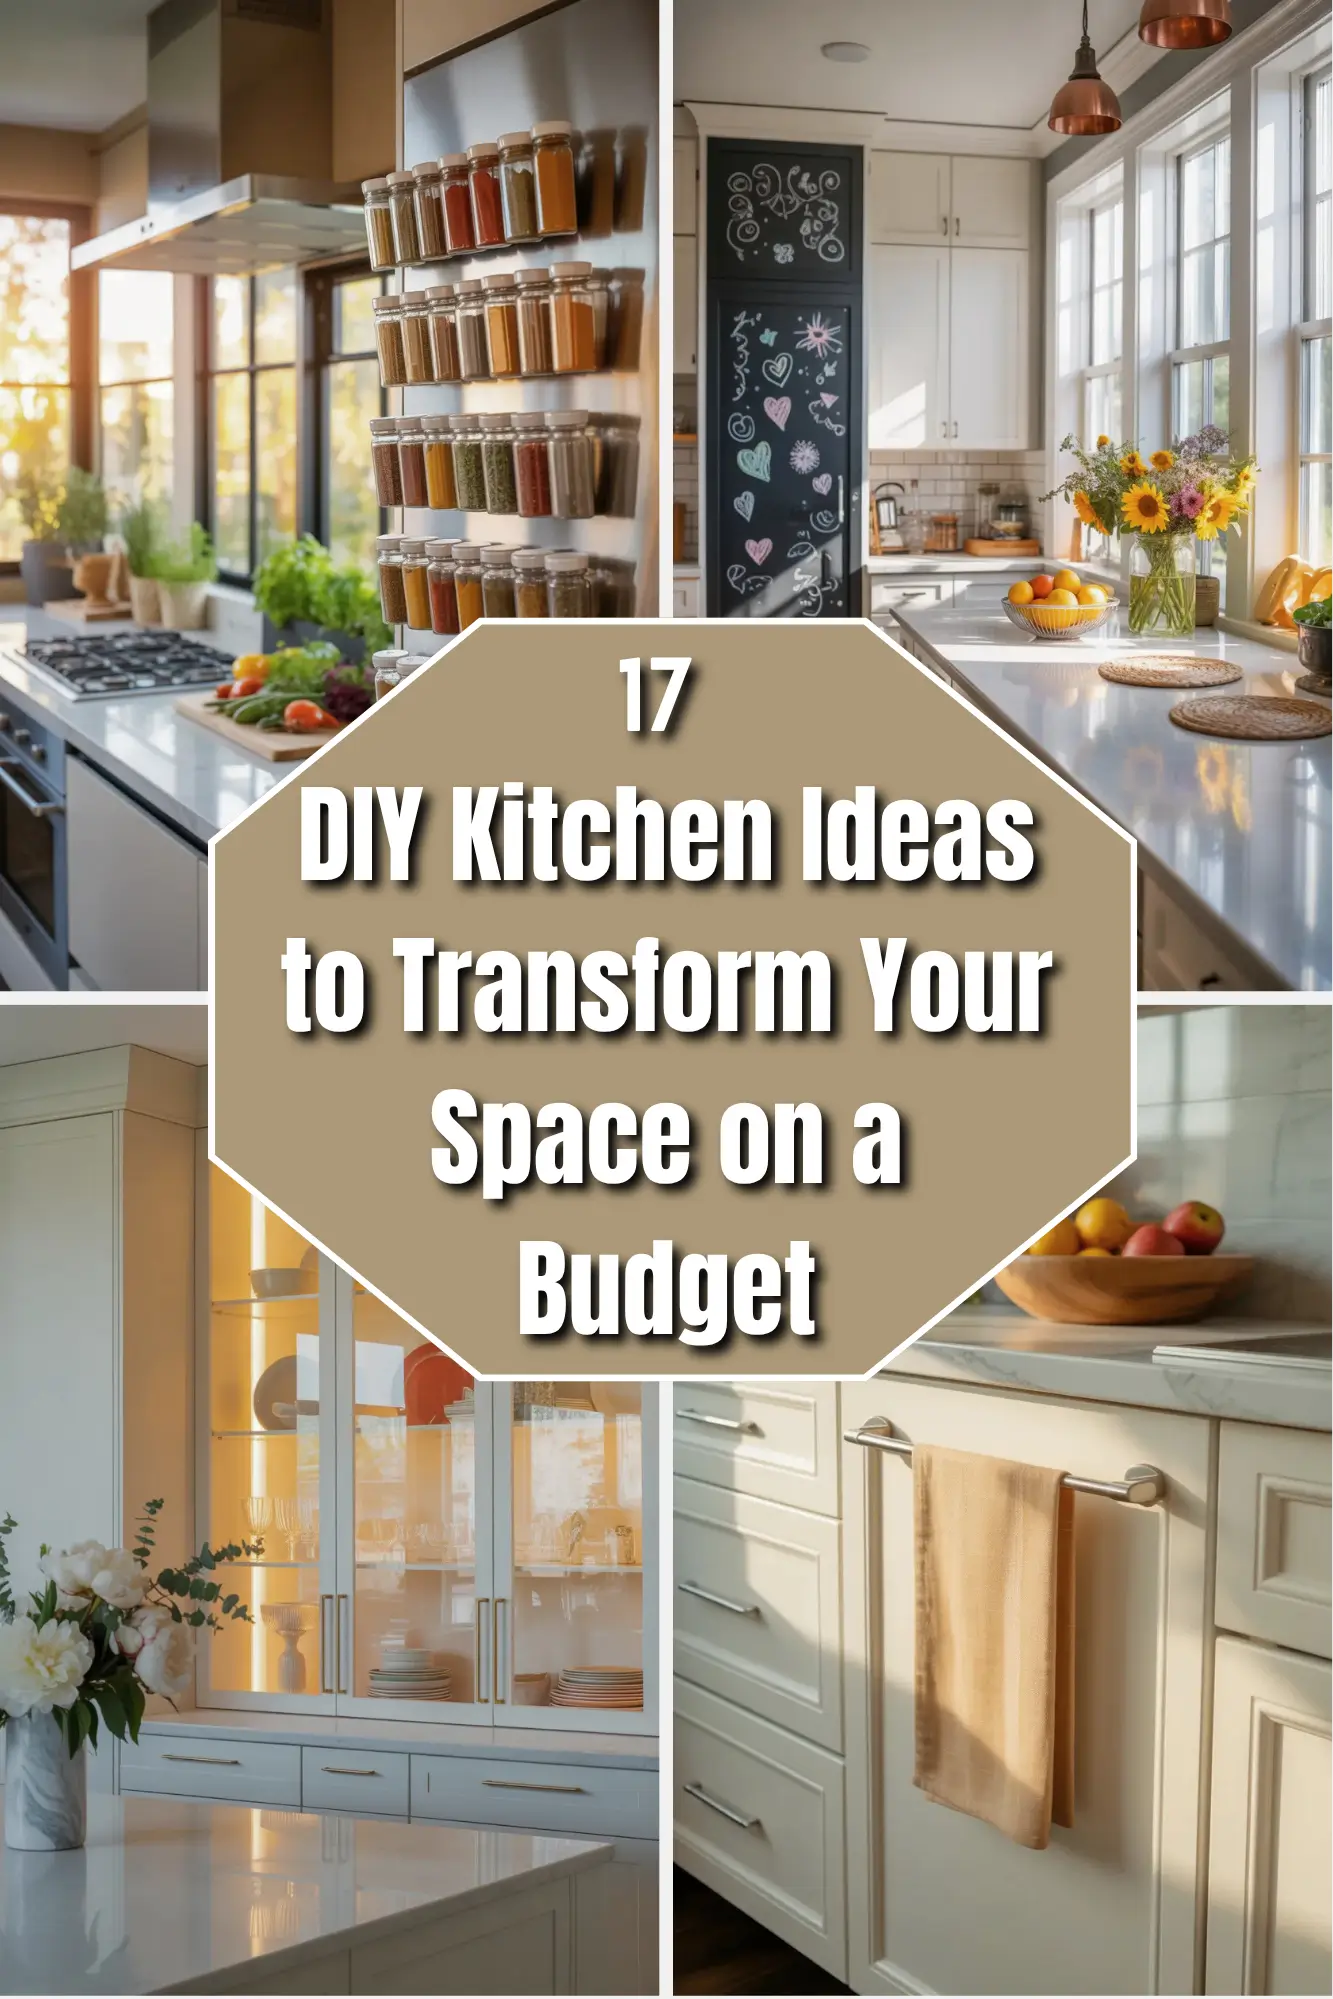
17 DIY Kitchen Ideas to Transform Your Space on a Budget
You stand in your kitchen. The cabinet door hangs crooked. The drawer sticks halfway open. The backsplash has a grease stain that no spray can touch. You think, “I cannot afford a full remodel. But I also cannot look at this another year.”
Good news. You do not need ten thousand dollars or a contractor’s license. You need weekend projects. Simple ones. The kind where you use a screwdriver, not a saw. The kind where a trip to the hardware store costs less than a pizza night.
I have collected seventeen DIY kitchen ideas that regular people actually finish. No “paint your countertops with special epoxy” nonsense that peels after three months. No “build floating shelves from raw lumber” that requires a workshop. Just honest fixes that make your kitchen feel fresh, clean, and yours.
Let us get your hands dirty.
Idea 1 Swap Out Your Cabinet Knobs and Pulls
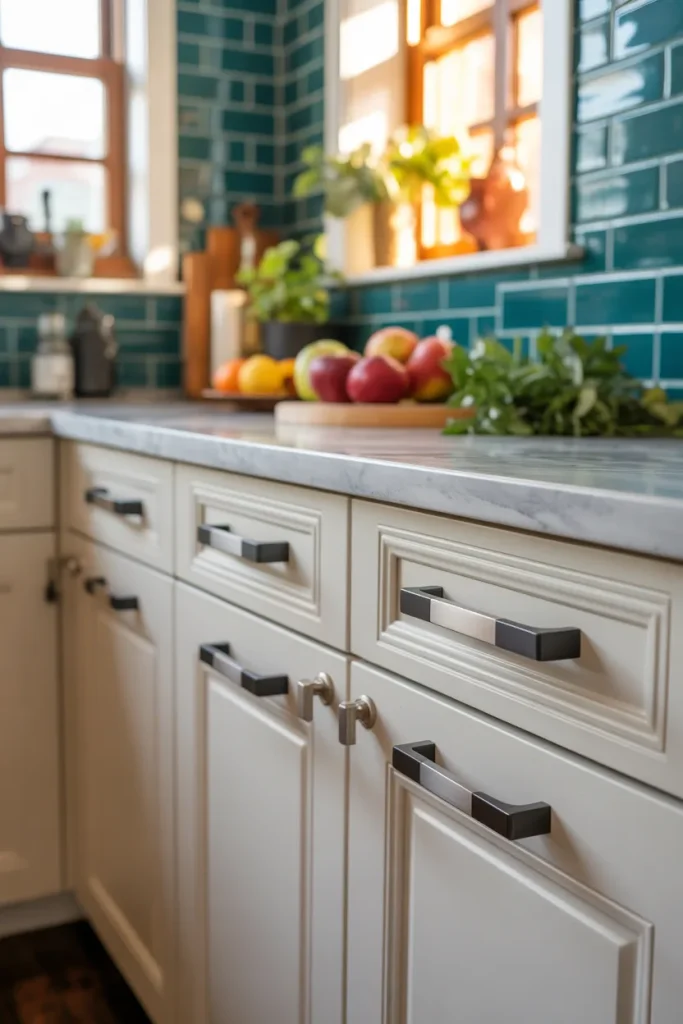
Old hardware makes a kitchen look tired. Those brass finish pulls from 1995? They scream “help me.” But replacing every single knob and pull costs almost nothing and takes one afternoon.
Unscrew one knob. Take it to the hardware store. Match the hole spacing. Buy modern matte black, brushed nickel, or even leather pulls. Go home. Screw them in. Stand back.
Your brain will not believe the change. Tiny metal touches trick the eye into seeing new cabinets. No painting. No sanding. Just a screwdriver and twenty minutes of your Saturday.
Do not buy the cheapest plastic ones. Spend a little more for solid metal. Your hands touch these every single day. Cheap ones feel hollow. Good ones feel like a real kitchen.
Idea 2 Peel-and-Stick Backsplash That Looks Real
Real tile backsplash costs hundreds and makes a dusty mess. Peel-and-stick backsplash panels cost twenty bucks. Stick them right over your old dingy wall. No grout. No glue fumes. No chipping old tile.
The trick is buying the thick vinyl kind, not the thin paper kind. Thick vinyl has a real texture. It looks like actual subway tile from three feet away. Thin paper looks like a sticker from a dollar store.
Clean your wall first with soap and water. Dry it completely. Peel the backing. Stick the sheet on. Smooth out bubbles with a credit card. Overlap edges carefully. Cut around outlets with scissors.
You can do a whole backsplash in two hours. When you sell your house, you peel it off with a hair dryer. No damage underneath.
Idea 3 Under-Cabinet Lighting on a Dime
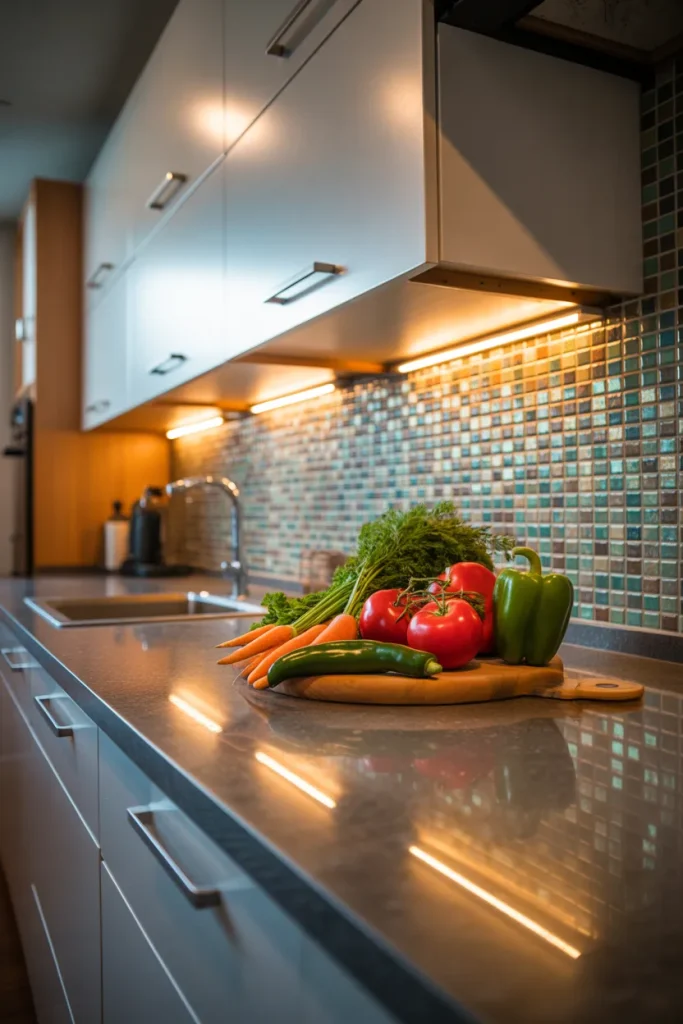
Dark countertops make a kitchen feel like a cave. But hiring an electrician to add under-cabinet lights costs a fortune. Use battery-powered stick-on lights instead.
Buy a pack of four slim LED bars. Each one takes three AAA batteries. Stick them under your upper cabinets with the included tape. Point the light down at your cutting board. Tap the lens to turn them on.
The batteries last six months if you use them one hour a day. When they die, you replace the batteries, not the whole light. Position each bar above your main work zones—sink, stove, coffee maker.
This one change fixes the number one complaint in small kitchens: not enough light where you actually chop vegetables.
Idea 4 Open Shelving by Removing Cabinet Doors
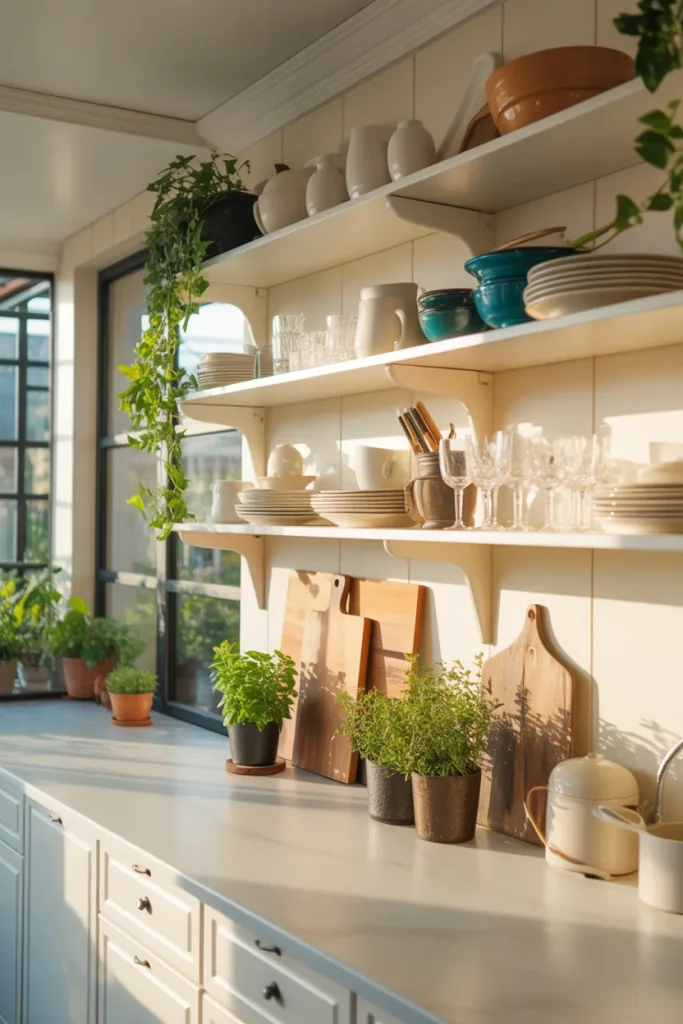
Do not buy new shelves. Do not tear out your cabinets. Simply unscrew two cabinet doors. Set them aside in your garage. You now have open shelving.
Sand the inside of the cabinet lightly. Wipe away dust. Arrange your everyday dishes, glasses, and bowls on the open shelves. Stack plates flat. Lean cutting boards against the back wall. Put a small plant or two on the highest shelf.
The open space breaks up heavy-looking cabinets. Your kitchen breathes. And you stop losing things in dark cabinet corners because everything is right there in plain sight.
Keep the cabinet doors in storage. When you move out or change your mind, screw them back on. No harm done.
Idea 5 Refinish Your Countertops with a Kit
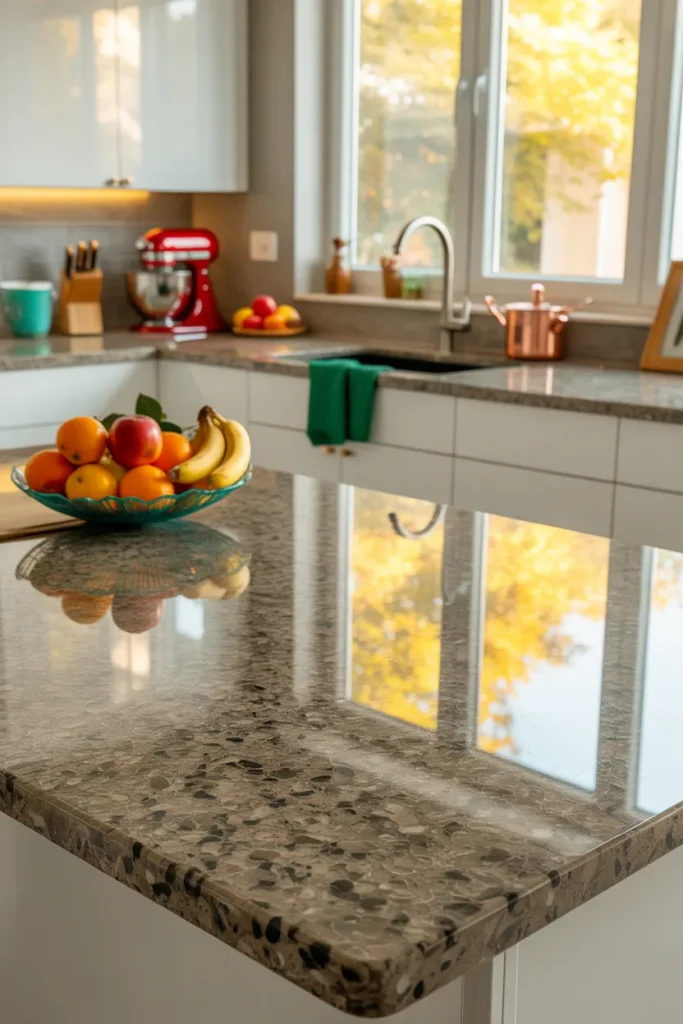
Countertop refinishing kits used to be a joke. The old ones looked like painted cardboard. But new kits from trusted brands actually work. You get a two-part epoxy paint that hardens into a shiny, durable surface.
Clean your countertops with heavy-duty degreaser. Sand them lightly with the included sandpaper. Roll on the base coat. Let it dry. Sprinkle the decorative chips. Roll on the clear top coat. Wait three days.
The result looks like speckled granite from five feet away. It resists stains and heat up to a hot mug but not a hot pan. Use cutting boards always. Clean with mild soap.
This project takes a full weekend but costs under a hundred bucks. Compare that to five thousand dollars for real stone.
Idea 6 Magnetic Knife Strip on the Wall
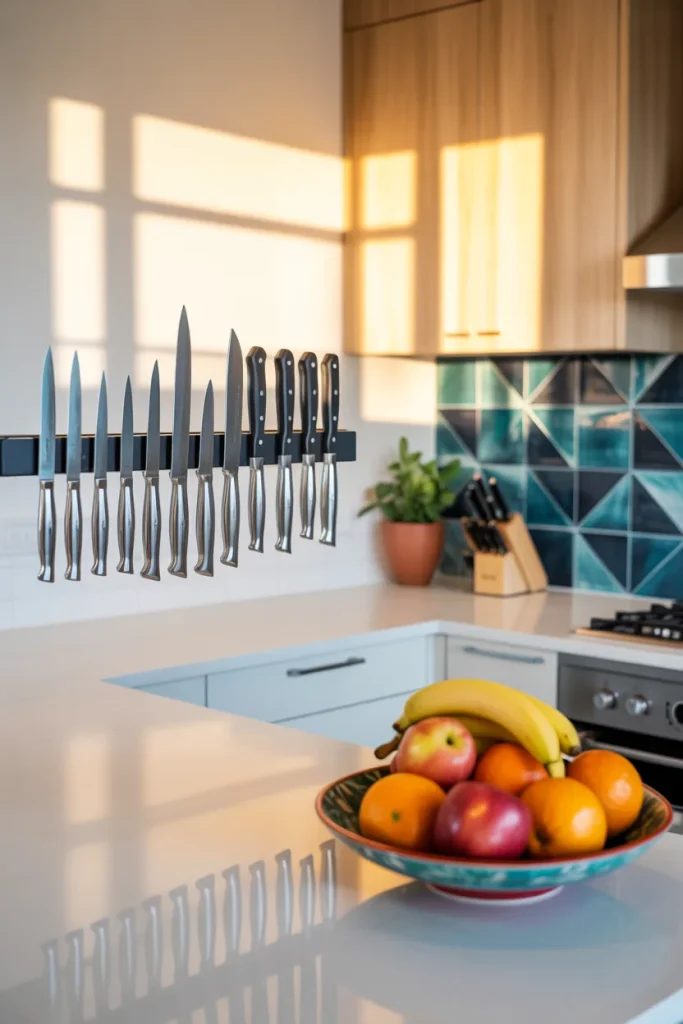
Your knife block takes up precious counter space. It also traps crumbs and bacteria between the slots. Toss it. Mount a magnetic knife strip on your backsplash or under a cabinet.
Buy a strip at least 18 inches long. Screw it into a wall stud or use heavy-duty adhesive strips. Stick your knives to the magnet, blade down, handle up. They stay put. They dry faster. You see every knife at once.
The side benefit is safety. You never reach into a dark drawer and slice your finger. You see each blade. You grab the one you need. Your counter clears up for a fruit bowl or a coffee maker.
Idea 7 Cabinet Door Refresh with Contact Paper
Old cabinet fronts look faded and scratched. Replacing them costs as much as new cabinets. Cover them instead with marble-pattern or wood-grain contact paper.
Measure each door. Cut the paper one inch bigger on each side. Peel the backing. Stick the paper to the door starting from the middle. Push out bubbles with a flat card. Trim the edges with a razor blade. Wrap the extra paper around the sides.
Contact paper comes in dozens of patterns. White marble lightens dark kitchens. Light oak warms up white kitchens. The paper lasts two to three years before peeling. Then you peel it off and apply fresh paper.
This is a rental-friendly trick too. Landlords never notice unless you choose neon pink.
Idea 8 Pull-Out Trash Can Inside a Cabinet
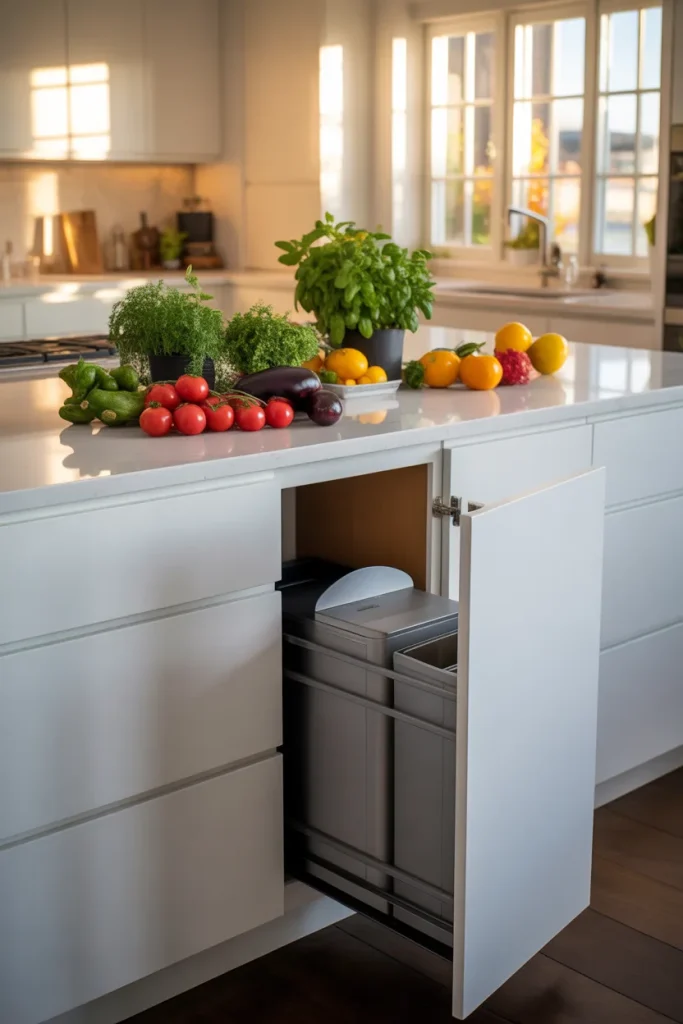
A trash can sitting on your floor looks messy and blocks your foot space. Convert one lower cabinet into a pull-out trash station.
Measure the inside width of your cabinet. Buy a sliding trash can pullout kit that fits. Screw the rails to the cabinet floor and back wall. Attach the frame. Drop in two small trash cans—one for garbage, one for recycling.
Close the cabinet door. The trash disappears. Pull the door open. The cans slide out right to your hand. No bending. No ugly bin in the corner. Your kitchen instantly looks cleaner because you hid the gross stuff.
This takes an hour to install. You need a drill and a screwdriver. That is it
Idea 9 Replace Your Sink Faucet with a Pull-Down
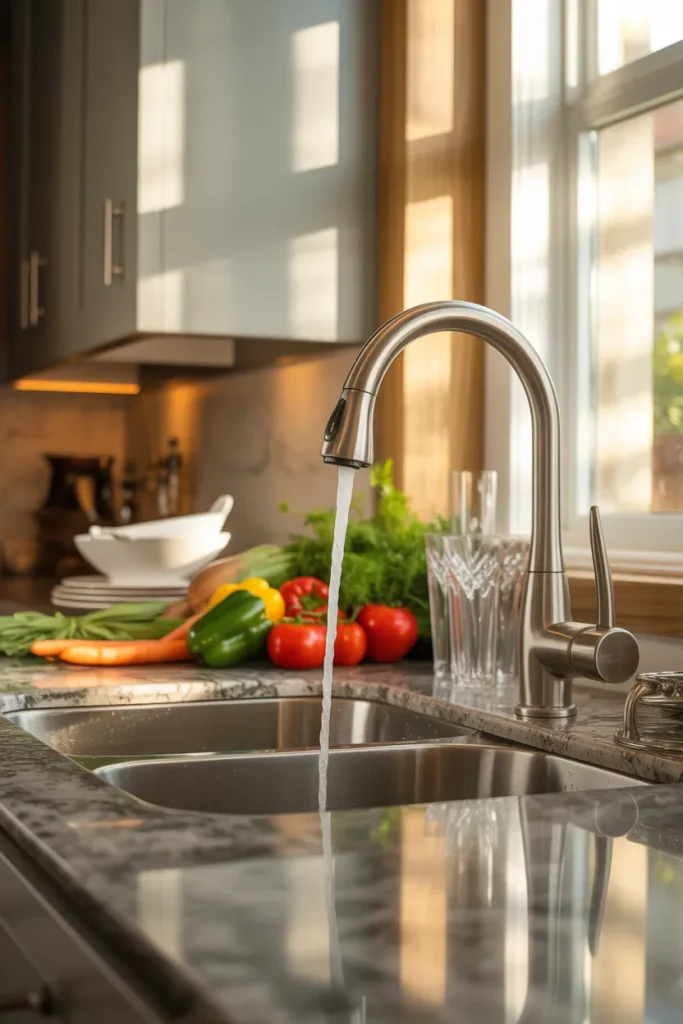
A short, low faucet makes washing big pots miserable. You bang the pot against the spout. Water splashes everywhere. Swap it for a pull-down faucet with a high arc.
Turn off the water valves under the sink. Disconnect the old faucet with a basin wrench. Drop the new faucet into the same holes. Connect the water lines. Screw on the spray head. Turn the water back on.
Modern pull-down faucets cost sixty to a hundred dollars. They come with everything you need. No plumber required. The high arc clears big pots. The spray head reaches every corner of the sink.
Your back thanks you. Your dishes thank you. Your wet shirt does not thank you because you are no longer soaking it.
Idea 10 Rolling Cart for Extra Counter Space
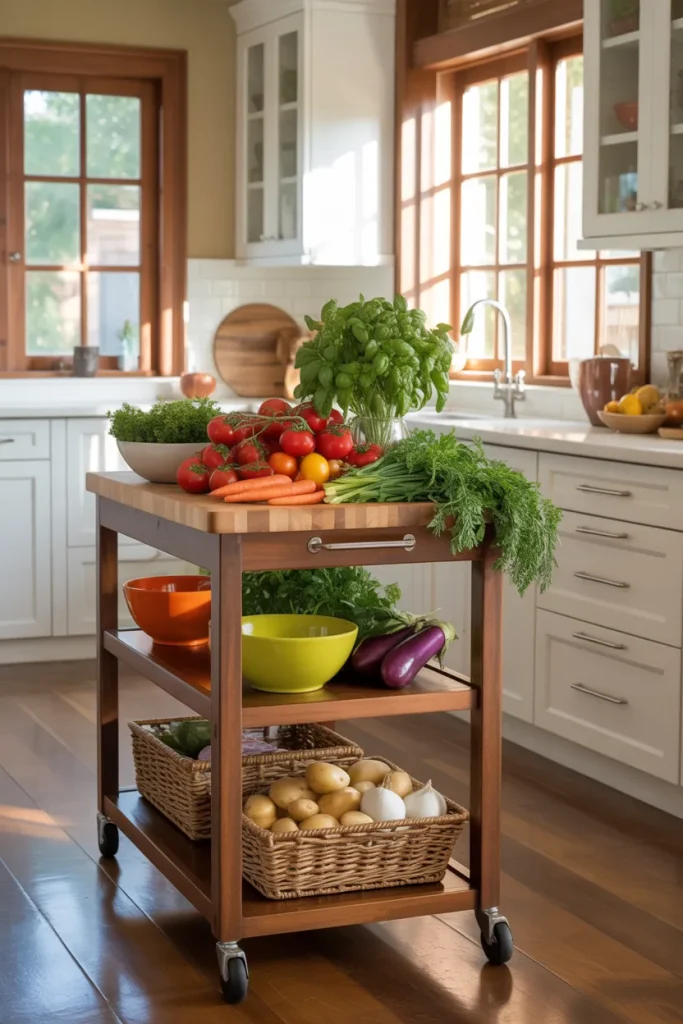
Small kitchens never have enough flat space. A rolling cart gives you a movable island that tucks away when you do not need it.
Buy a stainless steel or butcher block cart on wheels. Put it against the wall when you cook simple meals. Roll it to the center when you chop ten vegetables for soup. Use the bottom shelf for potatoes, onions, and garlic.
The best rolling carts have a towel bar on the side. Hang a dish towel there. Some have a knife slot or a spice rack built in. You can find good ones for under a hundred fifty dollars at discount stores.
When company comes, roll the cart into the dining room. Use it as a drink station or a dessert table. One piece of furniture does two jobs.
Idea 11 Adhesive Hooks Inside Cabinet Doors
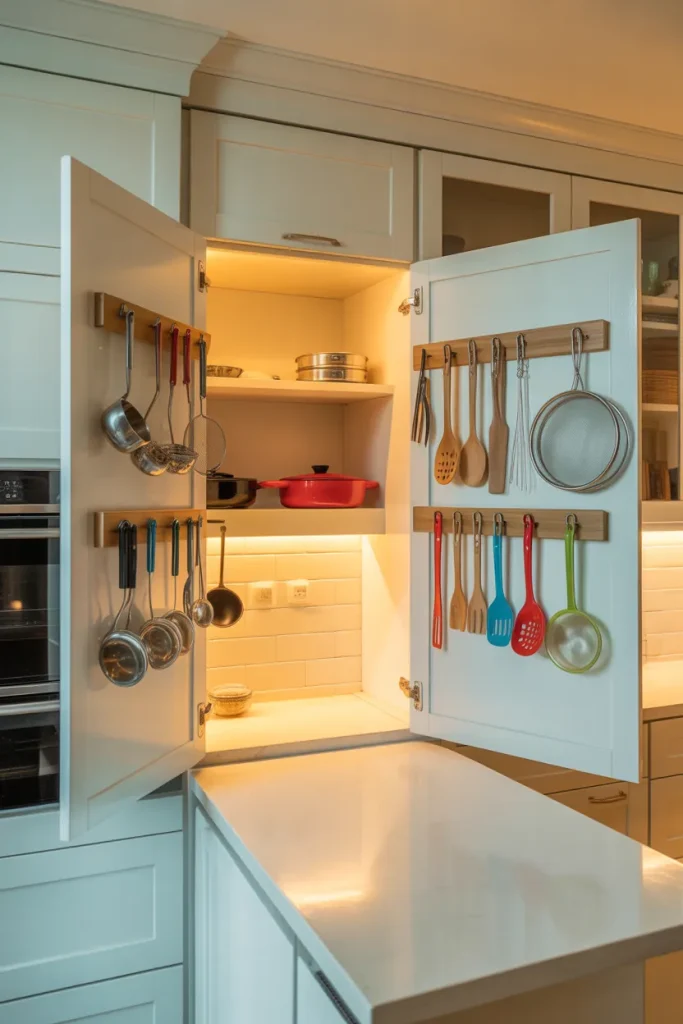
The inside of your cabinet doors is wasted space. Every single door can hold measuring cups, pot lids, oven mitts, or small strainers.
Buy clear adhesive hooks rated for five pounds. Stick them on the inside of your upper cabinet doors. Hang measuring spoons on one hook. Hang a small strainer on another. Hang your most-used pot lid on a third.
Close the door. Everything hides. Open the door. Everything hangs right where you need it. No digging through a drawer full of tangled spoons. No stacking lids like a puzzle.
Adhesive hooks come off cleanly with a hair dryer. So renters can use this too.
Idea 12 Paint Your Floor with Porch Paint
Vinyl or tile floors get scratched and dull. Replacing them costs thousands. Painting them costs forty dollars and a Saturday.
Clean your floor with TSP cleaner. Rinse twice. Let it dry completely. Roll on a coat of porch and floor paint in a light gray or tan color. Let it dry four hours. Roll on a second coat. Let it dry overnight. Apply two coats of clear polyurethane sealer.
The painted floor lasts two years with light traffic. In a kitchen, you will touch up scratches every six months. But a quart of paint goes a long way. And you choose exactly the color you want.
Do not do this on real hardwood. Only on vinyl, tile, or concrete.
Idea 13 Sliding Drawers Inside Deep Cabinets
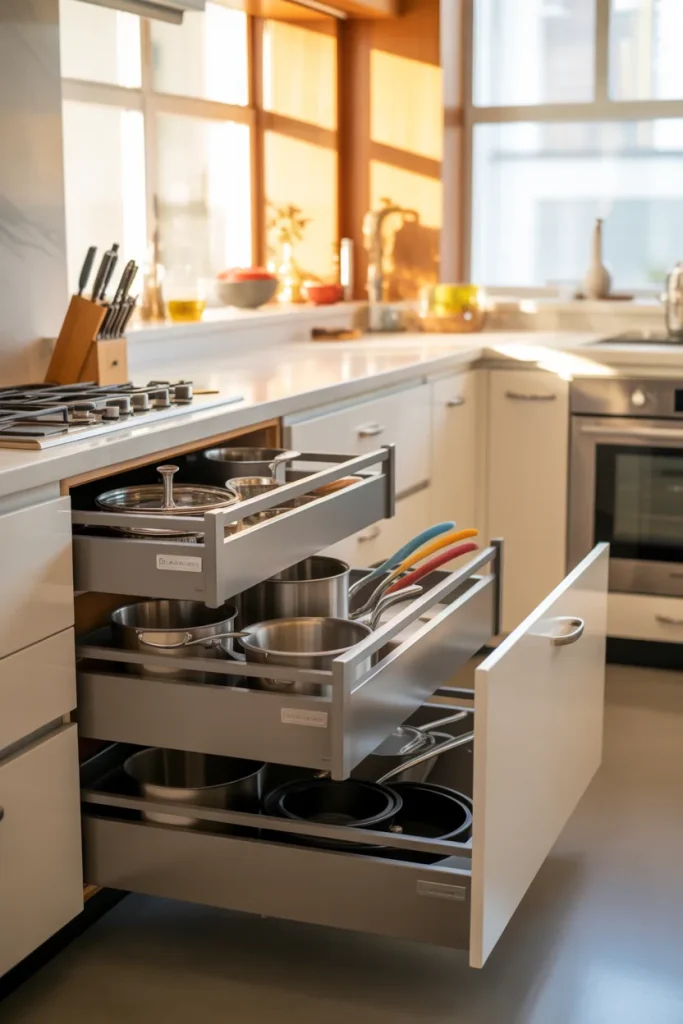
Deep lower cabinets are black holes. You put a pot in front. You lose the pot behind it. You buy another pot. Fix this with sliding drawer inserts.
Measure the inside width and depth of your cabinet. Buy ready-made sliding drawer units from a hardware store. Screw the rails to the cabinet floor. Set the drawers on the rails. Pull them open.
Now every pot has a home. You pull out the bottom drawer for your big stockpot. You pull out the top drawer for your frying pans. Nothing gets lost. Nothing sits on top of anything else.
If you do not want to buy drawer units, use small wire baskets that slide. They work almost as well and cost less.
Idea 14 Replace One Cabinet Door with Glass
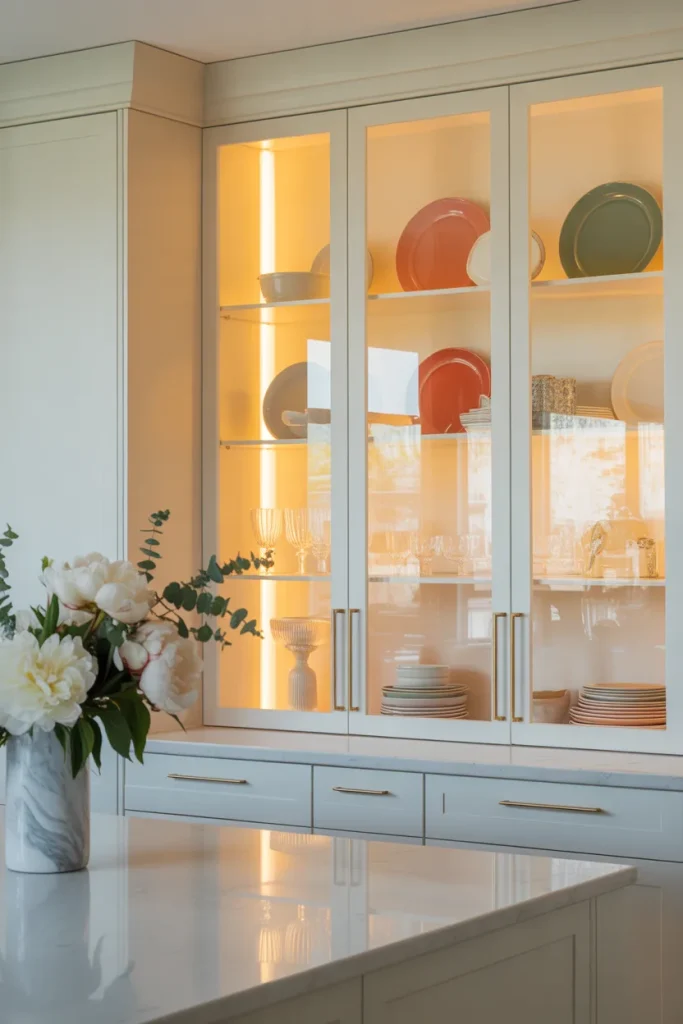
A solid wood door feels heavy. Swap one upper cabinet door with a glass insert. The glass reflects light and shows off your pretty dishes.
Remove the door. Take it to a glass shop. They cut out the center panel and install a pane of clear or frosted glass. Rehang the door. Paint the inside of the cabinet a light color so your dishes pop.
This costs more than other ideas—maybe sixty to a hundred dollars per door. But you only need one or two doors with glass. The rest stay solid. That single glass door becomes a focal point that breaks up the wall of wood.
Do not put glass on a cabinet above your stove. Grease splatters and looks terrible through the glass.
Idea 15 Magnetic Spice Tins on a Sheet Pan
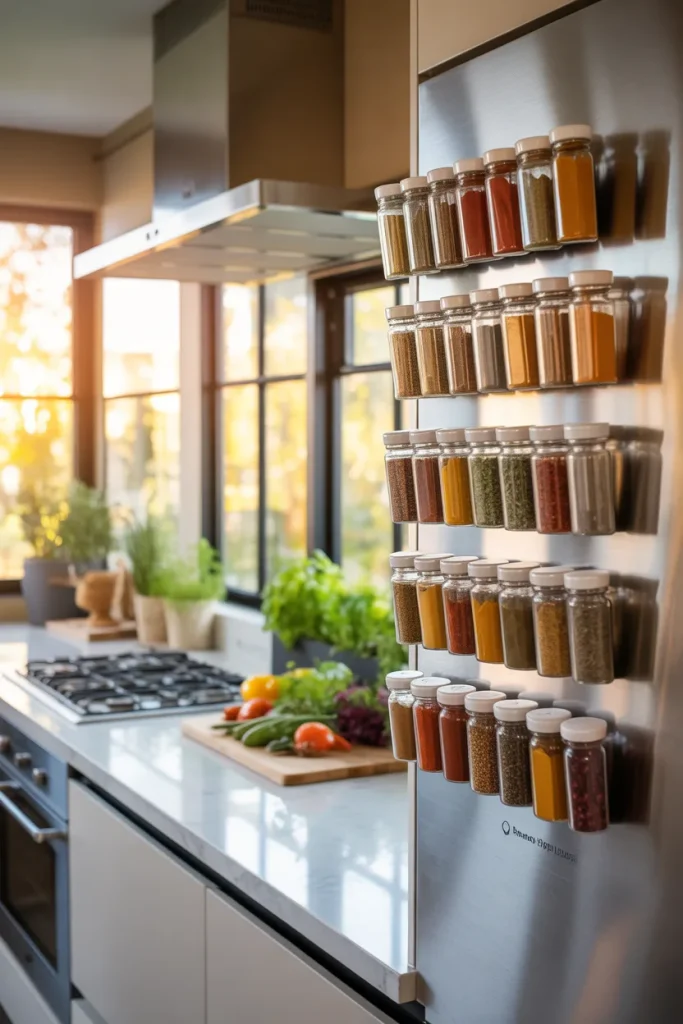
Spice racks take up counter space or wall space. Ditch the rack. Buy small magnetic tins and fill them with your most-used spices. Stick the tins to a metal sheet pan. Hang the sheet pan on your wall or inside a cabinet door.
The tins hold about two tablespoons each. Label the tops with a marker. Grab the tin you need, open it, sprinkle your spice, close it, stick it back. The magnet holds tight.
You can buy empty magnetic tins online for cheap. A sheet pan costs five bucks at a discount store. This whole project costs less than a single dinner out.
Plus, you look like a fancy chef with your spices floating on a metal board
Idea 16 Towel Bar on the Side of a Cabinet
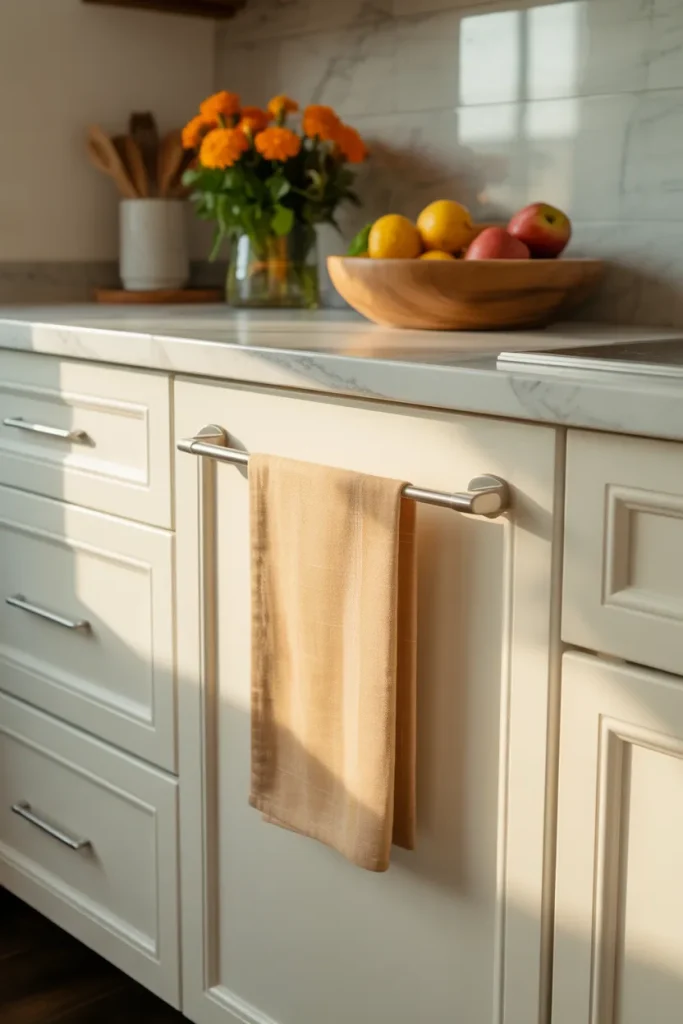
Dish towels draped over the oven handle look messy. They fall off. They catch on your pants. Mount a short towel bar on the side of a cabinet or the end of an island.
Buy a 12-inch towel bar. Screw it into the side panel of your cabinet. Hang a clean dish towel there every morning. The towel stays put. It dries between uses. And it hides around the corner instead of hanging right where you walk.
This works best on the side of the cabinet next to your sink. Your wet hands reach the towel without dripping water across the floor.
Idea 17 Chalkboard Paint on a Pantry Door
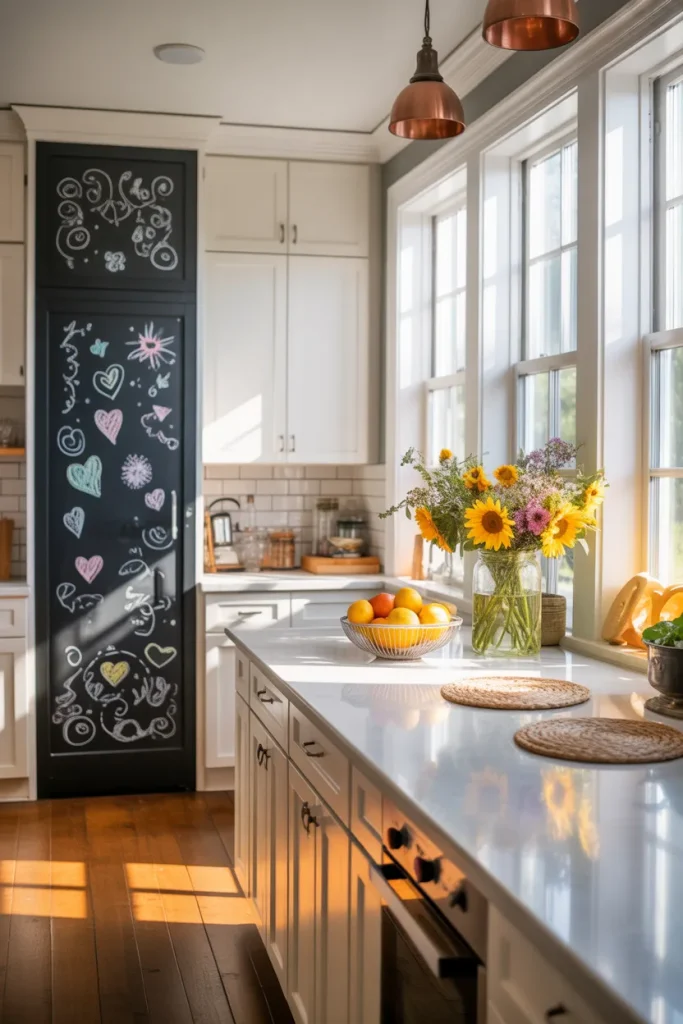
A plain pantry door does nothing for you. Paint it with chalkboard paint. Now you have a shopping list, a menu planner, and a kids’ drawing board all in one.
Clean the door with soap and water. Tape off the edges. Roll on two coats of chalkboard paint. Let it dry for three days. Rub the whole surface with a piece of chalk. Erase the chalk. The door is now seasoned and ready.
Write your grocery list right on the door. “Eggs, milk, bread.” When you run out of something, add it immediately. No lost paper lists. No phone typing while your hands are greasy.
Wipe the door clean with a damp rag every week. Repaint every two years if the writing gets fuzzy.
How to Pick Which DIY Projects to Do First
You cannot do all seventeen next weekend. Pick three that fix your biggest problems.
First, identify your biggest annoyance. Crooked hardware? Dark counters? No space for trash? Start with that.
Second, look at your budget. Peel-and-stick backsplash costs twenty dollars. A sink faucet costs a hundred. A rolling cart costs a hundred fifty. Do cheap projects first to build confidence.
Third, think about time. Swapping knobs takes an hour. Painting cabinets takes a whole weekend. Do not start a huge project on Sunday afternoon. You will end up with a half-finished kitchen and no place to cook dinner.
Fourth, ask yourself if you rent or own. Renters should stick to peel-and-stick items, adhesive hooks, and magnetic strips. Leave the paint and the faucet swapping for homeowners.
Tools You Need for Most DIY Kitchen Projects
You do not need a workshop. You need five basic tools. Buy them once and use them for every project.
- Screwdriver with interchangeable bits. Phillips head and flat head. That is all.
- Cordless drill. A cheap one from a discount store works fine.
- Measuring tape. Twelve feet is plenty.
- Level. A six-inch bubble level.
- Utility knife with snap-off blades. For cutting contact paper and peel-and-stick tile.
That is it. No table saw. No nail gun. No tile cutter. If a project requires those, skip it. This list is for real people with real kitchens.
What Not to Do as a DIY Beginner
Some kitchen projects look easy but go wrong fast. Avoid these traps.
Do not paint your countertops with regular wall paint. It chips immediately. Buy the special epoxy kit or do nothing.
Do not remove a load-bearing wall. That wall holds up your ceiling. Cracking it open costs thousands in repairs. Leave walls alone unless you hire someone.
Do not mess with gas lines. Moving a gas stove or a gas pipe requires a licensed pro. One mistake blows up your house.
Do not use peel-and-stick tile on your floor. It peels up at the edges within weeks. Floor tile needs real glue and grout.
Do not buy the cheapest paint for your cabinets. Cheap paint never hardens. Your dishes will stick to the shelves. Spend extra for cabinet-specific paint.
Keeping Your DIY Work Looking Good
Your hard work deserves protection. Follow these simple rules.
Wipe spills immediately. DIY surfaces are tougher than they used to be, but they are not indestructible.
Use cutting boards even on refinished counters. Never chop directly on epoxy or contact paper.
Clean with mild dish soap and water. Harsh chemicals strip paint and weaken adhesives.
Touch up scratches the same weekend you notice them. A small fix takes five minutes. A big fix takes five hours.
Take before and after photos. You will forget how bad your kitchen looked. Those photos remind you why you did the work.
Conclusion
Your kitchen does not need a ten-thousand-dollar remodel. It needs small, smart changes that you can do yourself. The seventeen ideas here prove that. New knobs. Stick-on tile. Battery lights. A magnetic knife strip. A rolling cart. Each one takes a few hours and a few dollars.
Start with the one that bothers you most every single day. That crooked cabinet door. That dark counter. That ugly trash can in the corner. Fix that one thing this weekend. Then next weekend, fix another.
Before you know it, your kitchen feels different. Not because you spent a fortune. Because you spent a little time and a little care. That is what DIY really means. Doing it yourself, for yourself, with your own two hands.
Now turn off your phone. Go open your junk drawer. Find that screwdriver. Your first project is waiting.