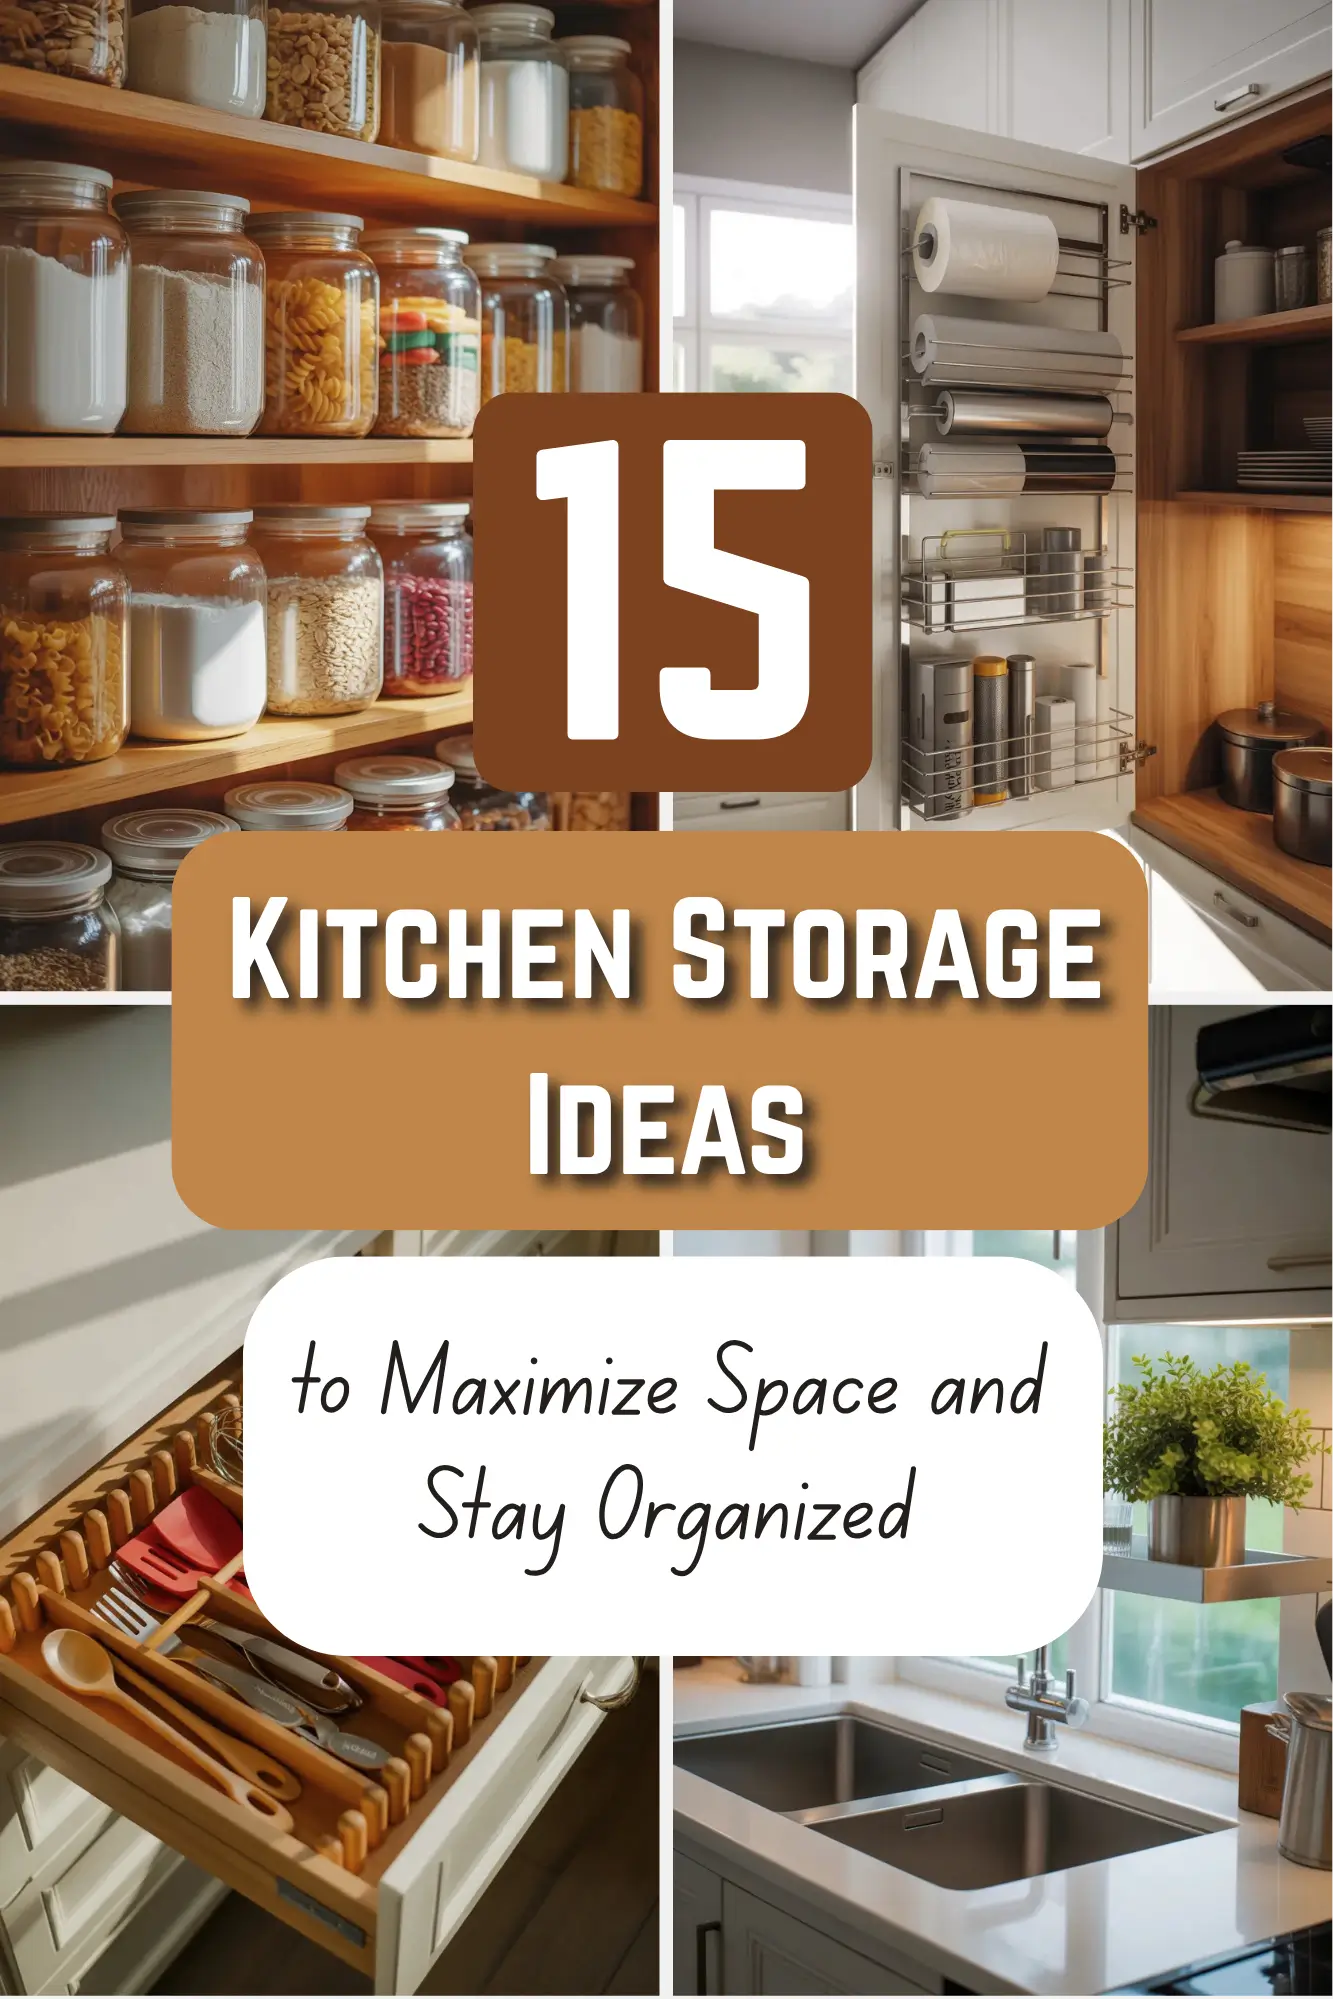
15 Kitchen Storage Ideas to Maximize Space and Stay Organized
You open a cabinet. A plastic lid falls on your foot. The pot behind it crashes onto the counter. You shove everything back in and slam the door. Then you wonder, “Why does my kitchen feel like a disaster every single day?”
Here is the truth: your kitchen is not too small. You are just using the wrong storage tricks. Most people stuff things wherever they fit. But smart storage means putting every spoon, pan, and box exactly where you need it—without digging or swearing.
I have gathered fifteen kitchen storage ideas that work in real, cramped kitchens. No ripping out all your cabinets. No spending thousands on custom drawers. Just human-tested fixes that take an afternoon or a weekend. Each idea saves space and your sanity.
Let us get your kitchen under control.
Idea 1 The Toe Kick Drawer
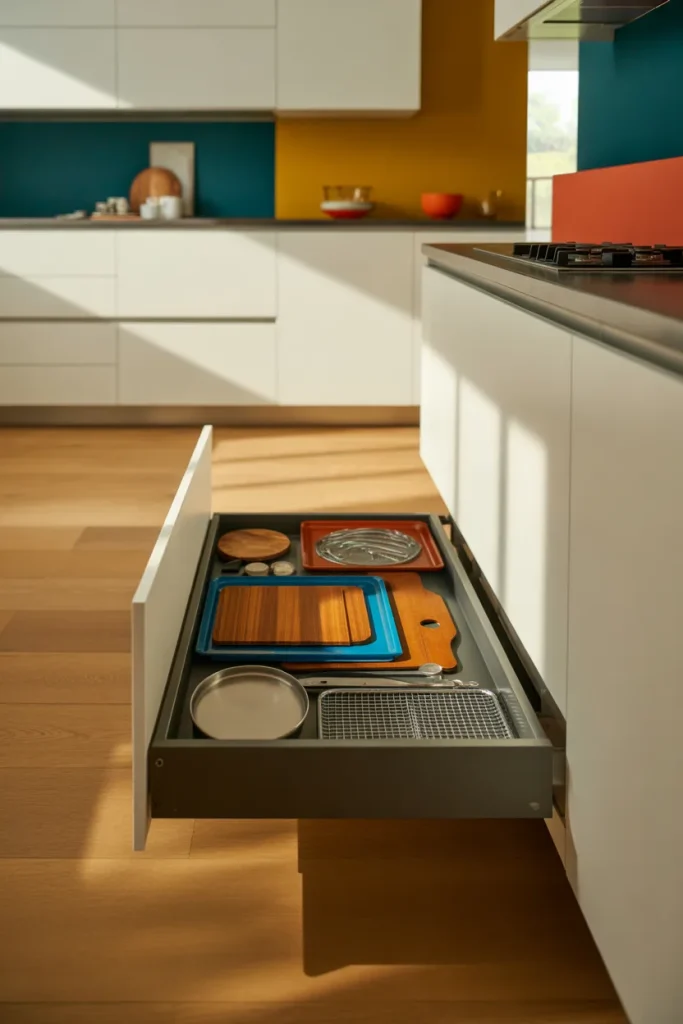
Look down at the base of your lower cabinets. See that little gap between the cabinet floor and the actual floor? That is the toe kick. It is empty space. Most people leave it hollow. But you can turn that dead zone into a skinny drawer.
A toe kick drawer is only about 4 inches tall. That sounds tiny, but it holds flat things perfectly. Baking sheets. Cutting boards. Tray lids. Cookie cooling racks. Things that normally slide around on deep shelves fit right into this shallow drawer.
You install a drawer that slides out at floor level. You open it by pressing a spring latch with your foot. No handle needed. This works because you never use that toe kick space for anything else. Now it holds your flattest, most annoying items
Idea 2 Pegboard on a Cabinet Door
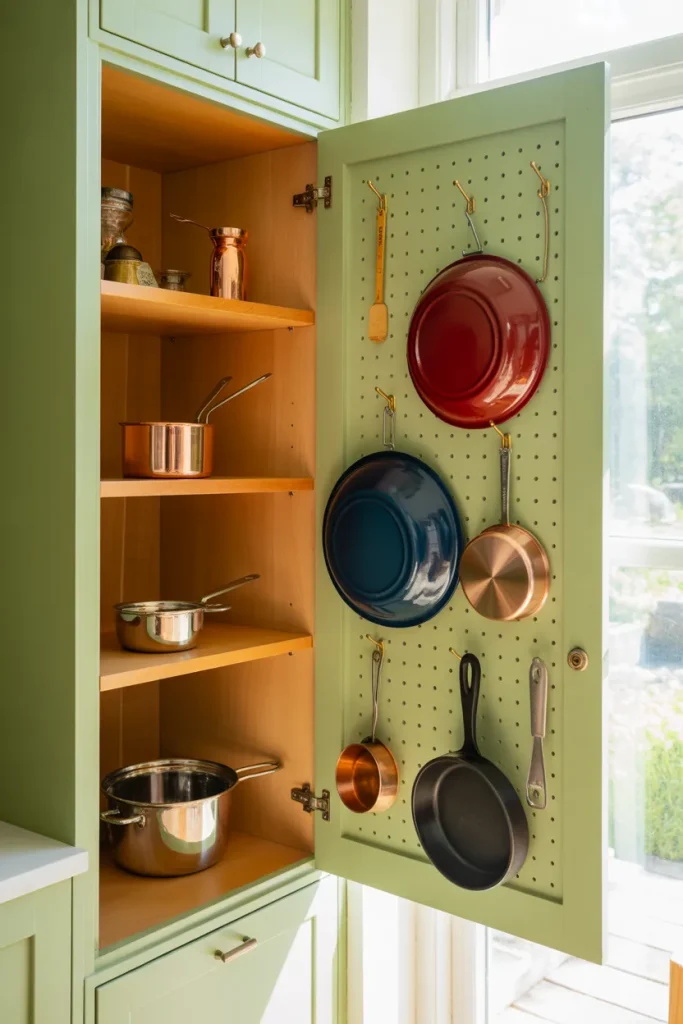
Inside your cabinet doors is wasted real estate. Sure, you might hang a tiny spice rack. But you can do so much more. Cover the inside of one lower cabinet door with a skinny pegboard. Use pegs to hang pot lids, measuring cups, and small skillets.
The key is using a thin hardboard pegboard—not the thick brown stuff from the hardware store. Paint it to match your cabinet. Mount it with short screws so it does not poke through the outside of the door.
Now every time you open that cabinet, your lids are right there. No stacking. No clanging. Just grab and go. This works best on a door near your stove.
Idea 3 Tension Rods for Spray Bottles
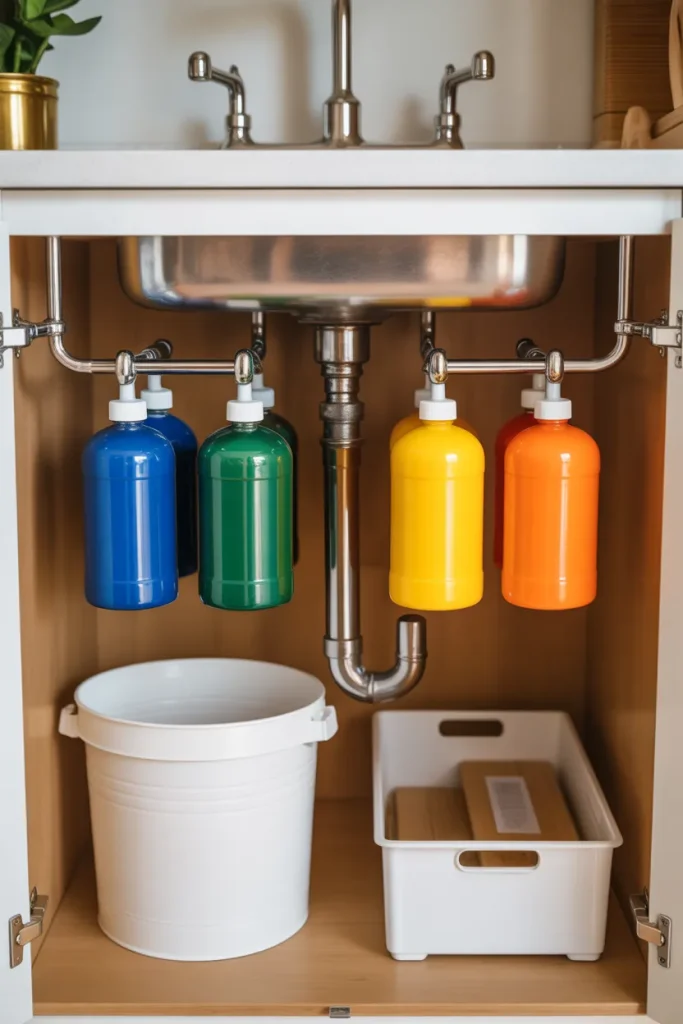
Under your sink is a mess. Bottles of cleaner fall over. Sponges get lost. You reach for the dish soap and knock down a bottle of oven cleaner. Stop that chaos with two cheap tension rods.
Put one tension rod near the front of the cabinet, left to right. Put another rod a few inches behind it. Now slide your spray bottles between the rods. The handles rest on top of the rods. The bottles hang in midair. No tipping. No rolling.
You can store six to eight spray bottles this way. The space underneath the bottles stays empty for a trash can or a bucket. Two tension rods cost less than ten dollars. This is the cheapest fix on the whole list.
Idea 4 Rolling Cart That Fits Your Fridge Gap
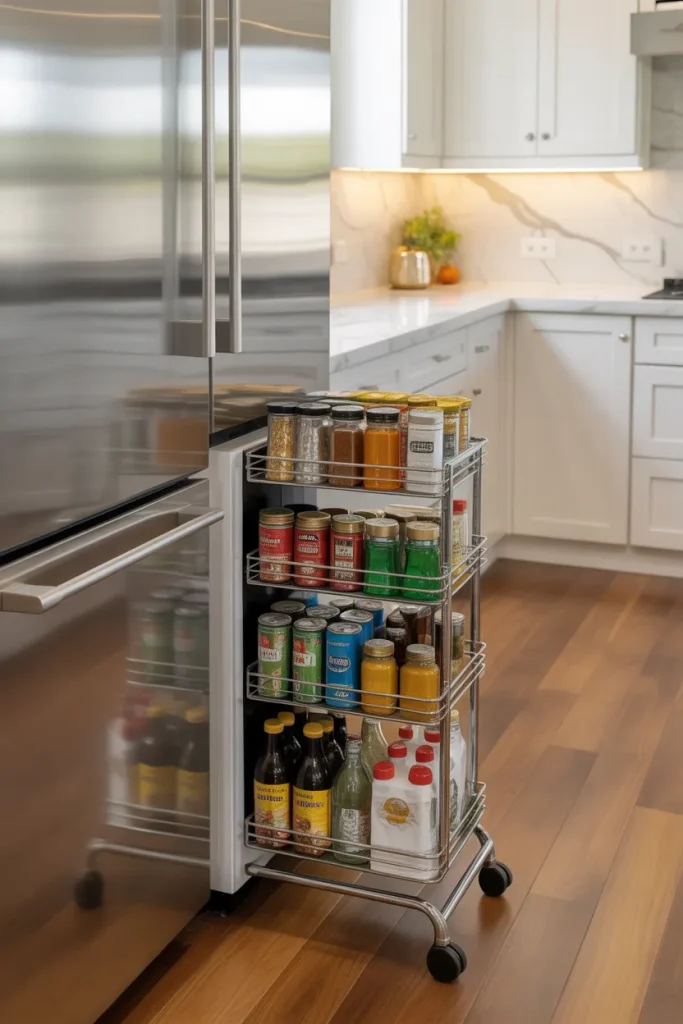
Most people have a skinny gap between their fridge and the counter. That gap collects crumbs and lost magnets. But you can fill it with a custom rolling cart on casters. Measure the gap width—usually 3 to 6 inches. Build or buy a cart that slides right in.
Paint it to match your cabinets. Use it for soda cans, spice jars, or boxed stock. Pull it out when you cook. Push it back when you are done. The cart hides the ugly gap and gives you a whole new column of storage.
If you cannot build a cart, use a narrow wire shelf on wheels. Restaurants use these for sheet pans. They fit most fridge gaps perfectly.
Idea 5 Drawers Inside Deep Cabinets
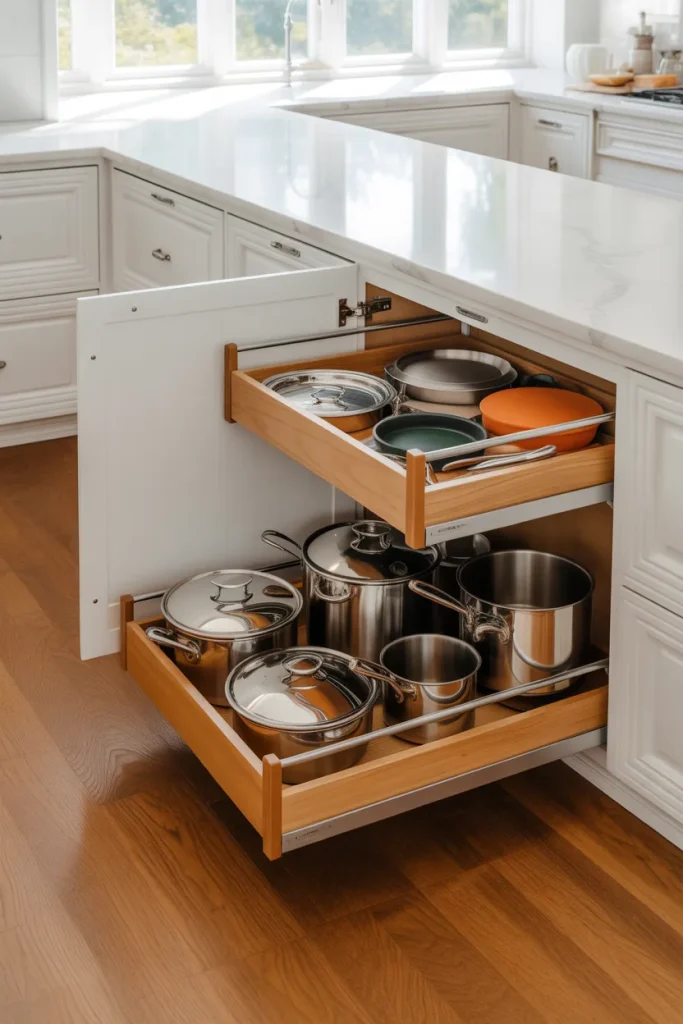
Deep lower cabinets are black holes. You put a pot in the front. Then another pot on top. Then a lid that slides to the back. Three months later, you find a moldy roasting pan you forgot about. The fix is pull-out drawers that fit inside the existing cabinet.
You do not rip out the cabinet. You install drawer slides on the inside walls. Then you mount a shallow drawer—about 4 inches tall—that slides out. Put a second drawer above it. Now your deep cabinet becomes two easy-to-reach layers.
The bottom drawer holds heavy pots. The top drawer holds lids and skillets. No digging. No kneeling. No forgotten pans.
Idea 6 The Lazy Susan Corner Hack
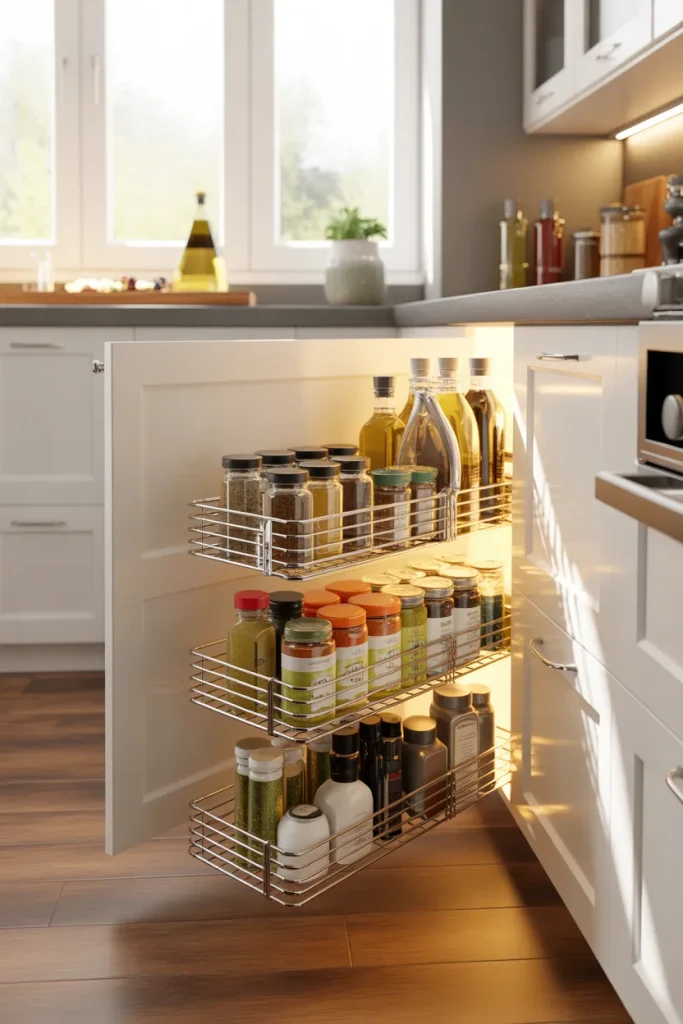
Corner cabinets are the worst. Stuff gets lost in the dark turn. You spin a lazy Susan and half the items fall over. But you can fix a corner cabinet without buying an expensive new organizer. Take out the door and install two half-moon shelves that spin separately.
Better yet, remove the door completely and put a set of pull-out wire baskets on a sliding track. When you open the corner, the whole basket system rolls out like a drawer. You see everything at once.
If you keep the lazy Susan, glue rubber grip mats to each shelf. The mats stop jars from sliding when you spin. Your peanut butter stays put. Your olive oil stays upright.
Idea 7 Magnetic Knife Strip for Spices
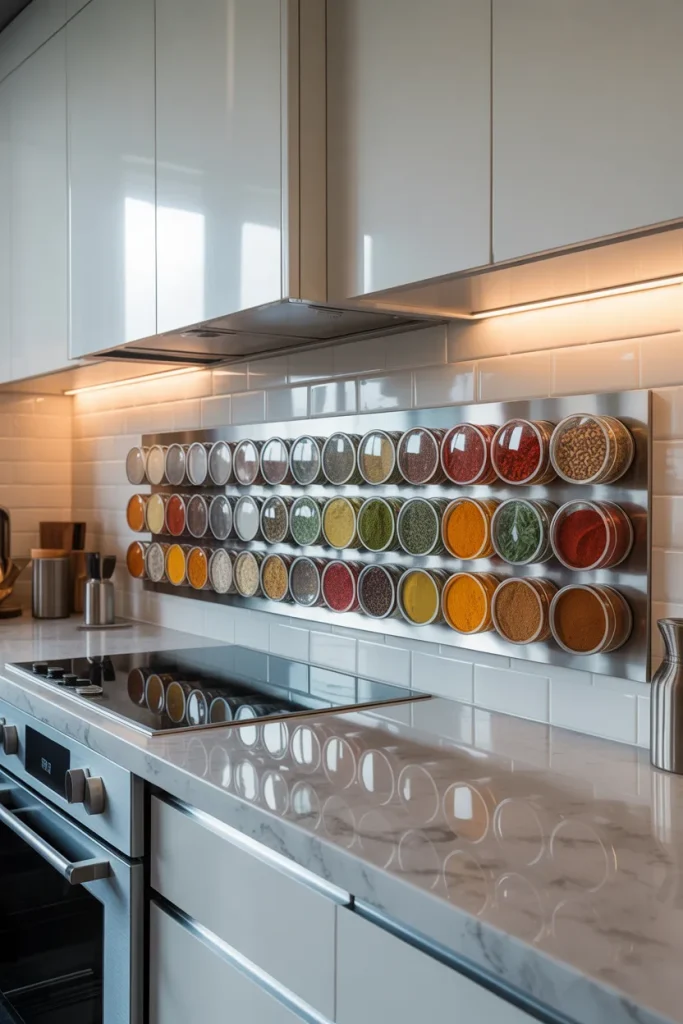
A magnetic knife strip belongs on your wall. But not for knives. Use it for spice tins. Buy small metal tins with clear lids. Fill each tin with a spice. Stick the tins right onto the magnetic strip.
You can fit fifteen spice tins on a twelve-inch strip. That frees up an entire cabinet shelf. Plus, you see all your spices at a glance. No digging through a dark cabinet searching for cumin.
Mount the strip on your backsplash near the stove. Keep the most common spices—salt, pepper, garlic, paprika—at eye level. The rest go on a second strip inside a cabinet door.
Idea 8 Slide-Out Trash and Recycling
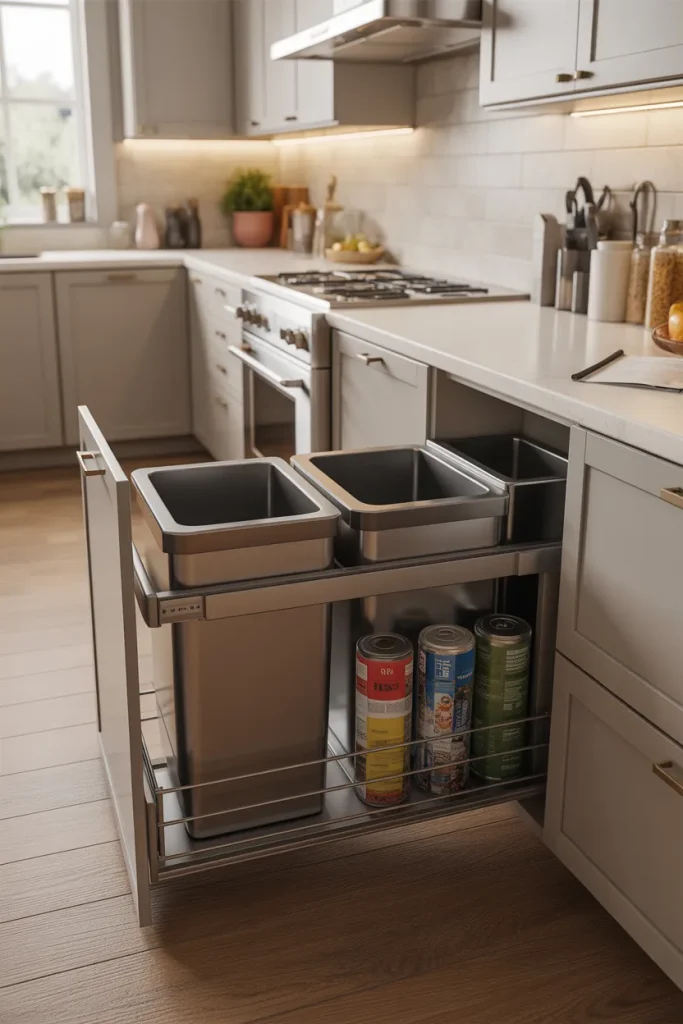
A trash can on the floor takes up space and looks ugly. It also blocks your lower cabinet doors. Build a slide-out rack inside a base cabinet. Mount two buckets on a drawer slide. One for trash. One for recycling.
When you cook, pull the rack open. Scrape food scraps right into the trash. Toss cans into the recycling. Then slide it shut. The mess hides. The smell stays contained. And you gain the floor space where your old trash can used to sit.
You need a cabinet that is at least fifteen inches wide. If you do not have one, use a narrow pull-out between the fridge and the wall.
Idea 9 Hanging Fruit Baskets from the Ceiling
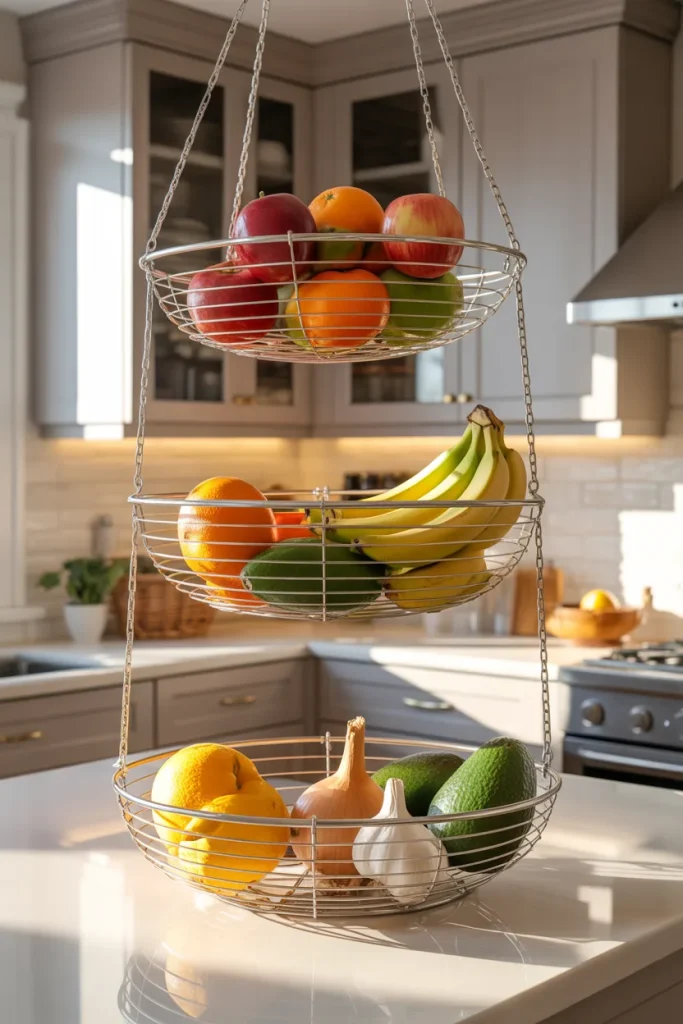
Countertop fruit bowls eat up valuable prep space. A banana stand steals two feet of counter. Move your fruit up. Hang a set of wire baskets from the ceiling. Use three small baskets at different heights. Lowest basket for apples and oranges. Middle basket for bananas and avocados. Top basket for onions and garlic.
Hang them over an empty corner or over the sink. Use ceiling hooks and chain so you can adjust the height. The baskets look like decor. They keep fruit from bruising. And your counter stays completely clear.
Do not hang them over the stove. Heat ruins fruit. Hang them where you walk past so you grab an apple on your way out.
Idea 10 Under-Cabinet Paper Towel Holder
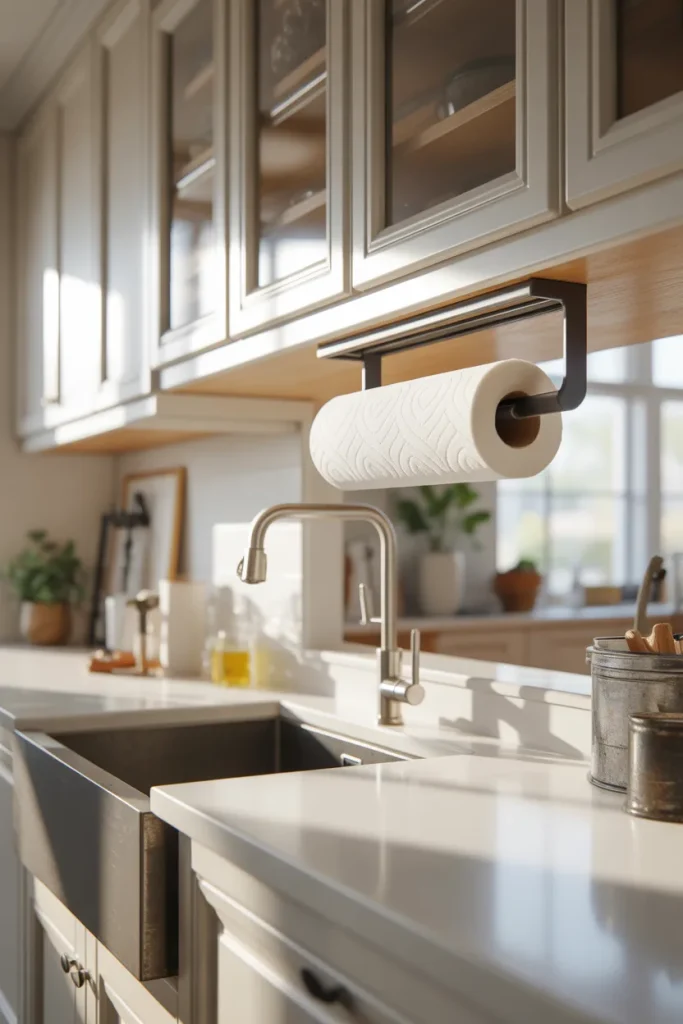
A paper towel roll on the counter is a space hog. It also gets wet and greasy. Mount a horizontal paper towel holder under your upper cabinet. The roll hangs upside down. You pull a towel and tear it off with one hand.
This frees up counter space immediately. Put the holder near your sink so you dry your hands without reaching across the stove. Use a spring-loaded holder so changing the roll is easy.
If you rent your home, use an adhesive pull-down holder. It sticks to the bottom of the cabinet without screws. Just make sure the adhesive is strong enough for a full roll of towels.
Idea 11 The Cookie Sheet Divider
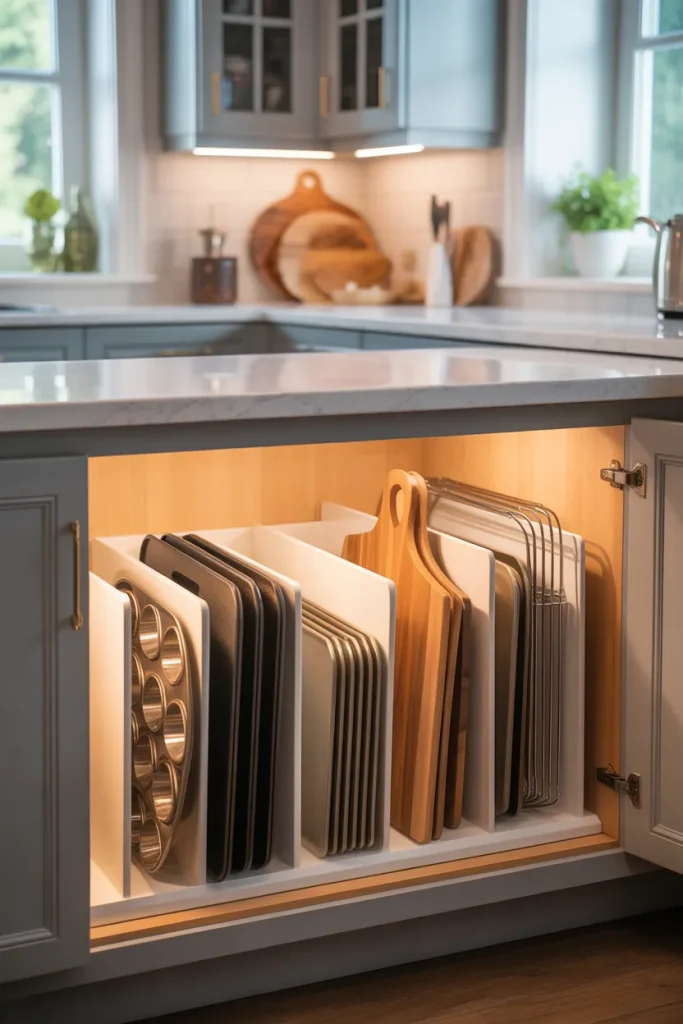
Cookie sheets and cutting boards are too big for normal cabinet shelves. They slide around and fall over. The fix is a simple vertical divider. Take a piece of thin plywood. Cut it to the height of your cabinet. Slide it into the cabinet next to the cookie sheets.
Now you have two slots. One slot for cookie sheets and muffin tins. One slot for cutting boards and cooling racks. Everything stands on its edge. Nothing falls over.
You can buy plastic dividers made for this. But a scrap of wood works fine. Paint it white so it blends in.
Idea 12 Over-the-Sink Shelf

The space above your sink is usually empty wall. But you are not using it. Install a narrow shelf that spans the width of your sink. Make it just deep enough for dish soap, a sponge holder, and a small plant.
This shelf keeps your counter dry because soap and sponges live above the sink. Drips fall back into the basin. You never wipe up soap puddles again. And you free up the corner of the counter where the soap used to sit.
Use a metal shelf so water does not warp it. Or use a piece of sealed wood with a slight tilt so water runs off.
Idea 13 Drawer Pegs for Utensils
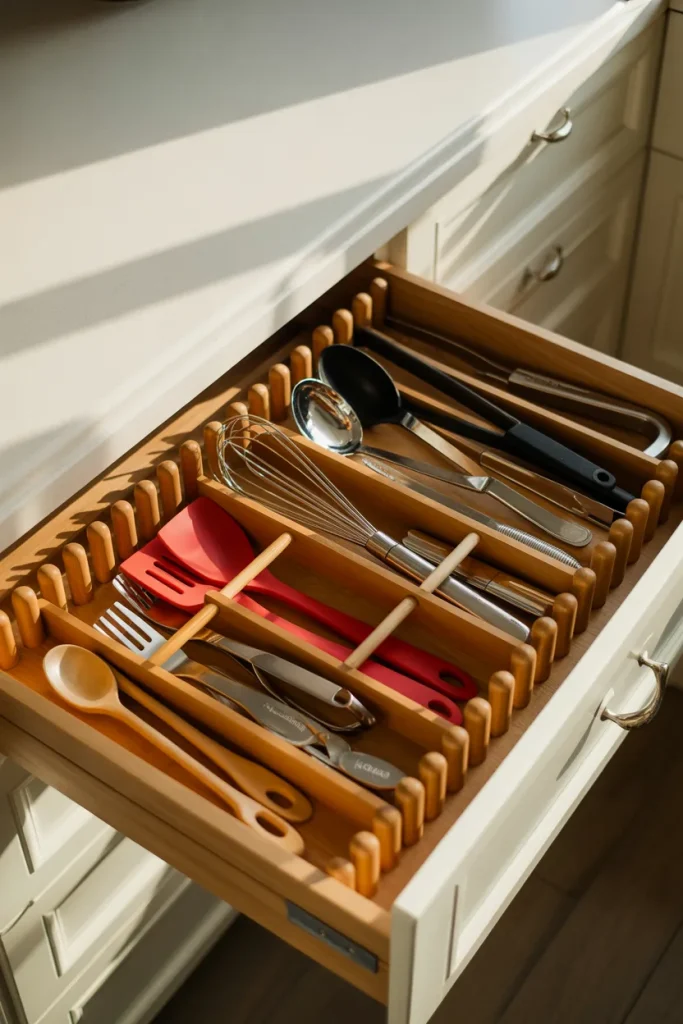
Deep drawers turn into utensil chaos. Spatulas and ladles tangle into a metal knot. You pull one and three come with it. Stop this with a grid of small wooden pegs. Drill holes in a thin plywood board. Glue in short dowels. Place the board inside the drawer.
Now each utensil has its own slot. Spatulas stand up in one row. Ladles in another. Whisk in a corner. You see every tool at once. Grab exactly what you need without the clatter.
You can buy fancy bamboo utensil organizers. But homemade dowels cost almost nothing and fit your exact drawer size.
Idea 14 Mason Jar Vacuum Lids for Bulk Goods
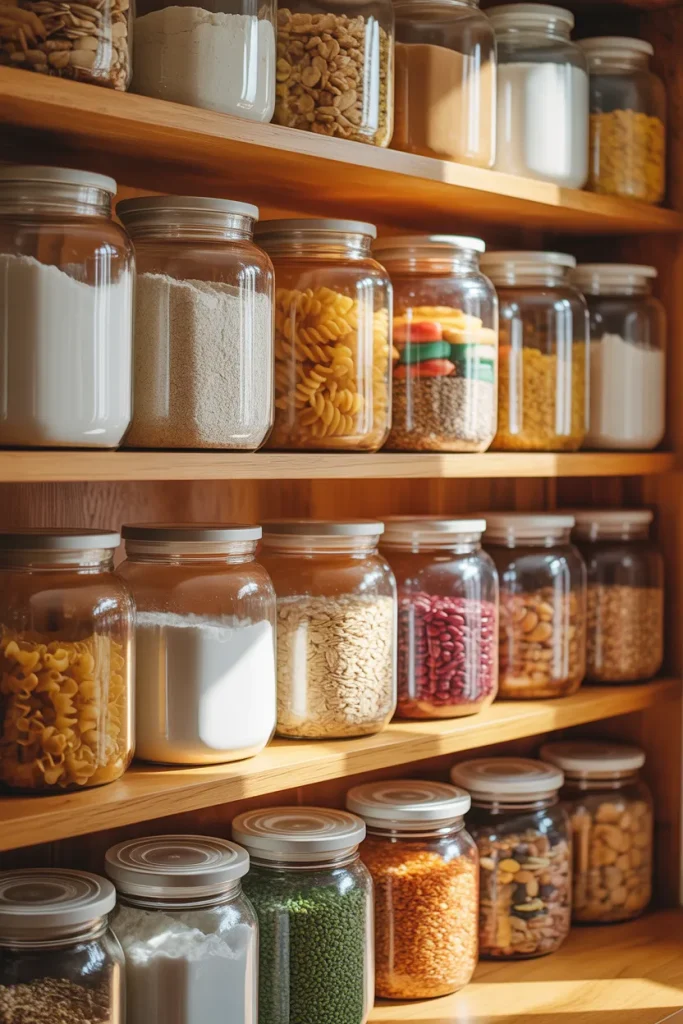
Bulk bins at the store save money. But those bags of flour and rice spill everywhere. Transfer your dry goods to mason jars. Then add a vacuum lid that pumps out the air. The jar seals tight. Bugs cannot get in. Flour stays fresh for months.
Line up the jars on a single shelf. Write the contents and date on each lid with a chalk marker. The jars look uniform and clean. You see when you are running low. And the vacuum seal means no weevils, no clumps, no waste.
A hand pump and four lids cost about twenty dollars. They pay for themselves the first time you do not throw away stale nuts.
Idea 15 The Door Track for Foil and Wrap
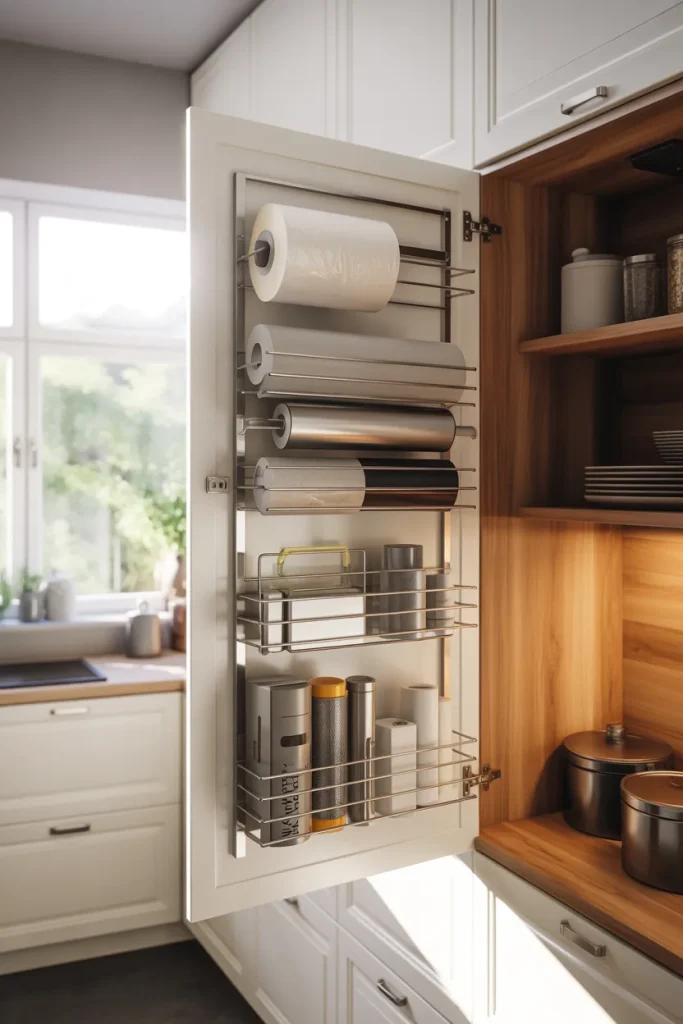
Boxes of aluminum foil, plastic wrap, and parchment paper never fit in a drawer. They are too long and too skinny. Install a tension rod on the inside of a cabinet door. Then hang a small wire basket from the rod. Slide the foil boxes into the basket standing on their ends.
Better yet, mount a simple file holder like the ones on a desk. Turn it sideways. Slide your foil boxes into the slots. Close the door. The boxes hide behind the door but stay reachable.
This works because the door is already there. You are not adding a new piece of furniture. You are just using an empty surface that you walk past every day.
How to Pick the Right Storage Ideas for Your Kitchen
You cannot do all fifteen at once. Pick two or three that match your biggest problem spots.
First, find your messiest zone. Is it under the sink? Use Idea 3 (tension rods for spray bottles). Is it deep lower cabinets? Use Idea 5 (drawers inside deep cabinets). Is it the corner cabinet? Use Idea 6 (lazy Susan hack).
Second, look at your empty walls. Do you have a gap between the fridge and counter? Use Idea 4 (rolling cart). Do you have bare wall above the sink? Use Idea 12 (over-the-sink shelf). Do you have ceiling space? Use Idea 9 (hanging fruit baskets).
Third, think about your budget. Under ten dollars buys tension rods (Idea 3) or magnetic strips (Idea 7). Under fifty dollars buys pegboard (Idea 2) or mason jar vacuum lids (Idea 14). Under one hundred dollars buys rolling carts (Idea 4) or slide-out trash racks (Idea 8).
Start with the cheapest fix that annoys you the most. That one small win will give you energy to tackle the next problem.
What to Avoid in Kitchen Storage
Some popular storage products are traps. Stay away from these.
Countertop spice racks. They take up valuable chopping space. Put spices on a wall strip or inside a door instead.
Mug trees. They collect dust and break easily. Hang mugs from hooks under a cabinet instead.
Stackable can organizers. They tip over when you pull a can from the bottom. Use a pull-out drawer or a tilted soda dispenser instead.
Drawer dividers that do not lock in place. They shift every time you open the drawer. Use dividers that screw down or use dowels that glue in place.
Anything with the word “as seen on TV.” Most of those gadgets break in a month. Stick to simple wood, metal, or glass.
Over-the-door shoe racks for food. They are not made for pantry items. The pockets rip. Use actual wire pantry racks instead
Simple Habits to Keep Your Kitchen Storage Working
New storage only helps if you keep it clean. Build these small habits.
Wipe down your pull-out drawers once a week. Crumbs fall into the slides and jam them. A quick vacuum keeps the drawer moving smoothly.
Rotate your mason jar dry goods every three months. Write the date on the lid. Use the oldest first.
Check your tension rods every two weeks. They slowly slip down. Give them a twist to tighten them back up.
Empty your under-sink trash slide-out every day. Do not let garbage pile up. A full trash bucket is heavy and hard to slide.
Vacuum your toe kick drawer twice a year. Dust bunnies collect underneath. A clean track means a smooth slide.
Real Numbers: How Much Storage You Can Add
These ideas add real space without remodeling. Here is what you gain.
- Toe kick drawer: 200 cubic inches of flat storage
- Pegboard on one cabinet door: space for 8 pot lids or 12 measuring cups
- Tension rods under sink: room for 6 to 8 spray bottles
- Rolling cart in fridge gap: 1 full square foot of shelf space
- Drawers inside deep cabinet: turns 24 inches of depth into 2 usable layers
- Magnetic spice strip: frees up 1 full cabinet shelf
- Hanging fruit baskets: clears 2 square feet of counter space
- Under-cabinet paper towel holder: clears 50 square inches of counter
- Mason jar vacuum lids: keeps bulk goods fresh 3 times longer
Add up just five of these fixes. You gain back an entire cabinet’s worth of space. No demo. No dust. Just a few hours of work.
Conclusion
Your kitchen is not broken. You just need better ways to hold your stuff. The fifteen ideas here give you smart, cheap, and fast fixes for every problem zone. The toe kick drawer catches flat baking sheets. The tension rods tame the under-sink mess. The magnetic strip turns spices into wall art. The rolling cart fills that stupid fridge gap.
Pick one spot that drives you crazy. Start there. Install the fix this weekend. Then stand back and open that cabinet. When nothing falls out and nothing clatters, you will feel a small win. That win leads to the next fix. And the next.
Soon your whole kitchen works for you instead of against you. You cook faster. You clean less. You stop losing lids under stacks of pots. A calm kitchen changes how you feel about dinner. It changes how you feel about your home.
So grab a tape measure and a screwdriver. Your first fix is waiting under the sink or behind that cabinet door. Go take back your space.