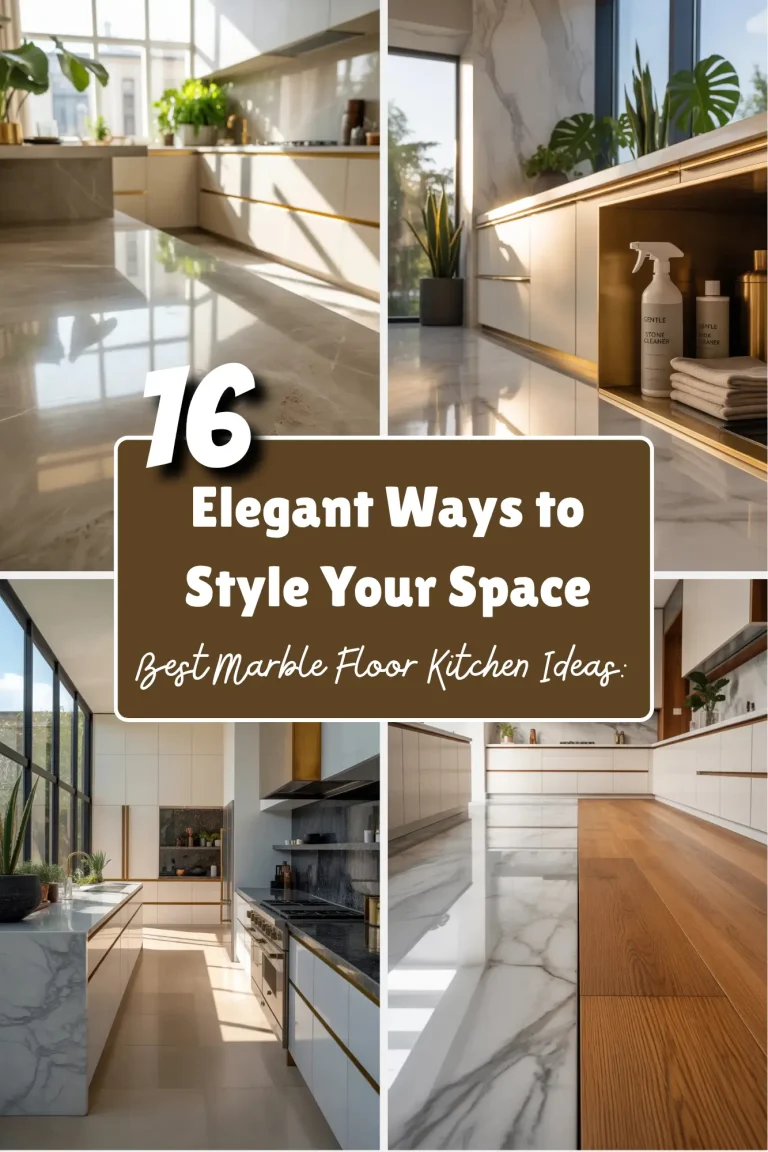
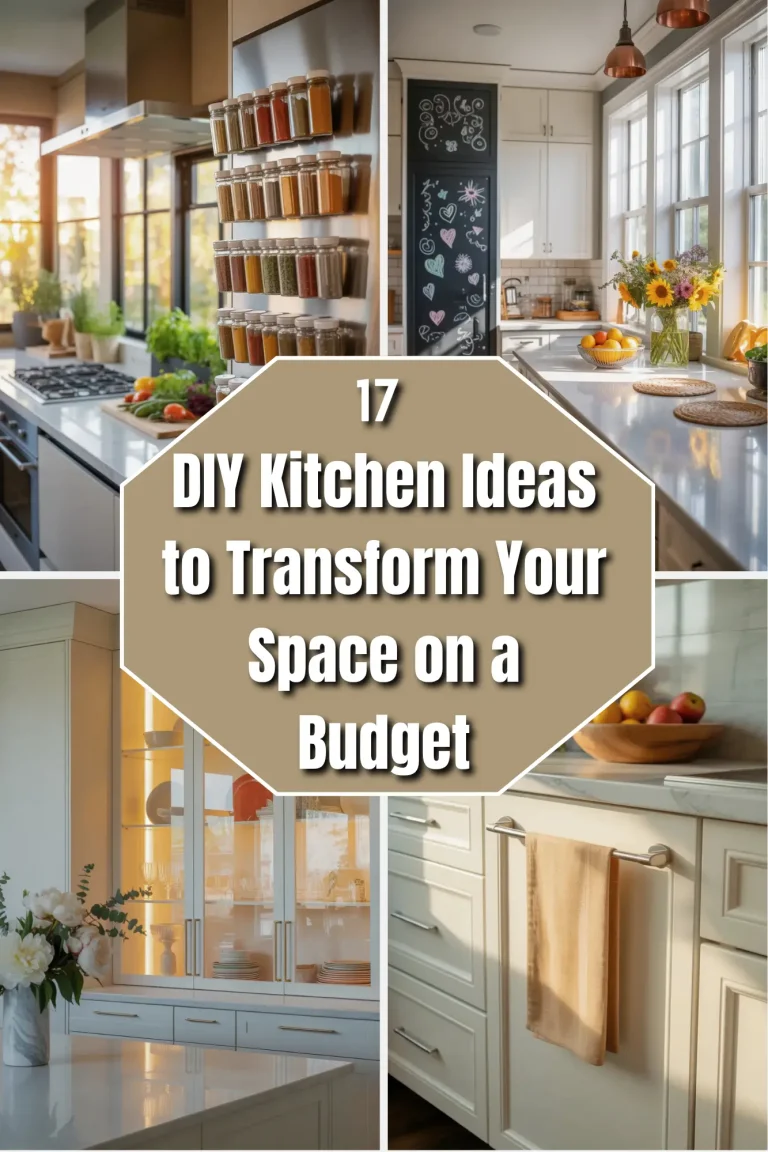
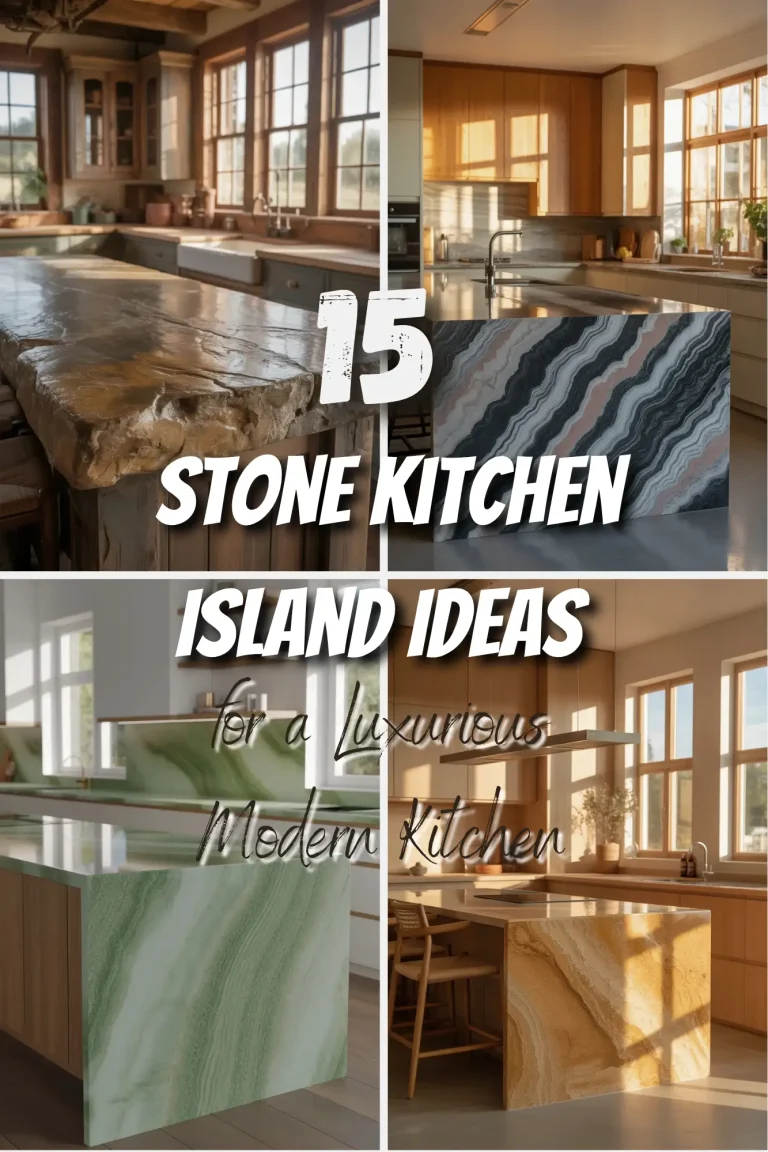
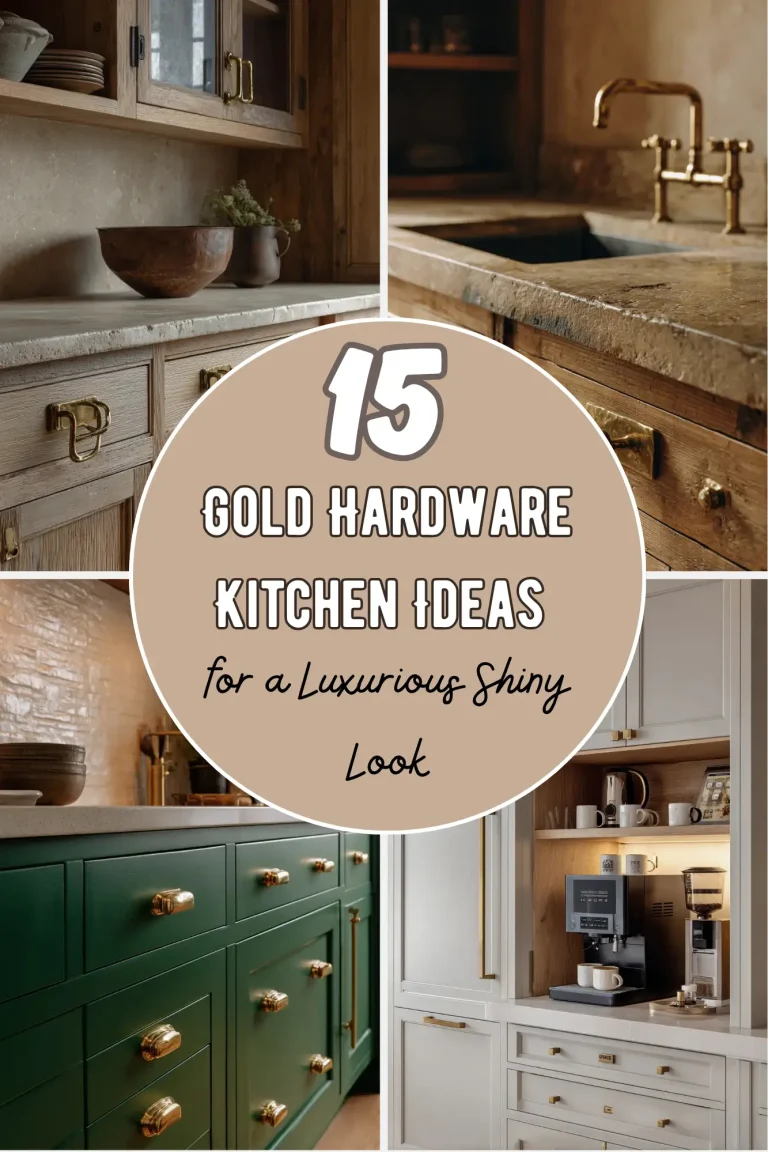
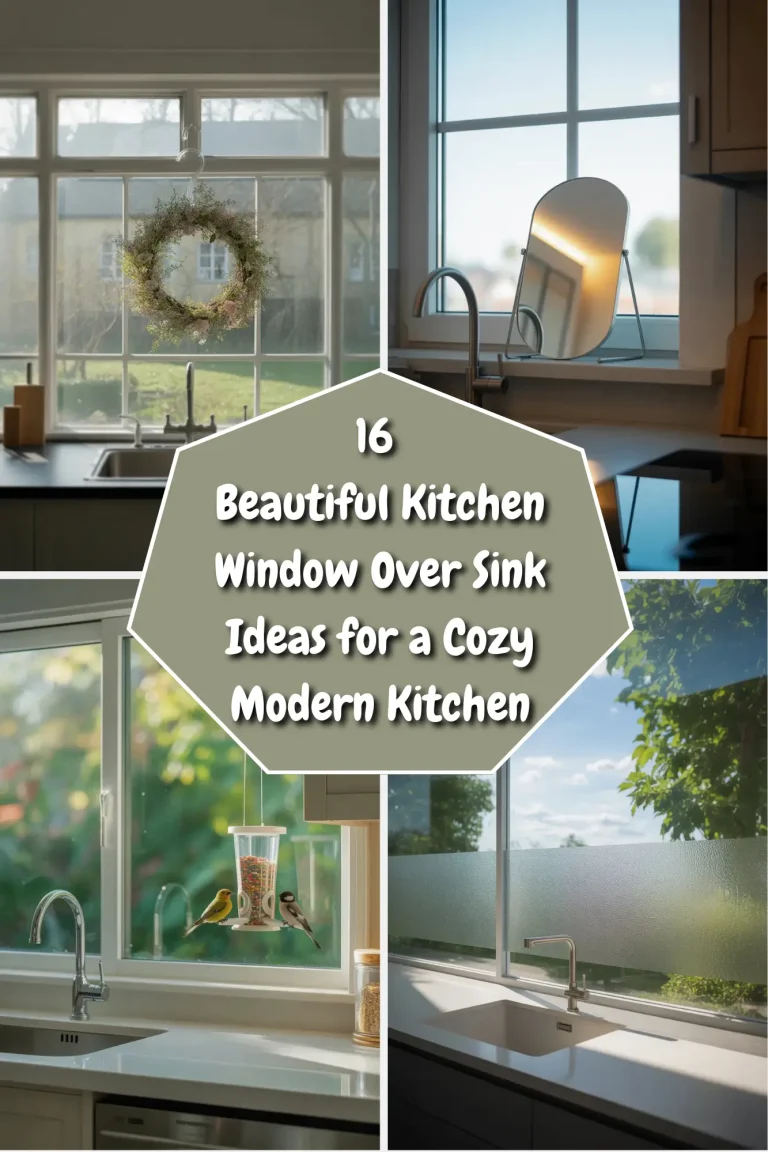
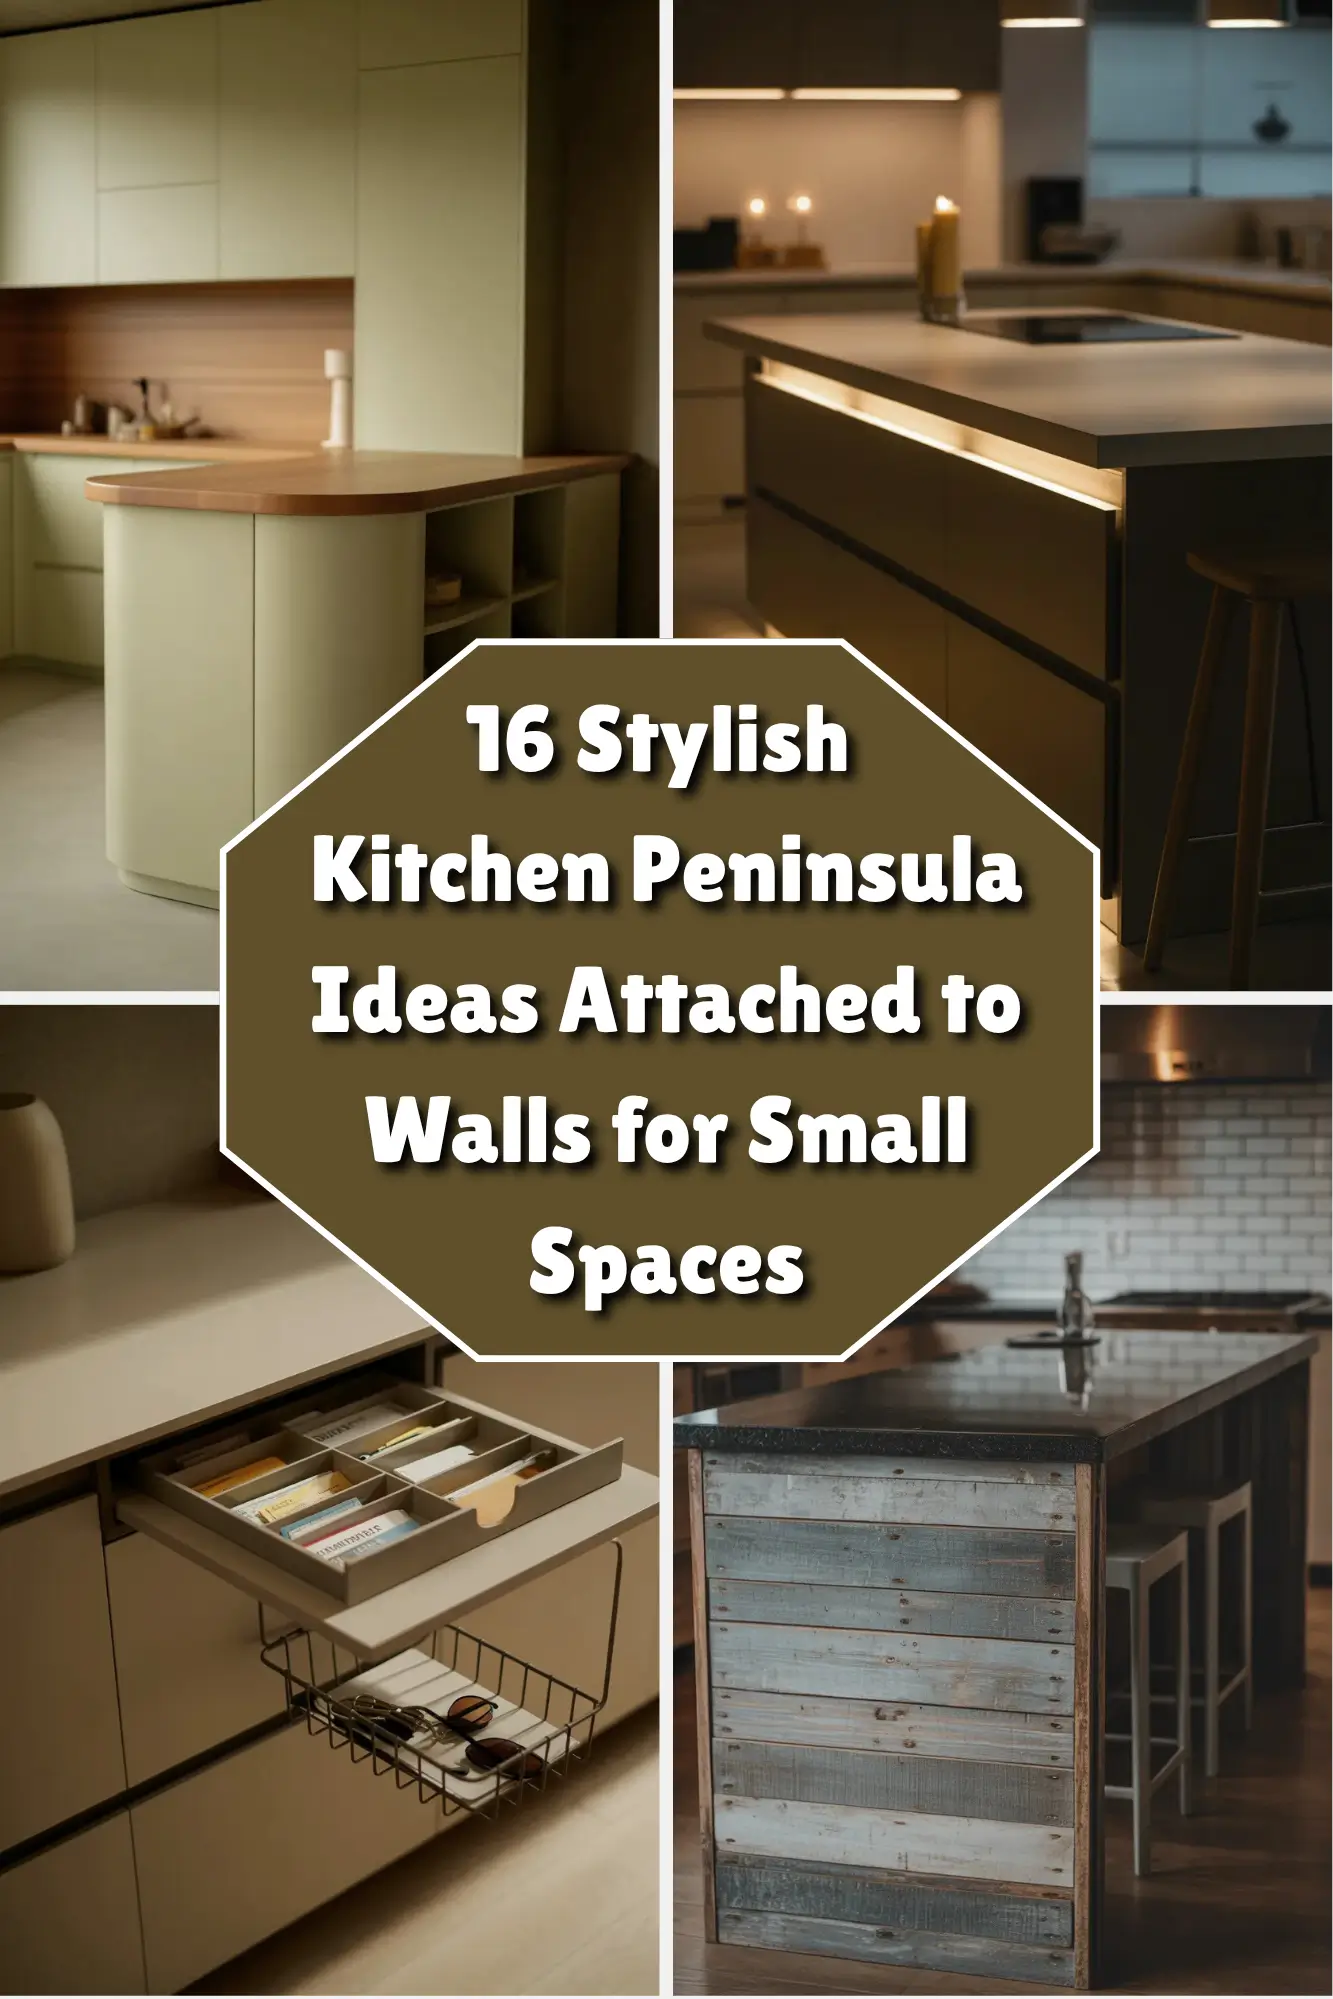
16 Stylish Ideas for Kitchen Peninsulas Attached to Walls
You walk into your kitchen every morning hoping for more counter space, but the room feels too narrow for an island. Sound familiar? Most people give up and live with clutter. But here’s the good news: a peninsula attached to your wall can fix that problem without needing a massive floor plan. Think of it as a half-island that sticks out from the wall like a friendly arm. It gives you extra room to chop veggies, eat breakfast, or chat with family while you cook. And the best part? You can make it look stunning with just a few smart choices. Let me walk you through 16 real-world ideas that turn a plain wall-connected counter into the star of your kitchen.
Why Attach a Peninsula to a Wall?
Before we jump into the ideas, let’s get clear on why a wall-attached peninsula works so well. Unlike a regular island that floats in the middle of the room, a peninsula anchors to one wall. That means you don’t need as much walking space around it. Your kitchen stays open, but you gain a ton of function. You can sit at it, store things under it, and even hide messes behind it. Builders and designers love them for small and medium kitchens. Now, let’s get into the 16 stylish ways to make yours shine.
Idea 1: The Breakfast Bar with Backless Stools
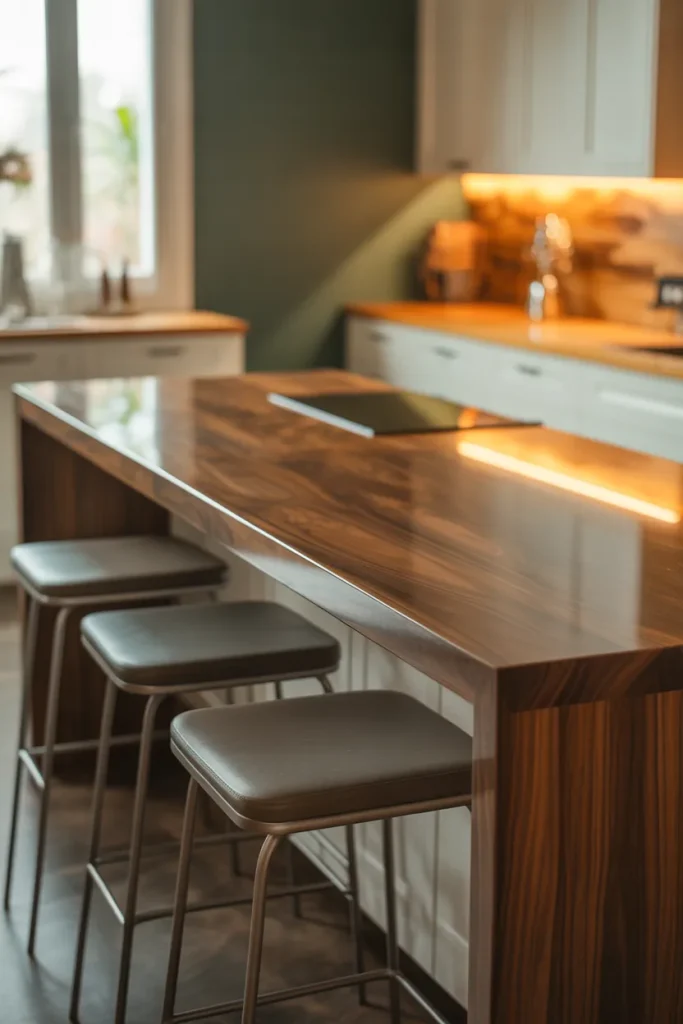
Picture a long, flat counter sticking out from your wall. Now imagine sliding three backless stools under it. That’s the breakfast bar peninsula. Keep the counter deep—about 24 inches from wall to edge—so knees fit under comfortably. Use a wood surface like oak or walnut to add warmth. Backless stools slide all the way underneath when no one sits there, so you don’t trip. Paint the wall behind it a different color, like deep blue or soft green, to make the peninsula pop. This idea works wonders in family kitchens where kids grab cereal before school.
Idea 2: Two-Tone Magic

Don’t settle for one boring color. Paint the wall side of your peninsula a light shade, like cream or pale gray. Then stain the eating side a dark wood tone or paint it charcoal. This two-tone trick fools the eye into thinking the space is bigger and more expensive. The light side blends with your cabinets. The dark side stands out like a piece of furniture. Use the same idea with materials: a white quartz top with a navy blue base. Every time you walk by, you’ll smile at how put-together it looks.
Idea 3: Hidden Charging Station
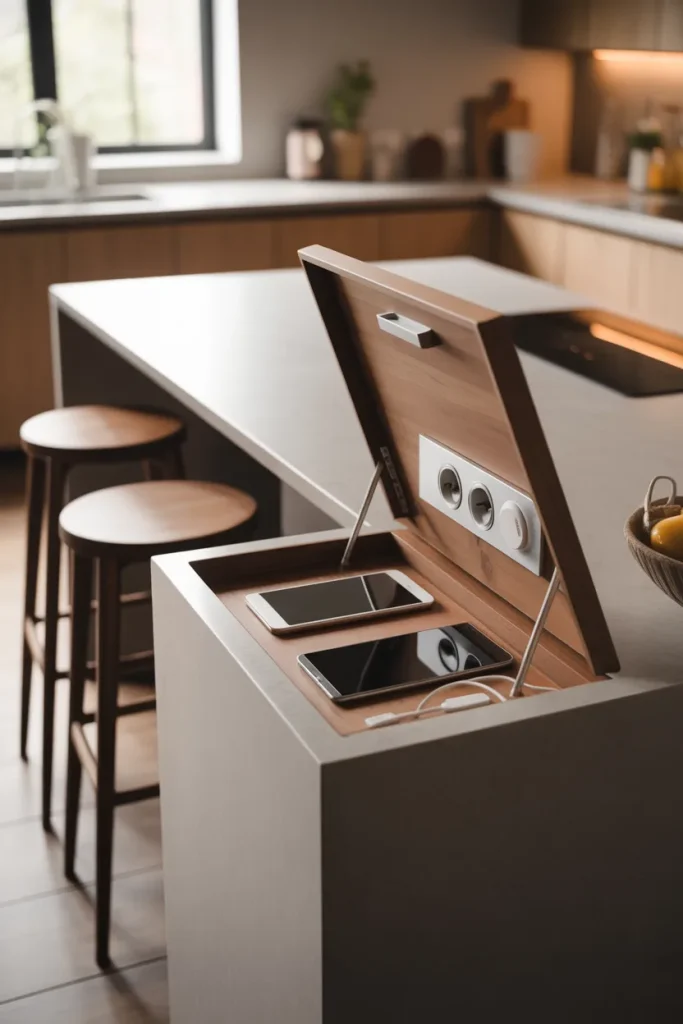
We all have phones, tablets, and maybe a smart speaker that need juice. Instead of hunting for outlets, build a charging station right into your wall-attached peninsula. Cut a small notch near the back where the counter meets the wall. Install two USB ports and one regular plug inside that notch. Cover it with a flip-up wooden lid. When you need to charge, lift the lid and drop your devices inside. Close the lid to hide cords completely. No more ugly wires dangling over your beautiful counter. Guests will ask how you did it.
Idea 4: Open Shelves Below, Not Closed Doors
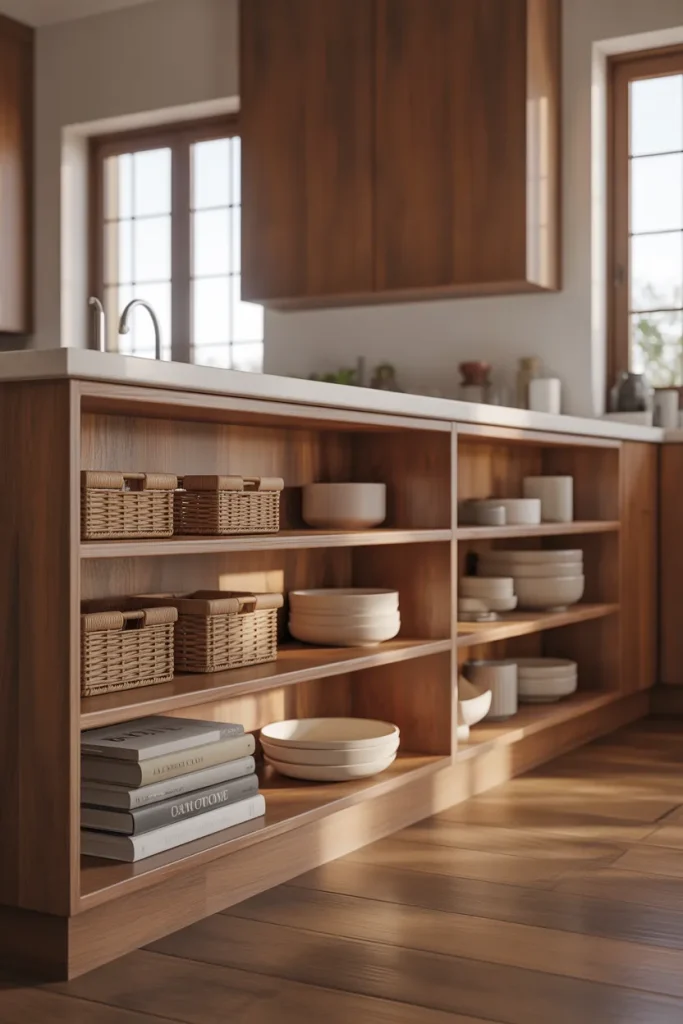
Most people build cabinets under their peninsulas. But closed doors make the space feel heavy and boxy. Instead, skip the doors and leave the lower part open. Stack pretty baskets, cookbooks, or white dishes on those open shelves. The light flows through, so your kitchen feels airier. You also save money on cabinet hardware. Stain the shelves the same color as your floor to tie everything together. On lazy Sundays, you can see exactly where the mixing bowls live without opening a single door.
Idea 5: The Waterfall Edge That Doesn’t Cost a Fortune
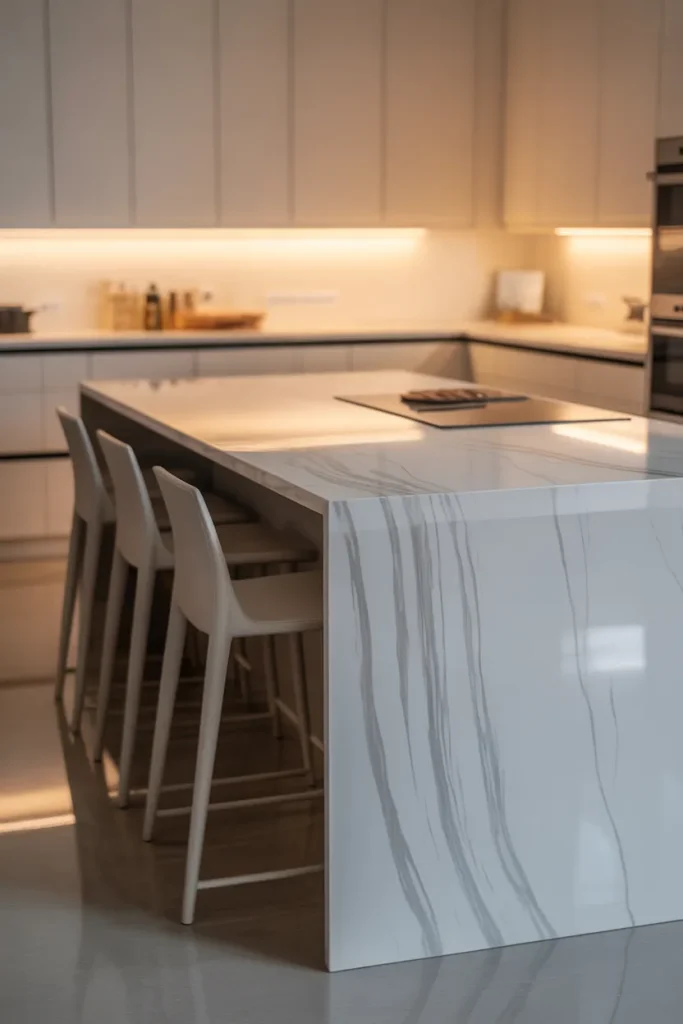
A waterfall edge means the countertop material drops straight down to the floor on the outer side. It looks expensive, and it usually is. But here’s a secret: use a laminate that mimics marble or concrete. Good laminates cost one-tenth the price of real stone. Wrap that laminate over the top and down the side. No one will know the difference from three feet away. Choose a crisp white laminate with faint gray veins. The waterfall creates a sleek, modern look that feels softer than sharp corners. Attach it to your wall, and suddenly your kitchen looks like a magazine spread.
Idea 6: Butcher Block Workstation
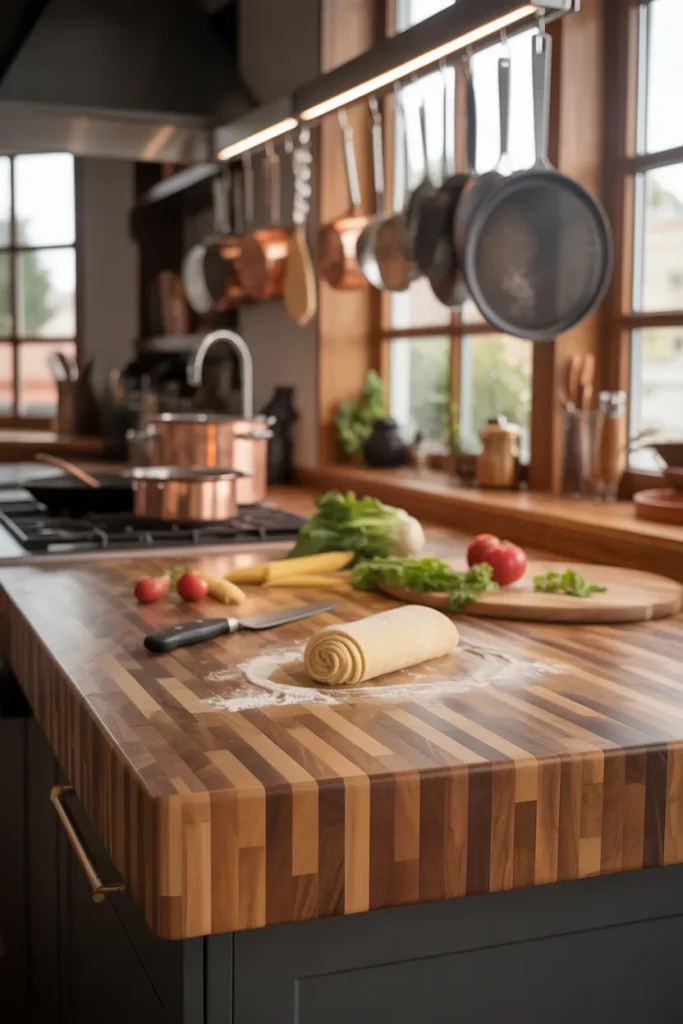
Not every peninsula needs to be for eating. Make yours a hardworking butcher block station instead. Use a thick maple or cherry top, about 30 inches deep. Keep the space underneath empty so you can slide a stool in when you want to sit, but most days you’ll stand there chopping onions and kneading dough. Install a small cutting board groove along the edge. Hang a thin steel rod above from the ceiling to hold pots and utensils. This setup turns your wall peninsula into a chef’s prep zone. It’s messy in the best way—the way real cooking happens.
Idea 7: Contrasting Legs for Vintage Charm
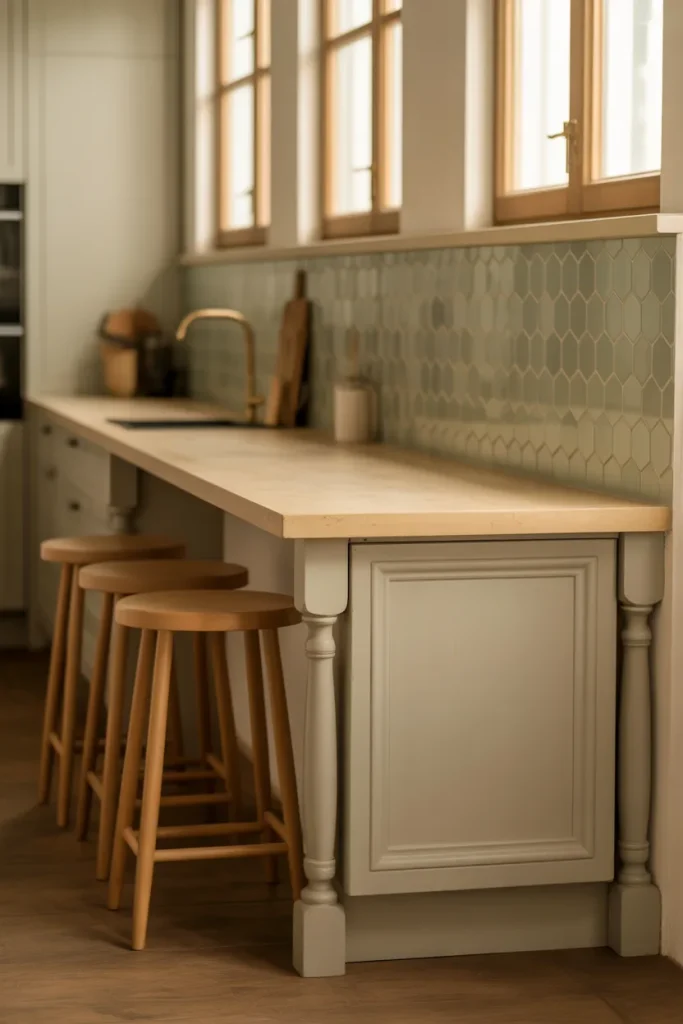
Attaching to the wall doesn’t mean the front edge has to float like a diving board. Give it personality by adding two turned wooden legs at the outer corners. Look for legs with curves like old farm tables. Paint them cream or leave them natural oak. The legs take weight off the wall bracket and add a cozy, vintage feel. Pair these legs with a simple tile backsplash behind the peninsula. Use small hexagon tiles in a soft blush or sage. Every time you pull up a stool, you’ll feel like you’re sitting at a country inn.
Idea 8: Deep Drawers Instead of Cupboards
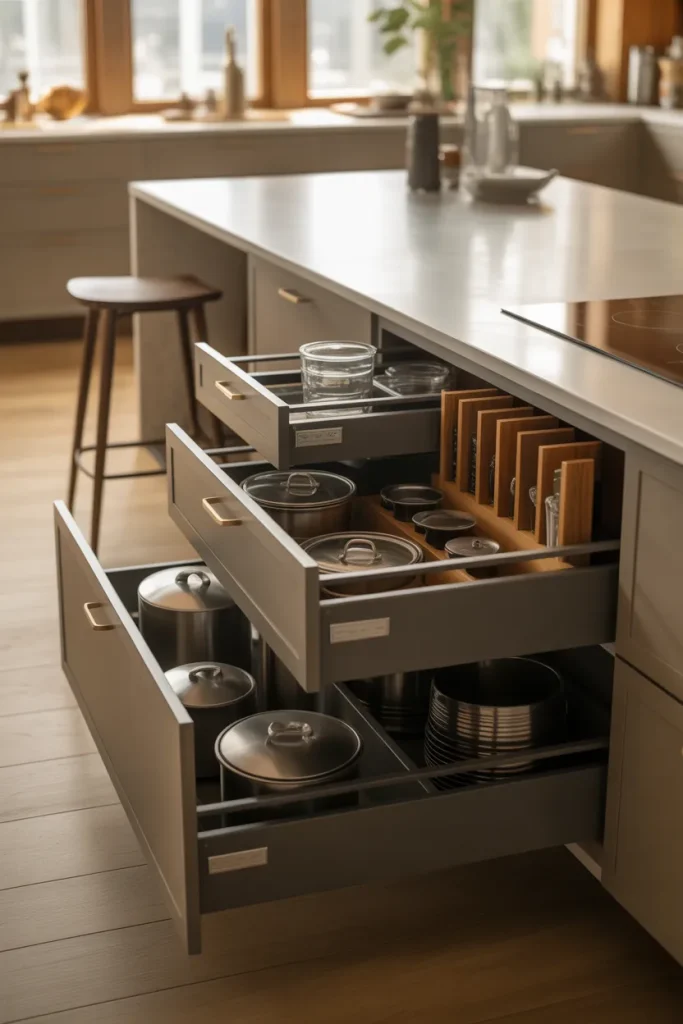
Cupboards under a peninsula waste space because you have to crawl inside to reach the back. Swap them for three or four deep drawers on heavy-duty glides. Put pot lids in the top drawer. Stack mixing bowls in the second. Store small appliances like the hand mixer in the third. The drawer faces should match your other cabinets, but add leather pulls or brass handles for a rich touch. Deep drawers roll out smoothly, so you see everything at once. This tiny change alone will make you wonder why you ever used cupboards.
Idea 9: The Homework and Coffee Combo
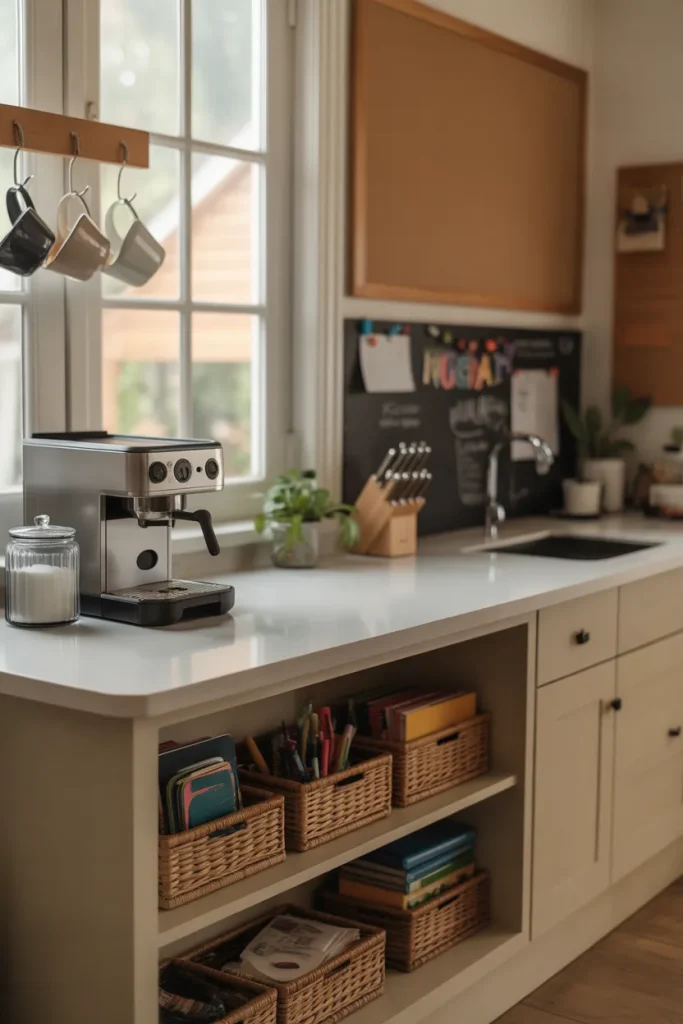
Make your peninsula a spot where two totally different things happen. On one half, keep a coffee station with a small espresso machine and a jar of sugar. On the other half, leave clear space for a kid’s homework or your laptop. Build a small shelf underneath to hold school supplies and coffee filters. Use a durable quartz top that wipes clean from both coffee spills and pencil marks. The wall behind gets a corkboard or chalkboard paint for notes and reminders. Now your kitchen runs the whole house—not just meals.
Idea 10: Mixed Materials on the Same Counter
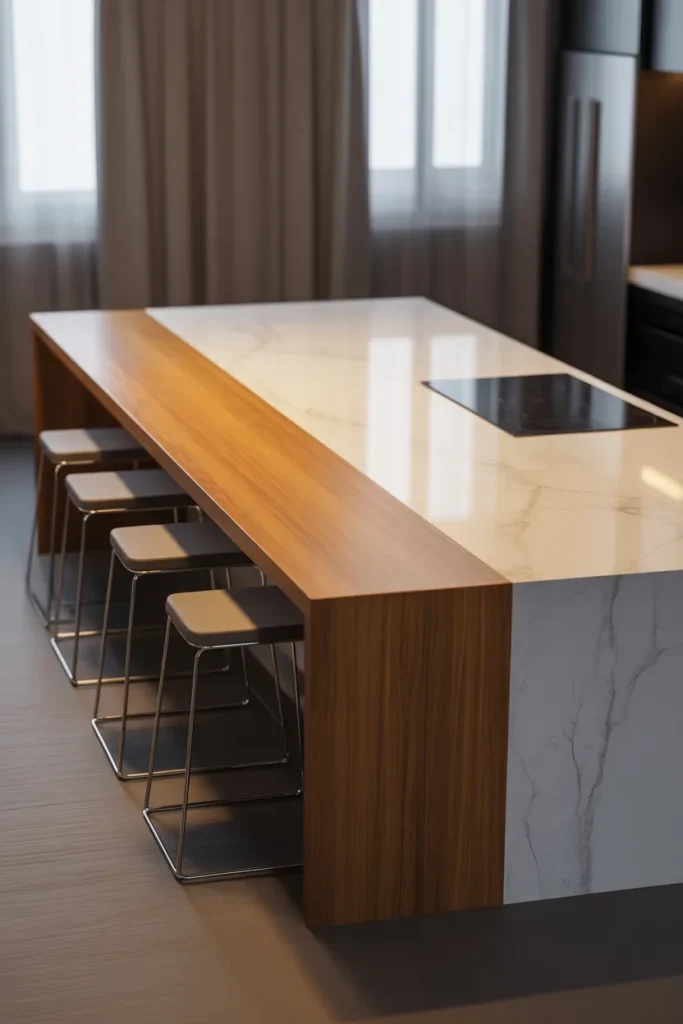
Stick to just one material, and things get boring fast. Mix two instead. Use a 12-inch strip of warm wood along the front edge where people eat. Fill the rest of the peninsula with cool white quartz or stainless steel. The wood feels nice under your elbows when you lean in. The metal or quartz stays stain-proof under hot pans. To attach this to your wall, make sure the back edge has a solid lip that ties both materials together. This trick looks like you hired a high-end designer. Your friends will peek under the counter trying to figure out how you did it.
Idea 11: Peninsula That Turns Into a Table
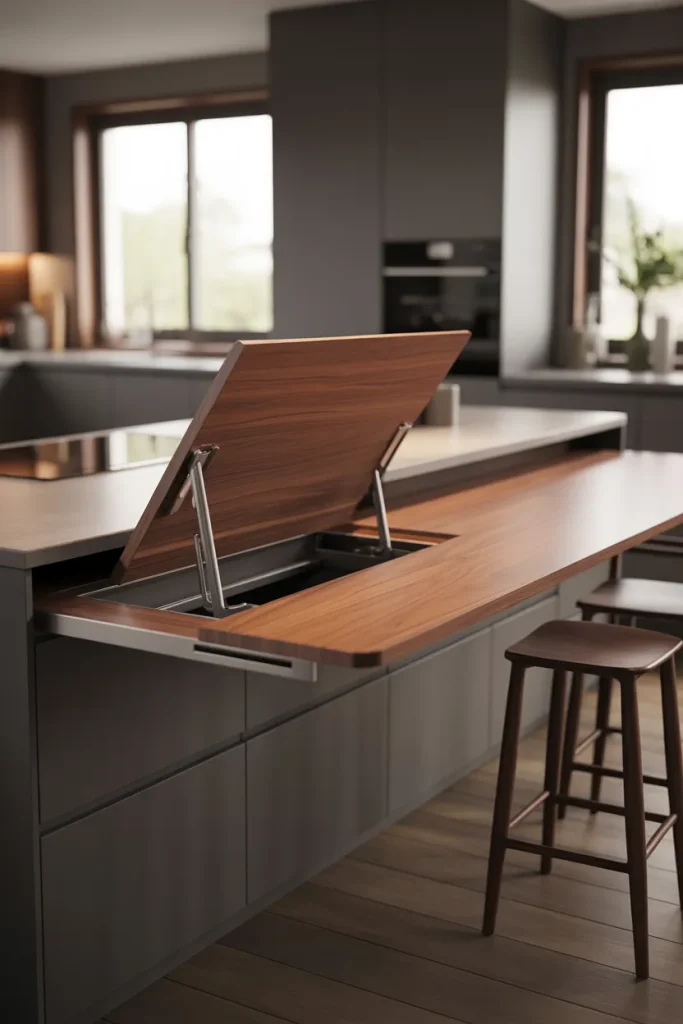
What if your peninsula could grow longer when you need it? Install a pull-out leaf under the main countertop. When it’s just your family, the leaf stays hidden. When guests come over for Thanksgiving, pull the leaf out and prop it on a fold-down leg. You instantly add two extra feet of seating. The leaf stores vertically against the wall side when not used. Make the leaf from the same wood as the main top so it blends in. This idea saves space 360 days a year and saves your dinner party on the other five.
Idea 12: The Short Order Cook’s Peninsula

If you love making pancakes on Saturday mornings, design your peninsula for cooking. Extend the countertop 36 inches from the wall. Place a small induction cooktop right on the surface near the wall. Leave the outer half for plates and toppings. Run the electrical cord down through a hole in the counter and plug it into a wall outlet hidden in the base. Now you can flip eggs while talking to the family sitting right across from you. Add a slim rail above to hold spatulas and a salt pig. No more running back and forth between stove and table.
Idea 13: Rustic Barnwood Siding on the Front
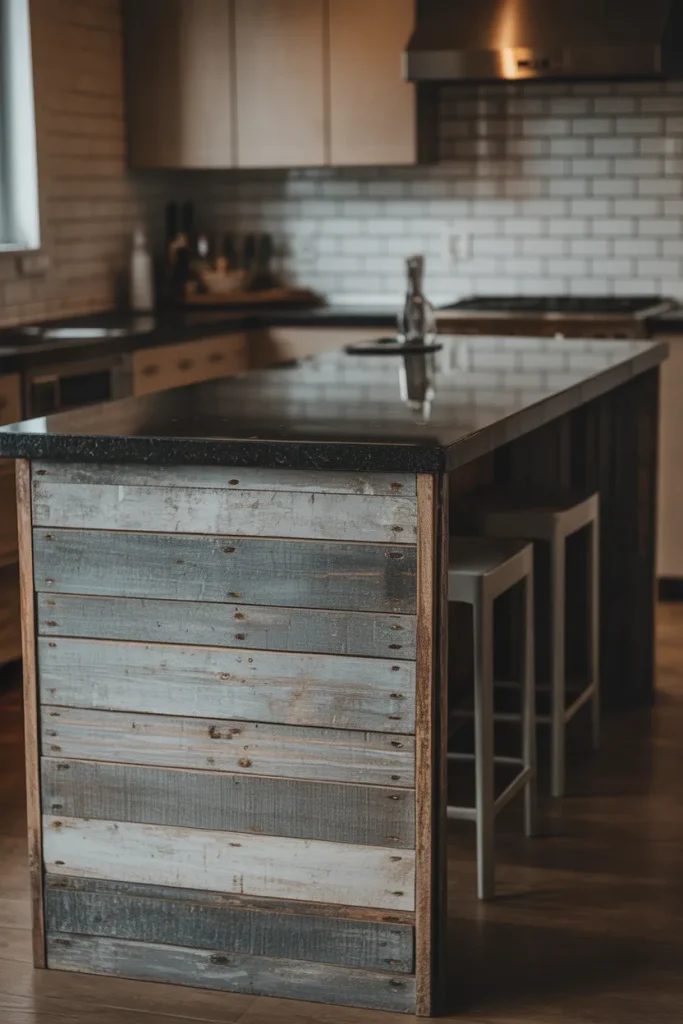
The front face of your peninsula—the part people see when they sit down—deserves love. Cover it with reclaimed barnwood planks. Look for old wood with nail holes and gray-silver weathering. Attach the planks horizontally or vertically, but vertical makes the room feel taller. Seal the wood with a matte clear coat so it doesn’t snag clothes. Pair this rustic front with a sleek black granite top for contrast. The wall behind the peninsula stays simple, maybe white subway tile. This mix of rough and smooth feels honest and lived-in. Dog scratches and kid scuffs only add to the story.
Idea 14: Peninsula With a Downlight Glow
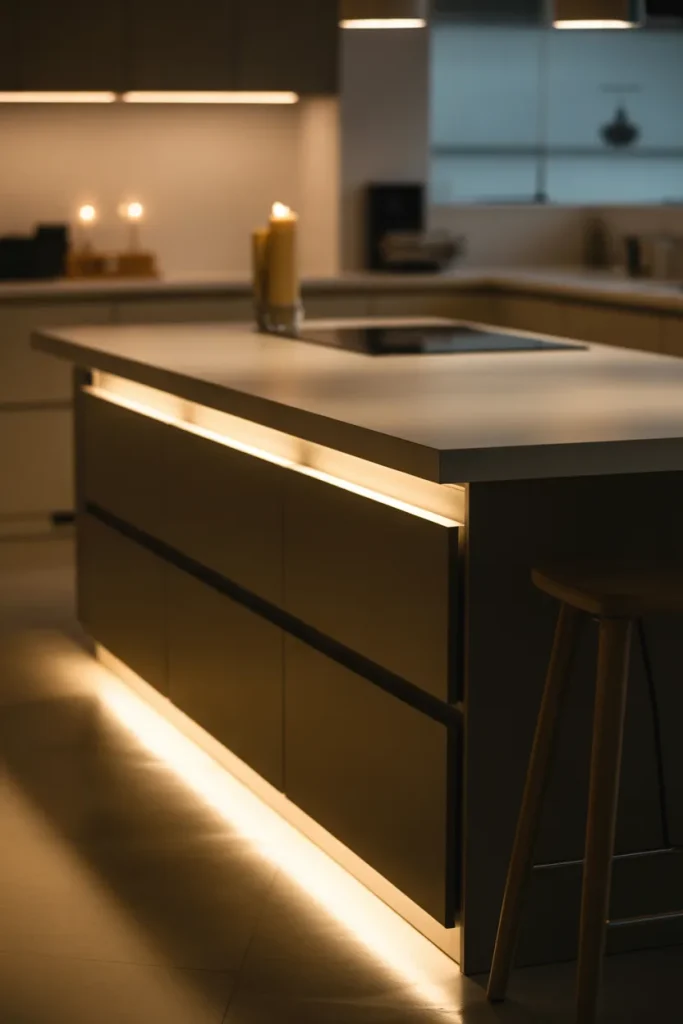
Most people light their peninsulas from above with pendant lights. That works fine. But try something smarter: mount a thin LED strip under the front lip of the counter pointing down. The light hits the floor and creates a soft glow without shining in anyone’s eyes. Use warm white LEDs at 2700 Kelvin so the light looks like candlelight. Hide the strip in a small aluminum channel so you don’t see individual dots. Turn this light on at night while you make tea. The whole kitchen feels calm and floaty. It’s the coziest trick in the book.
Idea 15: The Folder and Filer Peninsula
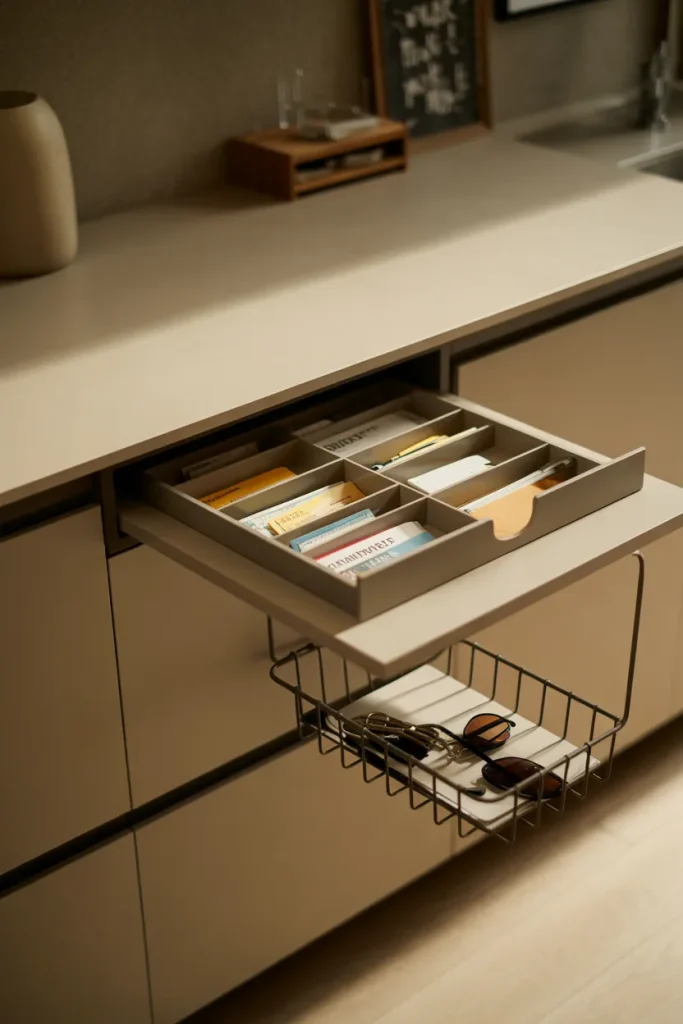
Not every kitchen needs another eating spot. Some need organization. Build your wall-attached peninsula with a shallow upper section that flips up like a desk lid. Under the lid, store mail, coupons, and the kids’ permission slips. Use metal file dividers to keep things sorted. The main counter stays clear for cooking. On the front of the peninsula, hang a small wire basket for keys and sunglasses. This setup turns your dead wall space into the command center of your home. No more paper piles on the actual kitchen counters. You’ll find bills the day they arrive instead of three weeks later.
Idea 16: Curved Front for Soft Safety

Sharp corners hurt hips and scare parents of toddlers. Give your peninsula a curved front instead. You can order a butcher block or laminate counter with a gentle wave along the outer edge. The curve directs people around the peninsula rather than into it. Visually, a curve feels much softer than a boxy corner. Match the curve with a rounded base and rounded shelves underneath. Paint the whole thing a creamy off-white so it almost disappears. This is the quietest, kindest peninsula you can build. It says, “Relax. No one’s getting bruised here.”
How to Choose Your Wall-Attached Peninsula
You just read 16 strong ideas. But which one fits your kitchen? Start by measuring your walkway. Leave at least 42 inches between the front of your peninsula and anything else—cabinets, fridge, or wall. If you have less space, skip seating and build a narrower prep peninsula. Next, look at your kitchen’s style. A farmhouse kitchen loves the barnwood and curved front. A modern kitchen craves the waterfall edge and hidden charging station. A busy family needs the homework combo or the folder and filer. Write down your top three favorites from the list. Then mix features. You can take the deep drawers from idea 8 and add the LED glow from idea 14. That’s the beauty of building your own.
Common Mistakes to Skip
Even smart people mess up peninsulas. One big mistake: making the overhang too short for knees. For seating, let the counter stick out at least 15 inches past the base cabinets. Another mistake: forgetting to brace the wall side. Always screw a 2×4 ledger board into wall studs before setting the counter. Third mistake: using cheap hinges on flip-up sections. Spend an extra twenty dollars on heavy-duty hardware. Last mistake: matching everything perfectly. The best peninsulas have one surprise element—a different color, a weird curve, a piece of old wood. Don’t be afraid of one weird detail.
Real Talk About Cost
You can build a basic wall-attached peninsula for under 300 dollars using plywood and a laminate top. A mid-range version with quartz, drawers, and nice legs runs 800 to 1,500 dollars. A high-end waterfall with induction cooktop and barnwood siding might hit 3,000 dollars. Here’s the truth I’ve learned from remodeling three kitchens: the middle option gives you 90 percent of the happiness for 30 percent of the price. Spend your money on the countertop surface and the front face. Save money on the internal frame and basic legs. No guest has ever said, “Wow, look at those pocket screws.”
Keeping It Clean
A peninsula attached to a wall collects crumbs where the counter meets the wall. Run a bead of silicone caulk in that corner to make wiping easy. Use a small hand vac once a week for drawer tracks and the LED strip channel. If you have open shelves, wash your baskets every three months. Protect wood surfaces with a food-safe mineral oil once a month. For quartz or granite, use nothing but soap and water. Harsh cleaners eat the sealant. Clean from the wall outward, pushing crumbs onto the floor, then sweep. Five minutes of daily wiping keeps your peninsula looking new for ten years.
Conclusion
A kitchen peninsula attached to a wall is not a compromise. It’s a smart move that gives you more counter space, more storage, and more seating without eating up your floor. You don’t need a giant island. You don’t need to knock down walls. You just need one straight wall and one good idea from this list. Start small: add open shelves and a butcher block top. Or go bold: build a curved front with hidden charging and a pull-out leaf. Either way, your kitchen will work harder for you every single day. Pick your favorite idea from the 16 above. Measure your space this weekend. Buy your materials next payday. And by the end of the month, you’ll be sitting at your own wall-attached peninsula, drinking coffee, and wondering why you didn’t do this years ago. Now go make your kitchen easier, prettier, and smarter—one peninsula at a time.