15 Living Room Wall Panel Design Ideas (That Actually Look Good)
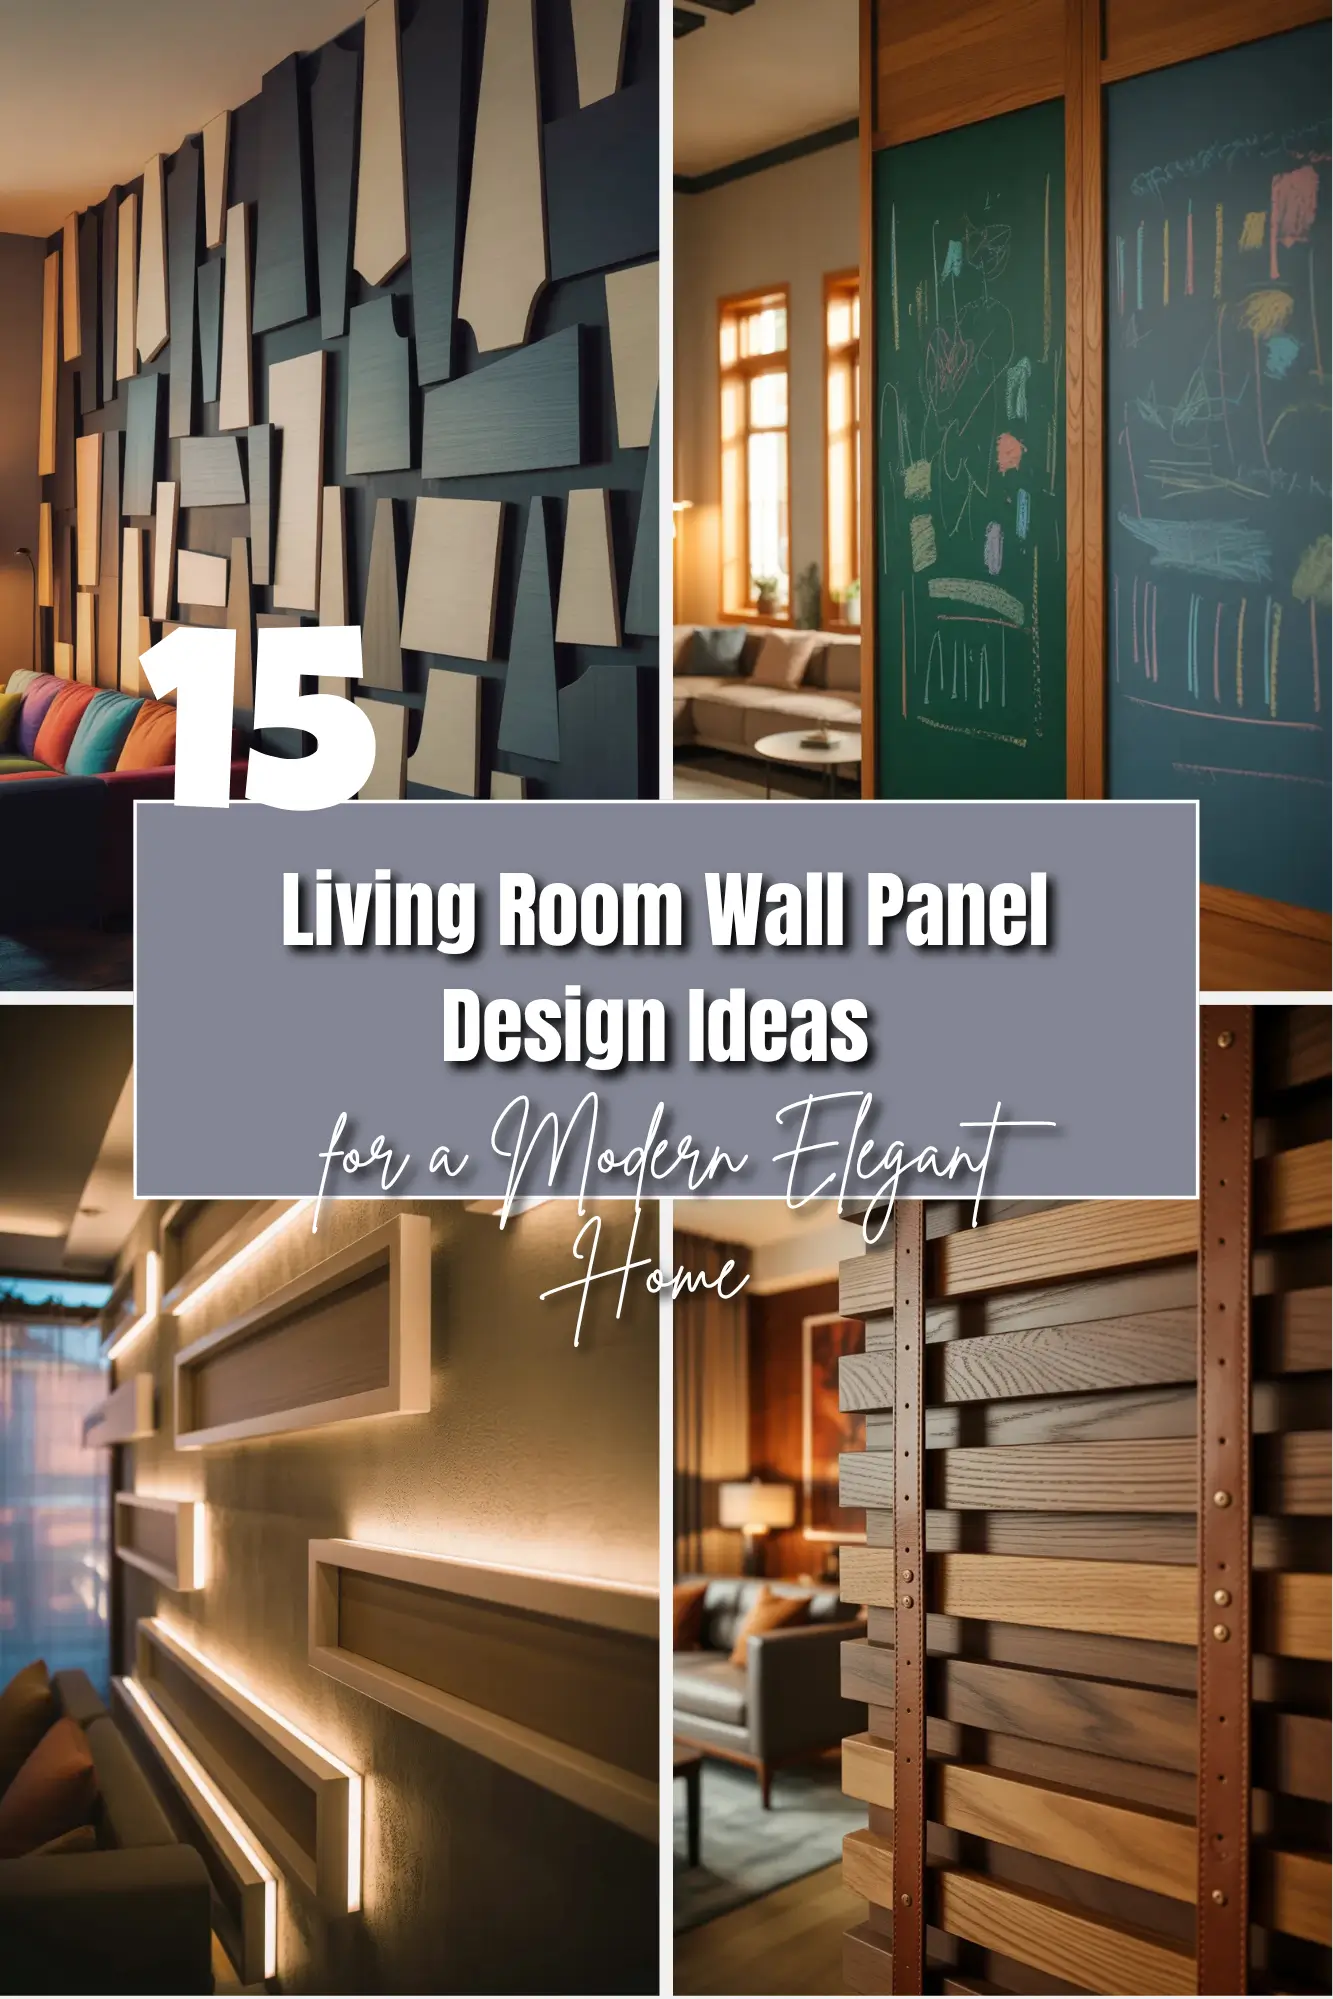
Why mess with your walls at all? Because flat drywall is forgettable. Walk into any new apartment. Every wall looks the same. White or beige. Smooth and lifeless. Your brain stops seeing it after a week.
Wall panels fix that. They add shadows, lines, and depth. Think of them like the ribs on a leaf. Without the ribs, a leaf is just a green blob. With them, it has shape and character. Same thing with walls.
Panels also hide flaws. Got a crack or a bump? A panel covers it. Want to make your ceiling look higher? Vertical panels pull the eye up. Want a cozy den feel? Dark horizontal panels spread the room out.
Best of all, you don’t need a contractor. Many of these ideas use MDF boards, wood strips, or even foam panels you can glue on. I’ll tell you which ones are beginner friendly and which need a little more skill.
Now let me walk you through 15 wall panel designs that work in real living rooms. Not magazine dreams. Real homes.
1. Vertical Shaker Panels for Taller Looking Walls

Shaker panels are the blue jeans of wall design. Simple, classic, and they go with everything. A Shaker panel is just a flat center board surrounded by thinner strips of wood. When you line up several of them vertically, your wall grows tall.
Why does this work? Your eye follows the lines from floor to ceiling. That makes the ceiling feel higher. Even if your living room has low eight foot ceilings, vertical Shaker panels trick the brain.
How to do it cheap: Buy thin MDF strips at any hardware store. Cut them to the height of your wall. Leave a two inch gap between each strip. Paint everything the same color as your wall. The shadows between the strips create the panel look without expensive wood.
Best colors: White, off white, or very light gray. Dark colors shrink the space.
Real talk: This idea works best on one accent wall. Don’t do all four walls or your room becomes a cage. Pick the wall behind your sofa or TV.
2. Horizontal Plank Panels to Widen a Narrow Room

Got a long, skinny living room? Horizontal planks are your friend. They work like stripes on a shirt. Horizontal stripes make you look wider. Same for a room.
These panels look like old barn wood or modern ship lap. But you don’t need rustic wood. You can use smooth pine boards or even medium density fiberboard cut into long strips. Mount them horizontally across your wall. Leave a small gap between each board for shadow lines.
One of my favorite tricks is to run horizontal planks halfway up the wall. Then paint the upper half a lighter color. That gives you a chair rail effect without a real chair rail. It also breaks up the wall so it doesn’t feel like a tunnel.
Keep the wood natural and seal it with clear wax for a soft shine. Or paint it the same color as your trim for a cleaner look.
Warning: Don’t use super wide planks on a small wall. Six inches wide is plenty. Wide planks make the room feel squished.
3. Grid or Box Panels (Also Called Wall Frames)
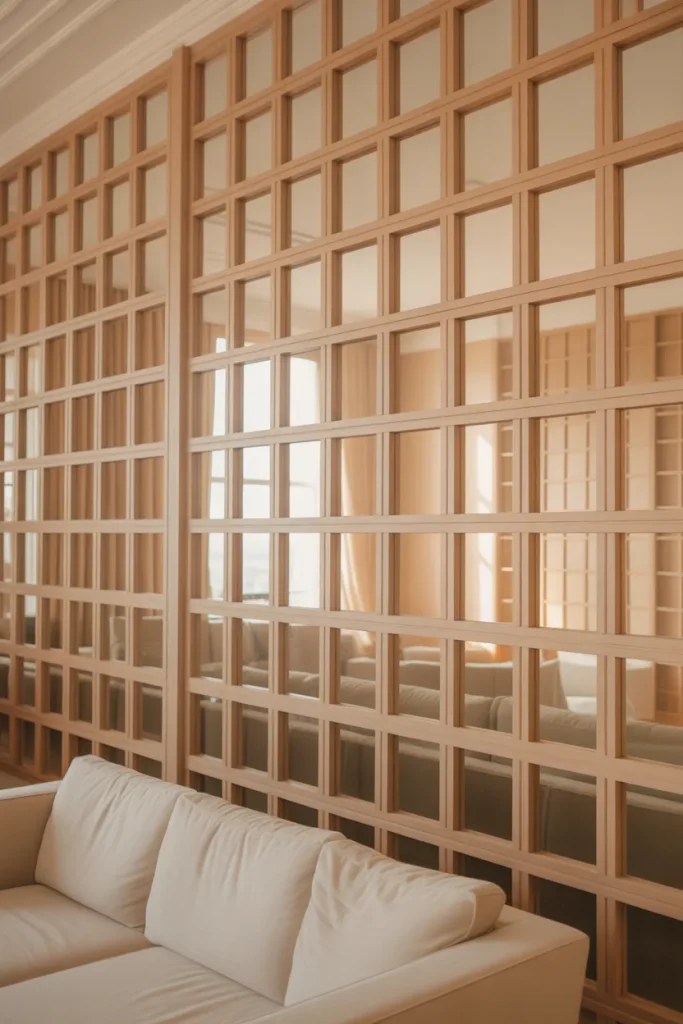
This design feels fancy but costs very little. You make squares or rectangles on your wall using thin wood strips. Each box sits inside a frame. The result looks like old English libraries or fancy Paris apartments.
How to build it: Measure your wall. Decide how many boxes you want. Most people do three boxes across and two or three down. Each box should be about two feet wide and three feet tall. Attach thin wood strips (half inch thick and two inches wide) directly to the drywall. Paint everything the same color.
The magic happens when you paint the wall and the strips the same color. The boxes pop out as shadows, not as different colors. That keeps the look clean and modern.
Best for: The wall behind your sofa or the wall your TV hangs on. Don’t put grid panels behind a bookshelf. That’s just silly.
Pro tip: Use a laser level. Crooked boxes will drive you crazy every time you walk in the room. Trust me.
4. Wide Slat Wood Panels (The Modern Trend)

You’ve seen these on Instagram. Long vertical wood slats spaced about an inch apart. Sometimes the slats are very thin. Sometimes they’re wide, like two inches across. Wide slats feel bold and modern.
These panels are great for one reason: texture. The gaps between slats make deep shadows that change throughout the day. Morning light makes long shadows. Afternoon light softens them. The wall actually moves with the sun.
You can buy felt backed slat panels that come in four foot by eight foot sheets. Glue them right to the wall. Or build your own using one by two boards from the lumber yard.
Color ideas: Natural oak or walnut looks warm. Black slats on a white wall looks dramatic and expensive. White slats on a white wall looks subtle and beachy.
Where to put it: Behind your TV. The slats break up the black screen box. Also good on a small entry wall that leads into the living room.
5. Raised Center Panels for a Traditional Vibe
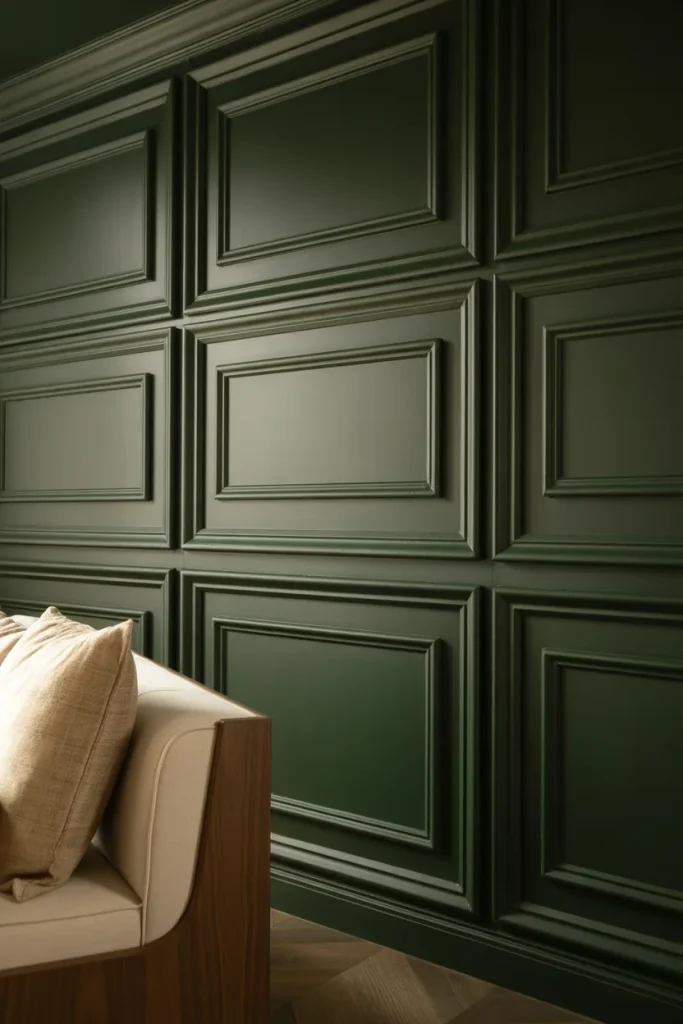
Raised panels are the opposite of flat panels. The middle section sticks out toward you. This is what you see on fancy front doors and old china cabinets. It says “this room has history.”
You can buy raised panel inserts at home improvement stores. They come as ready made squares. You just nail them into a frame you build on your wall. Or you can route the edges of a thick board to make your own raised shape.
Honest warning: This is not a beginner project. Cutting perfect angles and making the raised part look smooth takes skill and tools. But if you have a friend who woodworks, buy them pizza and borrow their talent.
Use raised panels on just one small section of wall. Maybe behind a reading chair or above a fireplace. Covering a whole wall with raised panels feels like a church. Too much.
Paint them a deep color like navy blue or forest green. The raised parts catch the light and stand out.
6. Beadboard Panels for Cottage Charm
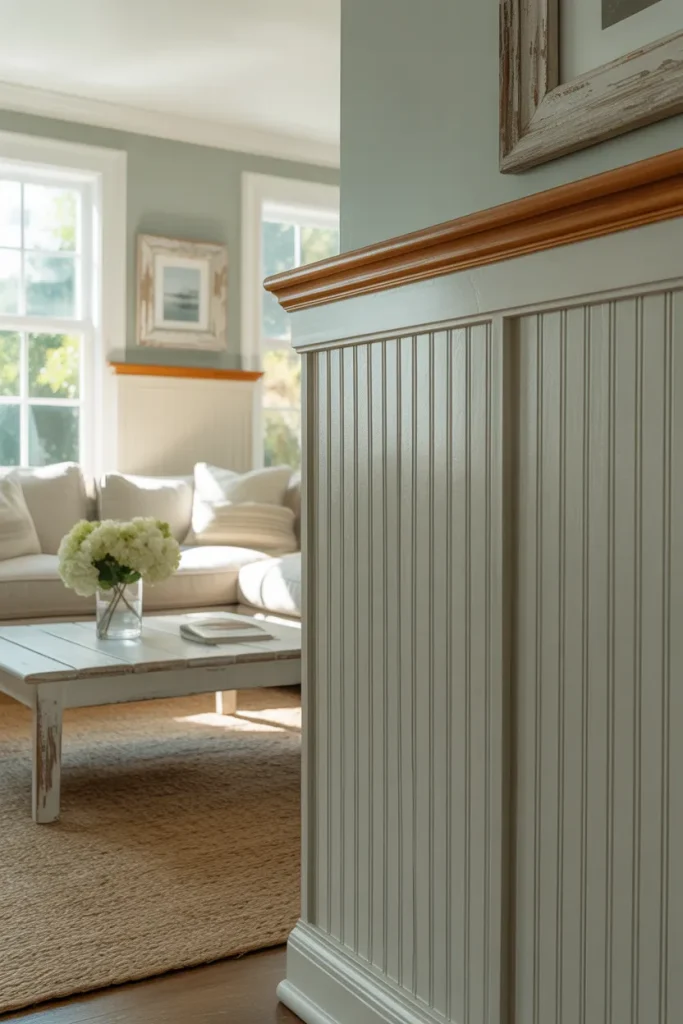
Beadboard is that wood paneling with the little vertical grooves. Each groove looks like a row of tiny beads stacked together. It reminds people of old farmhouses and beach cottages.
The good news: Beadboard comes in big four by eight foot sheets. You cut it with a circular saw and glue or nail it to your wall. One sheet covers a large area fast. The bad news: cutting around outlets and windows takes patience.
Beadboard looks best on the lower half of a wall. Put a wood cap rail between the beadboard and the upper drywall. Paint the beadboard white or a light pastel. Paint the upper wall a matching or slightly lighter color.
This design hides dents and scuffs like a champ. Got kids or dogs? Beadboard is your armor. It takes a beating and still looks cute.
Don’t use beadboard on every wall. Pick one wall or just the lower three feet of all walls. Full walls of beadboard feel like a sauna.
7. Diamond or Diagonal Panels for Drama
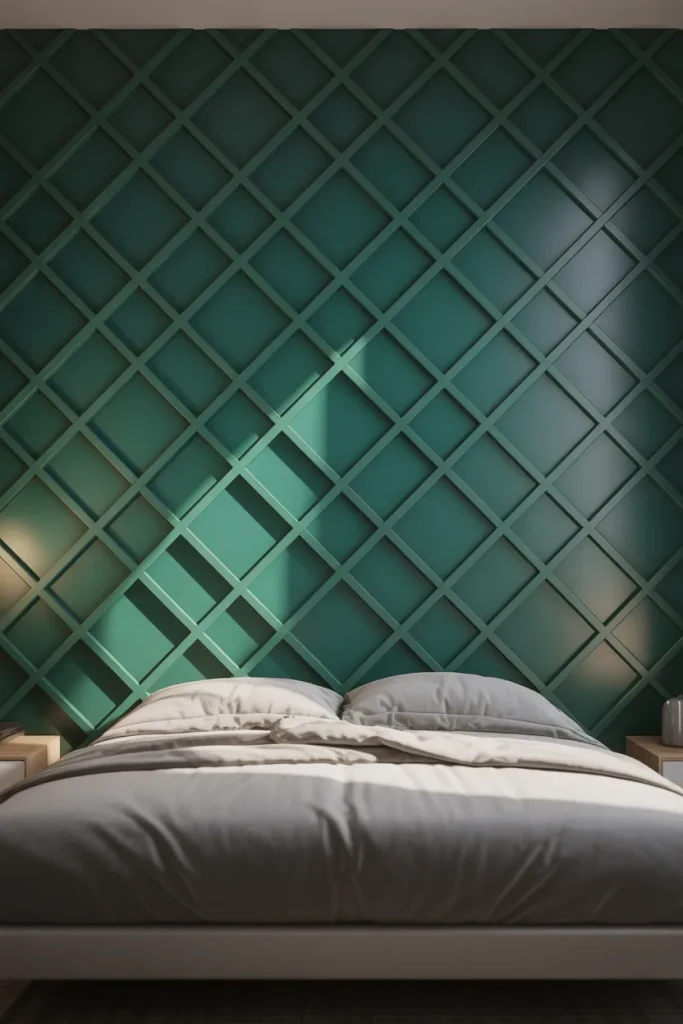
Most wall panels run straight up and down or side to side. Diamond panels go diagonal. They cross each other to make diamond shapes. Sometimes the diamonds are flat. Sometimes they’re raised like a checkerboard.
This design screams confidence. It’s not for shy rooms. But if you have a bold color like emerald green or deep burgundy, diamond panels turn that wall into art.
Building diamond panels is tricky because of the angles. You need a miter saw to cut forty five degree corners. And you need to measure carefully so all your diamonds line up. One crooked diamond ruins the whole wall.
Easier path: Buy foam diamond panels online. They come in two by two foot squares. Glue them to the wall with construction adhesive. Paint them whatever color you want. The foam is light and easy to cut with a box knife.
Where this shines: Behind a bed in a studio apartment that mixes living and sleeping. Or on a small accent wall next to a window. Don’t put it behind a TV. The pattern competes with the screen.
8. Two Tone Panels (Split Color)
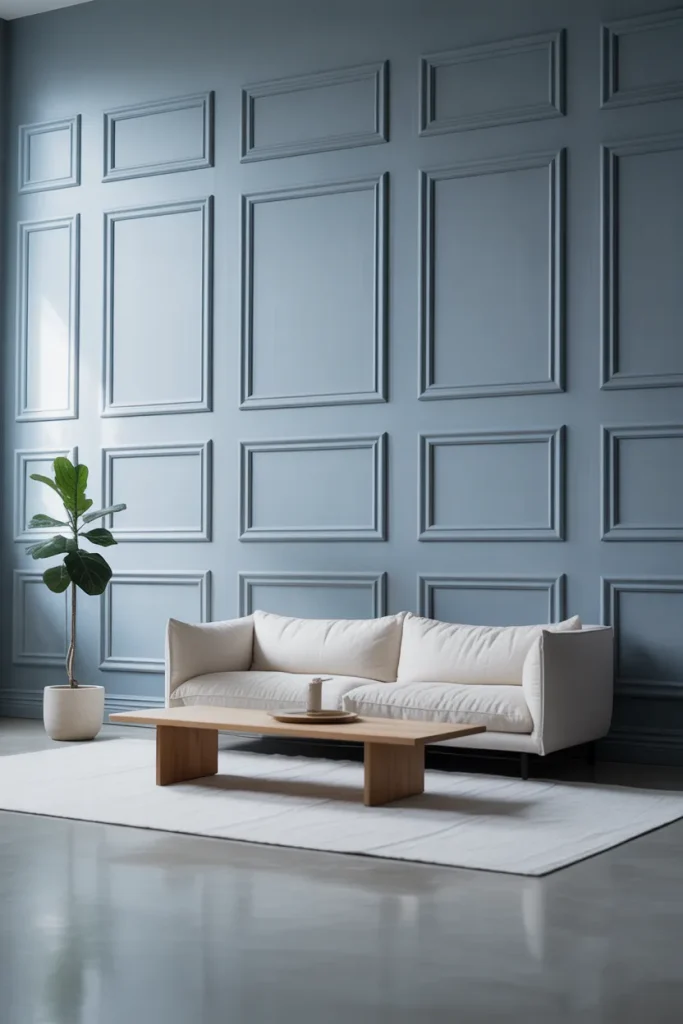
Here’s a secret. You don’t need to change the shape of your wall to get a panel look. You can fake it with paint. Two tone panels use color instead of wood.
Pick a wall. Paint the whole thing a base color. Let’s say light gray. Then use painter’s tape to mark off large rectangles on the wall. Paint inside those rectangles a darker gray. When you pull the tape off, you have the look of inset panels. No wood required.
The illusion works because our brains see the color change as a shadow. Keep the rectangles about two inches smaller than the tape lines. That two inch border of base color acts like the frame of a real panel.
This is the cheapest idea on the whole list. A gallon of paint and a roll of tape costs under fifty bucks. It’s also the fastest. You can finish a wall in an afternoon.
Downside: It’s only paint. No real texture. But from ten feet away, most people can’t tell the difference.
Best for renters. When you move out, just paint over it with the original color.
9. Upholstered Fabric Panels for Soft Walls

Most wall panels are hard wood. But fabric panels bring softness and silence. They soak up sound. So if your living room echoes like a gymnasium, fabric panels fix that.
You make them by wrapping foam or batting with fabric. Stretch the fabric tight and staple it to a thin plywood back. Then mount the whole thing on your wall like a big art piece. You can make one giant panel or several smaller squares.
Choose velvet, linen, or wool for a rich look. Choose bright cotton prints for a kid friendly playroom. Choose leather or faux leather for a masculine den.
The best part: You can change the fabric later. Got tired of blue velvet? Pull the staples and wrap it with green tweed. The wood backing stays on the wall.
Where to put fabric panels: Behind your main sofa. They protect the wall from sofa bumps. Also great on a wall where you hang a TV because they reduce sound reflection.
Warning: Dust collects on fabric panels. Vacuum them with a brush attachment every month or they look grimy.
10. Reclaimed Wood Panels (Rusty but Classy)
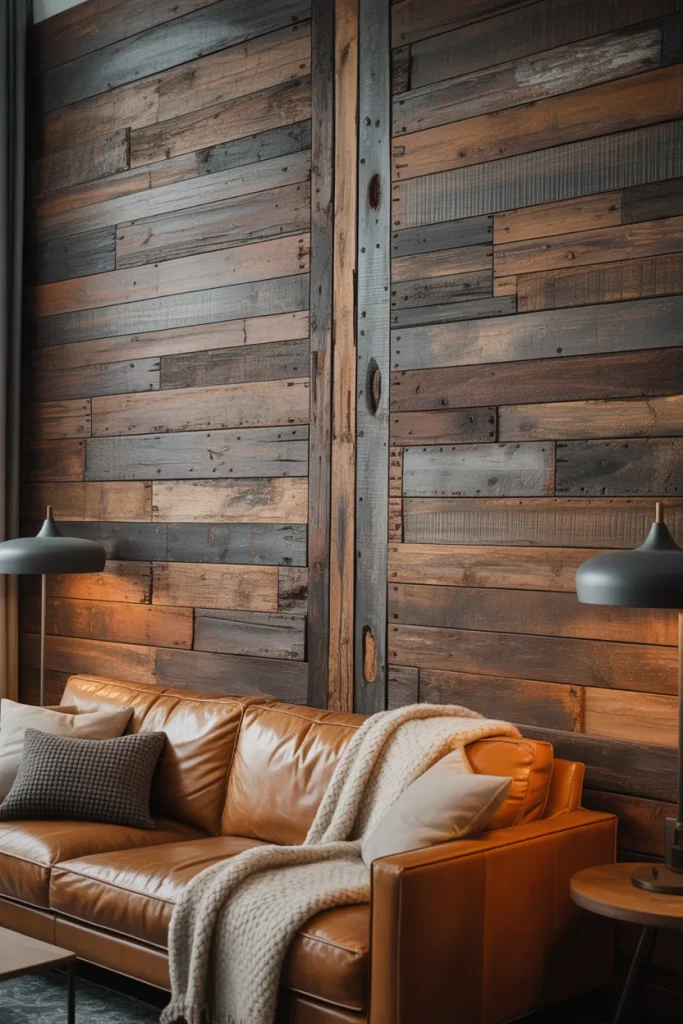
Reclaimed wood comes from old barns, factories, or shipping pallets. Each board has nail holes, saw marks, and weather stains. That rough history gives your living room a story.
You don’t need real reclaimed wood though. New wood can be beaten, burned, or brushed to look old. The trick is using a wire brush to pull out the soft grain. Then stain it with a dark walnut or gray wash.
Arrange the boards vertically or horizontally. Leave small gaps between them so the wall behind shows through. That gap keeps the room from feeling like a log cabin.
This style works best in living rooms with leather couches, wool blankets, and metal light fixtures. It looks weird next to shiny white plastic furniture. So match your room first.
Cost tip: Check Facebook Marketplace for people tearing down old fences or sheds. Sometimes you get free wood if you haul it away.
Watch for bugs. Never bring old wood inside without cleaning it first. Bake small boards in a low oven (150 degrees for an hour) to kill anything hiding inside.
11. Shadow Box Panels with LED Lighting
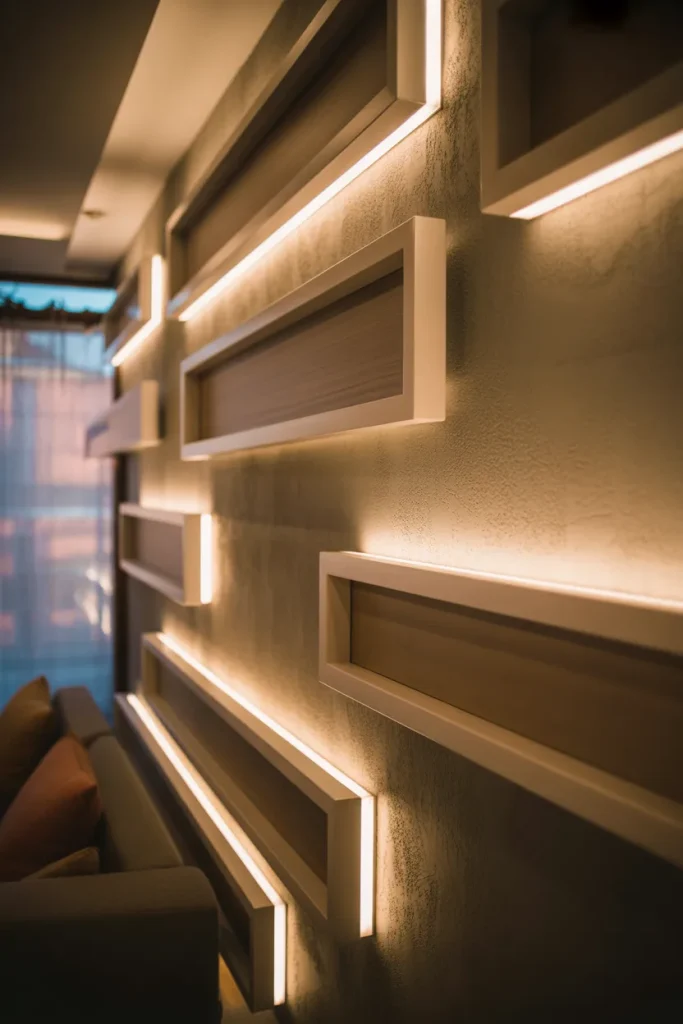
Normal panels sit flat against the wall. Shadow box panels sit out a little. You build a shallow box, maybe three inches deep. Then you install LED light strips inside the box. The light spills out around the edges of the panel.
This creates a floating look. Your wall panels seem to hover. The soft glow works as evening lighting without turning on overhead lights.
You can buy ready made shadow box panels with lights built in. Or build your own. Build a simple wood frame. Wrap it with a thin panel of wood or fabric. Attach it to the wall using standoffs (little metal spacers). Run a low voltage LED strip behind it.
Best colors for the light: Warm white (2700 Kelvin) feels like candlelight. Cool white feels like a doctor’s office. Avoid red or blue unless you want a gaming room vibe.
Where to use this: On the wall your TV hangs on. The glow behind the TV reduces eye strain. Also good on a dark hallway leading into the living room.
Don’t overdo it. Two shadow boxes on one wall is plenty. Ten makes your room look like a spaceship.
12. Wainscoting with a Twist (Mixed Heights)

Wainscoting usually covers the bottom third of a wall. But standard wainscoting is boring. Try mixing heights instead. On one wall, run wainscoting up thirty inches. On the next wall, run it up forty eight inches. On a third wall, run it all the way to the ceiling.
This sounds chaotic but it works. The changing heights make your eye travel around the room. Small rooms feel bigger because the eye never stops moving. Big rooms feel more broken up and cozy.
Use the same panel style everywhere. Don’t mix beadboard on one wall and Shaker on another. Keep the wood and paint consistent. Only change the height.
This trick also helps with weird room shapes. Got a wall with a window low to the floor? Run your wainscoting to just below the window. Got a wall with nothing on it? Run it higher. Let the architecture guide you.
Paint the wainscoting a darker color than the upper wall. That grounds the room. Think of it like heavy boots on a person. They give weight and stability.
13. Asymmetric Freeform Panels
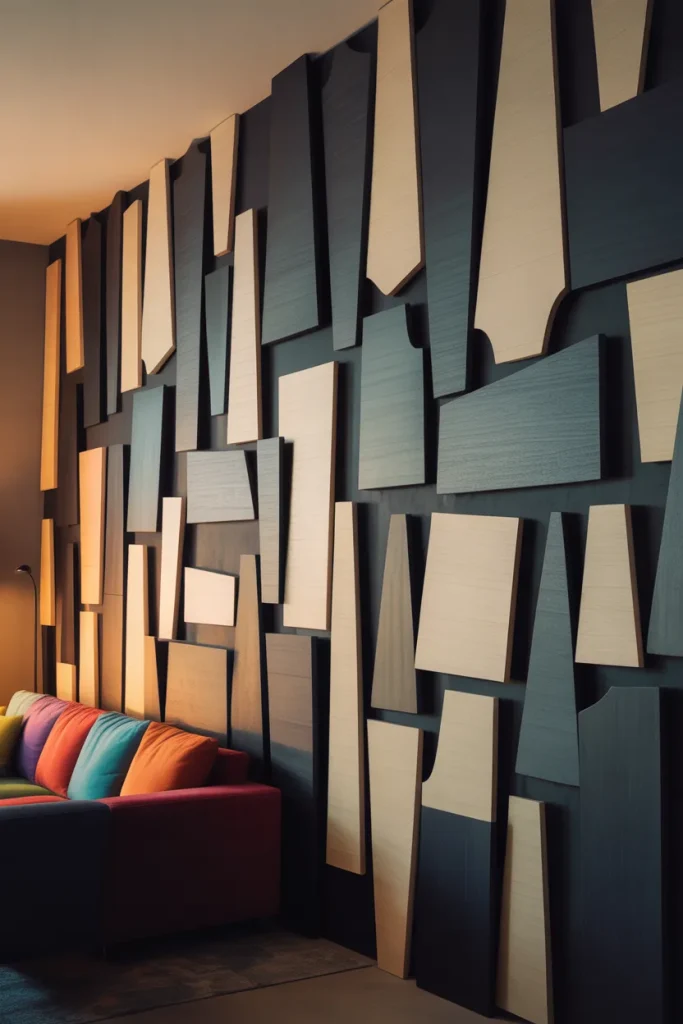
Most people like straight lines and perfect rectangles. But some rooms need a little weirdness. Asymmetric panels have no rules. One panel might be tall and skinny. Another might be short and fat. They overlap, touch, and leave empty spaces.
This is modern art on your wall. It says you don’t care about matching your sofa to your curtains. It says you have personality.
You can build asymmetric panels with the same MDF strips you use for Shaker panels. Just cut them at different lengths and arrange them like puzzle pieces. Nothing needs to line up. Nothing needs to be square.
Hardest part: Committing to the look. Most people start arranging strips, then panic and make everything straight again. Push through. Asymmetric takes guts.
Best for a living room with colorful furniture and abstract art. Worst for a room with floral patterns and doilies. Know your style before you try this.
Pro tip: Sketch your design on paper first. Use colored markers to show which areas are raised panels and which are empty wall. That sketch saves you from gluing strips in bad places.
14. Leather or Faux Leather Strap Panels

Here’s something you don’t see every day. Horizontal wood slats on the wall with leather straps running vertically over them. The straps buckle or tie to the slats. It looks like old luggage or a horse saddle.
This design mixes warm wood with soft leather. The straps add a curve to all your straight lines. It feels masculine but not mean. Vintage but not old.
Make the slats from oak or walnut. One by two boards work fine. Space them about eight inches apart. Then cut leather strips (real or faux) into two inch wide pieces. Attach each strip to a slat using a brass screw and washer at the top and bottom. Pull the strap tight so it doesn’t sag.
You can use belt leather from a craft store. Buy a long belt blank and cut it to length. Punch holes in the ends for the screws.
Where this works: In a living room with a leather sofa and brass light fixtures. Also good in a library or office corner. Not good in a beach cottage with seashells everywhere.
Cost warning: Real leather is expensive. Faux leather looks okay for about two years, then it peels. Spend the money on real leather if you want this to last.
15. Chalkboard or Whiteboard Panels (Interactive Walls)

Last idea is for living rooms that do double duty. Maybe you have kids who draw. Maybe you work from home and need to sketch ideas. Maybe you just like leaving notes for your family.
Turn one section of your wall into a chalkboard or whiteboard panel. Frame it with wood trim so it looks like a giant picture frame. Then paint the inside with chalkboard paint or stick on a whiteboard sheet.
Chalkboard paint comes in colors now. Not just black. You can get green, blue, even pink. Chalk markers write brighter than old dusty chalk.
Whiteboard panels cost more but clean easier. Buy a big sheet of whiteboard material from a hardware store. Glue it to your wall. Trim the edges with wood.
This panel doesn’t have to be the whole wall. A four foot by four foot square is plenty. Place it low enough for kids to reach or high enough for standing adults.
The best part: Your wall becomes useful. Write grocery lists. Draw cartoons. Leave love notes. When you have guests over, give them markers and let them doodle. It becomes a conversation starter.
Downside: Chalk dust gets everywhere. Use a damp cloth to erase. Whiteboard markers dry out if you leave the caps off. Pick your battle.
Conclusion
Your living room walls don’t have to be blank and boring. You just saw fifteen different ways to add life to them. Some take a weekend and fifty bucks. Some take real skill and a few hundred dollars. But every single one of them beats a plain white wall.
Pick one idea that matches your skill level and your room size. Don’t try to do all fifteen. That’s crazy. Just start with one accent wall. Live with it for a month. Then decide if you want to do more.
Remember that the best wall panel is the one that makes you feel good when you walk in the room. Not the one that wins an Instagram award. Not the one your neighbor said to build. Yours.
So grab a pencil. Measure your wall. Watch a YouTube video on how to cut a straight line. Then go make something that didn’t exist before. That’s the whole point of a home. Not to look perfect. To look like you.
Now get to work. Your boring wall is waiting for its upgrade.